Viral Morphology Unveiled: A Comprehensive Guide to Electron Microscopy Techniques and Applications
This article provides a comprehensive overview of electron microscopy (EM) techniques for analyzing viral morphology, tailored for researchers, scientists, and drug development professionals.
Viral Morphology Unveiled: A Comprehensive Guide to Electron Microscopy Techniques and Applications
Abstract
This article provides a comprehensive overview of electron microscopy (EM) techniques for analyzing viral morphology, tailored for researchers, scientists, and drug development professionals. It explores the foundational principles of EM in virology, details established and cutting-edge methodological applications, offers practical troubleshooting guidance, and discusses validation frameworks and comparative analyses with other structural biology tools. The content synthesizes current advancements, including cryo-electron microscopy's revolutionary role in structure-based drug design, to serve as a essential resource for viral pathogen research and therapeutic development.
The Foundation of Viral Visualization: How Electron Microscopy Reveals Pathogen Architecture
Electron microscopy (EM) has served as a cornerstone technique in virology, providing the first visual evidence of viruses and enabling their classification based on ultrastructural morphology. Since its development in the 1930s, EM has made possible the direct visualization of viral particles, which are too small to be resolved by light microscopy [1] [2]. This capability has been instrumental in the discovery of many clinically significant viruses and has fundamentally shaped our understanding of virus-host cell interactions. Although partly supplanted by molecular techniques for routine diagnosis, EM remains indispensable for the initial identification of unknown viral agents, investigation of viral morphogenesis, and ensuring the viral safety of biological products [1] [3]. This article outlines the critical historical milestones of EM in virology and provides detailed protocols for its application in modern viral research.
Historical Milestones in Viral Discovery
The application of electron microscopy to virology has marked several transformative periods in science history, characterized by technological innovations that expanded our capacity to identify and characterize viral pathogens.
The Early Developments
The transmission electron microscope (TEM), initially described as a "supermicroscope" by Max Knoll and Ernst Ruska in 1932, provided a resolution far exceeding that of light microscopes available at the time [1] [2] [4]. The first documented use of TEM in clinical virology was for the differential diagnosis of smallpox and chickenpox using vesicle fluid from patients' skin, demonstrating its diagnostic potential from the outset [1] [2].
The Golden Age of Virus Discovery
The period from the 1960s to the 1980s represented the "glory days" for viral EM, fueled by the widespread commercial availability of electron microscopes and the introduction of negative staining techniques [1]. This simple yet powerful method, involving the deposition of viral samples on carbon-coated grids stained with heavy-metal salts, enabled rapid visualization and morphological analysis of viruses from liquid samples [1] [3]. This era witnessed the discovery and classification of numerous virus families, including adeno-, entero-, paramyxo-, and reoviruses [1]. The application of EM to "dirty" clinical samples like plasma, urine, and feces led to major breakthroughs, including the identification of:
- Hepatitis B virus (Dane et al., 1970) in plasma [1] [2]
- Hepatitis A virus (Feinstone et al., 1973) in stool samples [1] [2]
- Rotaviruses (Bishop et al., 1973; Flewett et al., 1973) as a primary cause of gastroenteritis [1] [2]
- Norwalk virus (Kapikian et al., 1972), later renamed norovirus [1] [2]
Table 1: Major Virus Discoveries Enabled by Electron Microscopy
| Virus | Year Identified | Sample Source | Significance |
|---|---|---|---|
| Hepatitis B | 1970 | Plasma | First visualization of the hepatitis B virion (Dane particle) [1] |
| Rotavirus | 1973 | Stool | Identified as major cause of epidemic gastroenteritis in humans and animals [1] |
| Norwalk Virus | 1972 | Stool | First identification during community outbreak of gastroenteritis [1] |
| Parvovirus B19 | 1975 | Serum | Discovered during search for hepatitis B virus [1] |
| SARS-CoV-2 | 2020 | Cell Culture | Rapid identification during COVID-19 pandemic [5] [6] |
Modern Applications and Emerging Techniques
While molecular methods like PCR and ELISA largely replaced TEM for routine viral diagnosis due to their higher sensitivity, EM retains crucial roles in virology [1] [3]. It remains the premier "catch-all" method for identifying unknown or emerging pathogens in outbreak situations, as demonstrated during the discoveries of the Hendra virus (1995), Nipah virus (1999), and the SARS coronavirus (2003) [1] [2]. Furthermore, regulatory agencies recommend TEM for investigating the viral safety of biological therapeutics, and it remains essential in research for discriminating between aggregated proteins and structured viral particles [1].
Modern advancements continue to expand EM's capabilities. Correlative Light and Electron Microscopy (CLEM) combines fluorescence microscopy with EM, allowing researchers to bridge the resolution gap between these techniques [7]. Energy-Dispersive X-ray (EDX) analysis integrated with EM enables elemental mapping, adding a "color" dimension to traditional grey-scale EM images and allowing identification of organelles and molecules based on their elemental composition [8]. Additionally, machine learning approaches are now being developed for unsupervised classification of viral surface spikes in EM images, enhancing the objectivity and reproducibility of morphological analyses [9].
Essential Methodologies and Protocols
The two principal techniques for viral detection by EM are negative staining of suspensions and thin-section EM of resin-embedded samples. These robust and reliable methods have remained largely unchanged for decades, ensuring consistency with a vast repository of historical reference data [3].
Negative Staining for Rapid Viral Identification
Negative staining is a quick technique for visualizing viral particles in liquid samples, ideal for rapid diagnostics and particle enumeration [3].
Table 2: Research Reagent Solutions for Negative Staining EM
| Reagent/Material | Function | Application Notes |
|---|---|---|
| Formvar or Pioloform-filmed EM Grids (300-400 mesh) | Sample support | Provides an electron-transparent film for particle adsorption [3] |
| Alcian Blue, Poly-L-lysine, or Bacitracin | Grid surface conditioning | Renders the grid surface hydrophilic and sticky for efficient particle adsorption [3] |
| Uranyl Acetate or Phosphotungstic Acid | Heavy metal stain | Embeds and contrasts viral particles; creates negative image [3] |
Protocol: Negative Staining for Viral Particles
- Grid Preparation: Condition EM grids by applying a charged surface. This can be achieved either by glow discharge or by chemical treatment with Alcian blue, which is robust and efficient for adsorbing particles [3].
- Sample Adsorption: Apply a small volume (e.g., 5-10 µL) of the viral suspension to the pre-treated grid surface. Two primary methods are used:
- Drop-On-Grid (DOG): Place the sample droplet directly on the grid. This is more effective for dense particles like bacteria or poxviruses [3].
- Grid-On-Drop (GOD): Float the grid on a droplet of the suspension. This can help reduce the adsorption of larger, irrelevant particles that may sediment away from the grid surface [3].
- Washing: Briefly rinse the grid with a drop of distilled water to remove salts and other soluble contaminants. Carefully blot away excess liquid with filter paper.
- Staining: Apply a drop of heavy metal stain (e.g., 1-2% uranyl acetate or phosphotungstic acid) to the grid for seconds to minutes. Blot away the excess stain to leave a thin, amorphous layer embedding the viral particles [3].
- Visualization: Air-dry the grid and examine using a transmission electron microscope operating at 80-100 kV.
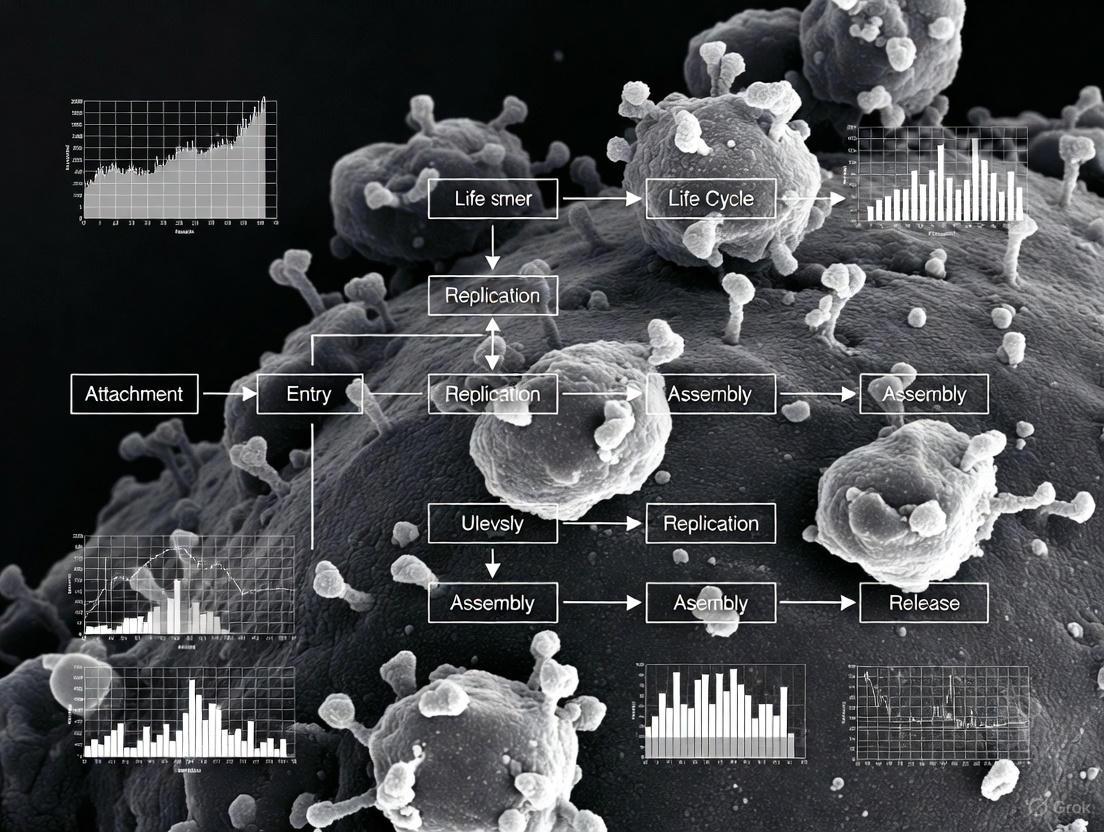
The following workflow diagram summarizes the negative staining protocol:
Diagram 1: Negative Staining Workflow
Thin-Section EM for Intracellular Viral Analysis
Thin-section EM allows for the visualization of viral particles within the cellular context, revealing details about viral replication, assembly, and virus-host interactions [5] [6].
Protocol: Thin-Section EM for Infected Cell Cultures
- Cell Culture and Infection: Grow susceptible cells (e.g., Vero E6 cells for SARS-CoV-2) to 70-80% confluence and infect with the virus at a desired multiplicity of infection (MOI) [5].
- Fixation: At the appropriate time post-infection, replace the culture medium with a primary fixative, typically 2.5% glutaraldehyde in a buffer (e.g., 0.05 M HEPES, pH 7.2). Fix for at least 1 hour at room temperature [5].
- Post-Fixation and Staining: Post-fix with 1% osmium tetroxide to stabilize lipids and provide contrast. This step is critical for visualizing membrane structures.
- Dehydration and Embedding: Dehydrate the fixed cell pellet through a graded series of ethanol or acetone, followed by infiltration and embedding with a resin, such as Epon or Araldite [5] [8].
- Sectioning and Staining: Use an ultramicrotome to cut ultrathin sections (60-90 nm) of the embedded block. Mount sections on EM grids and stain with heavy metal stains like uranyl acetate and lead citrate to enhance contrast [5].
- Visualization: Examine the stained sections using a transmission electron microscope.
The following workflow summarizes the thin-section EM protocol:
Diagram 2: Thin-Section EM Workflow
Quantitative Morphology in Modern Virology
EM morphometry provides quantitative data on viral parameters such as size and spike density, which can be correlated with viral properties like transmissibility.
Case Study: Morphometric Analysis of SARS-CoV-2 Variants
A 2024 study performed a detailed morphometric analysis of major SARS-CoV-2 Variants of Concern (VOCs) using thin-section EM, demonstrating the continued value of quantitative EM in virology [5].
Table 3: Morphometric Parameters of SARS-CoV-2 Variants from Thin-Section EM
| SARS-CoV-2 Variant | Maximum Particle Diameter (nm) | Spike Number per Virus Profile | Notable Morphometric Trend |
|---|---|---|---|
| Reference Strains (e.g., Munich929) | Baseline | Baseline | Used as reference for comparison [5] |
| Alpha (B.1.1.7) | Slightly smaller | Slightly increased | Dominant variant with increased spike density [5] |
| Beta (B.1.351) | Larger | Reduced | Less dominant variant with reduced spike density [5] |
| Delta (B.1.617.2) | Slightly smaller | Slightly increased | Dominant variant with increased spike density [5] |
| Omicron BA.2 (B.1.1.529) | Slightly smaller | Slightly increased | Dominant variant with increased spike density [5] |
The study noted that the more dominant variants (Alpha, Delta, Omicron) tended to show a slightly increased spike density, often associated with a smaller particle size. In contrast, the less dominant Beta variant exhibited a reduced spike density and a larger particle size [5]. These findings highlight how EM-derived morphometric data can contribute to understanding phenotypic differences between viral variants.
From its foundational role in the discovery and classification of major viral pathogens to its modern applications in characterizing emerging viruses and quantifying phenotypic traits, electron microscopy has been an indispensable tool in virology. While its diagnostic role has evolved, EM remains unmatched for direct, morphology-based viral identification, investigation of virus-cell interactions, and safety testing. The integration of EM with advanced elemental analysis, correlative techniques, and machine learning promises to further enhance its power, ensuring that electron microscopy will continue to be a vital technology for virologists and drug development professionals confronting current and future viral challenges.
Electron microscopy (EM) has become an indispensable tool in viral morphology research and drug development, enabling scientists to visualize pathogens and cellular structures at nanometer resolution. The power of EM to inform vaccine design and therapeutic strategies, as demonstrated during the SARS-CoV-2 pandemic, hinges on a solid understanding of its core physical principles [5]. For researchers investigating viruses, mastering these fundamentals is not merely academic—it directly impacts the quality of structural data, the accuracy of pathogen identification, and the validity of subsequent scientific conclusions. This application note details the essential concepts of resolution and contrast, provides practical protocols for viral imaging, and establishes rigorous criteria for morphological analysis to ensure research reproducibility and reliability in viral studies.
Resolution in Electron Microscopy
Definition and Determinants
Resolution in electron microscopy refers to the smallest distance between two points that can still be distinguished as separate entities in the resulting image. For viral research, this determines the level of structural detail observable, from overall virion shape down to individual spike proteins. The resolution revolution, driven primarily by the development of direct electron detectors, has transformed cryo-EM from a niche technique to a powerhouse capable of determining biomolecular structures at near-atomic resolution [10].
The theoretical and practical limits of resolution are governed by several key factors:
- Electron wavelength: Determined by the accelerating voltage of the microscope
- Lens aberrations: Imperfections in the electromagnetic lenses that deflect electrons
- Signal-to-noise ratio: Influenced by electron dose, detector efficiency, and sample properties
Table 1: Key Resolution Capabilities Across EM Modalities
| Technique | Typical Practical Resolution | Optimal Use Cases in Virology |
|---|---|---|
| Negative Stain TEM | 15-20 Å | Rapid viral detection, particle counting |
| Thin-Section TEM | 10-15 Å | Intracellular viral localization |
| Cryo-EM Single Particle | 2-3 Å | Atomic structure determination |
| Cryo-Electron Tomography | 3-5 Å | Viral architecture in situ |
The Resolution Revolution and Current Trends
The 2017 Nobel Prize in Chemistry recognized the transformative impact of improved cryo-EM resolution, attributed largely to direct electron detectors that capture images with significantly enhanced resolution compared to previous technologies that converted electrons to light [10]. Current research focuses on making high-resolution cryo-EM more accessible through lower-voltage (100 keV) instruments that maintain image quality while reducing costs, potentially democratizing the technique for broader research community access [10].
Contrast Mechanisms in Electron Microscopy
Physical Principles of Contrast Generation
Contrast is the difference in signal intensity between a feature of interest and its surroundings in an image. For biological samples like viruses, which consist primarily of low-atomic-number elements, generating sufficient contrast presents a particular challenge. In the absence of a sample, an electron beam would produce a uniformly gray micrograph, with minimal variation between pixels [11]. Biological samples introduce local variations in electron scattering that create the image contrast necessary for visualization.
Two primary mechanisms generate contrast in electron micrographs of viral samples:
Amplitude Contrast
Amplitude contrast arises when electrons are absorbed, deflected, or otherwise blocked by the sample, reducing the amplitude of the electron wave that reaches the detector [11]. While heavy atoms used in negative staining deflect a large proportion of the incoming electron beam, creating excellent amplitude contrast, this mechanism plays a negligible role for unstained biological macromolecules in cryo-EM because proteins and the surrounding aqueous buffer contain atoms with similar atomic numbers [11]. A notable exception occurs with nucleic acids, which contain heavier phosphorus atoms that generate slightly higher amplitude contrast [11].
Phase Contrast
The vast majority of contrast in cryo-EM comes from phase contrast [11]. Biological samples are primarily "phase objects" that delay the electron wave rather than absorbing it, creating a phase shift between incoming and exiting waves [11]. Since detectors record intensity (the square of amplitude) rather than phase, pure phase objects would normally be invisible. Contrast generation requires the microscope to be configured to convert these phase shifts into detectable amplitude variations through interference between scattered and unscattered waves [11].
Phase Contrast Generation Pathway: This diagram illustrates the transformation of initially invisible phase shifts into detectable contrast through intentional defocus or phase plate technology.
The Weak Phase Object Approximation
For most biological samples including viruses, the weak phase object approximation provides a practical model for understanding contrast formation [11]. This approximation assumes that the sample only scatters a small proportion of the incoming electron wave, with the scattered wave experiencing a constant phase shift of exactly π/2 [11]. The exit wave is therefore modeled as the sum of the incoming wave and this small, phase-shifted scattered component. Under ideal focused conditions, the phase shift renders phase objects invisible in the final image, necessitating specialized techniques to convert these phase shifts into detectable amplitude variations [11].
Enhancing Contrast for Biological Samples
Defocus-Controlled Phase Contrast
Collecting images intentionally out of focus introduces additional path length differences between scattered and unscattered electrons, converting phase information into detectable amplitude contrast [11]. As electrons travel from the sample, those scattered at different angles take different paths to reach the same point on the detector, creating phase shifts through path length differences. At specific defocus values, these path length differences produce constructive or destructive interference that transforms phase variations into measurable intensity differences in the image [11].
Chemical Staining for Conventional EM
In conventional transmission electron microscopy of thin sections, heavy metal stains provide essential contrast by binding to cellular structures and viruses. The efficiency of a stain depends primarily on the atomic weight of its constituent atoms, with uranium (atomic weight 238) and lead being the most widely used for their high electron density [12].
Table 2: Research Reagent Solutions for EM Contrast Enhancement
| Reagent | Composition | Primary Applications | Mechanism of Action |
|---|---|---|---|
| Uranyl Acetate | Aqueous or alcoholic solution of U(C₂H₃O₂)₂·2H₂O | Membrane contrast, nucleic acids | Binds to proteins, lipids, nucleic acid phosphate groups |
| Lead Citrate | Alkaline solution of lead citrate | General contrast enhancement, ribosomes | Interacts with proteins, glycogens, and reduced osmium |
| Reynold's Lead Citrate | Lead nitrate + sodium citrate | Standard double staining protocol | Forms lead citrate in situ for consistent staining |
| Alcian Blue | Copper phthalocyanine | Grid surface treatment | Adds charge to support film for better particle adsorption |
Double contrasting with uranyl acetate followed by lead citrate represents the standard routine technique for conventional TEM, providing comprehensive structural visualization of viral components and cellular ultrastructure [12]. Uranyl acetate produces the highest electron density and fine grain image quality, particularly for membranes and nucleic acids, while lead citrate enhances a wider range of cellular structures including ribosomes, lipid membranes, and cytoskeletal elements [12].
Imaging Techniques and Protocols for Virology
Sample Preparation Methods
Proper sample preparation is critical for preserving viral structure and generating interpretable images. The choice of preparation method depends on research objectives, whether for rapid diagnostic identification or high-resolution structural analysis.
Negative Staining Protocol for Viral Detection
Negative staining provides a rapid technique for visualizing viral particles in suspensions such as body fluids, stool specimens, or cell culture supernatants [13] [3]. This method is particularly valuable for detecting emerging viral pathogens and in surveillance of potential bioterrorism agents when specific molecular reagents may be unavailable [13].
Materials Required:
- Formvar or Pioloform-coated EM grids (300-400 mesh)
- Alcian blue or other surface charge treatment
- 2% uranyl acetate or 2% phosphotungstic acid
- Patient sample or viral culture supernatant
Procedure:
- Grid Preparation: Treat grids with Alcian blue (0.1% in water) for 10 seconds to create a charged, hydrophilic surface for optimal particle adsorption [3].
- Particle Adsorption: Apply sample to grid using either Drop-On-Grid (DOG) or Grid-On-Drop (GOD) method, incubating for 30-60 seconds [3].
- Washing: Briefly rinse grid with distilled water to remove salts and soluble contaminants.
- Staining: Apply heavy metal stain (uranyl acetate) for 10-30 seconds, then blot excess liquid [3].
- Air Drying: Allow grid to dry completely before EM examination.
For low-concentration samples, ultracentrifugation (100,000 × g for 30-50 minutes) can pellet viruses from larger volumes (2-8 ml) before resuspension in a small volume for staining [13].
Thin-Section EM for Intracellular Viruses
Thin-section transmission electron microscopy remains invaluable for studying viral pathogenesis within cellular contexts, particularly for complex samples where cryo-techniques face throughput limitations [5] [3].
Materials Required:
- Infected cell cultures or tissue samples
- Glutaraldehyde (2.5%) and paraformaldehyde (1-4%) in buffer
- Osmium tetroxide (1%) for post-fixation
- Ethanol or acetone series for dehydration
- Epoxy resin (Epon, Glycid ether 100) for embedding [14]
- Uranyl acetate and lead citrate for staining [12]
Procedure:
- Primary Fixation: Fix samples with 2.5% glutaraldehyde in 0.05M HEPES buffer (pH 7.2) for at least 1 hour at room temperature [5].
- Post-fixation: Treat with 1% osmium tetroxide in the same buffer for 1 hour.
- Dehydration: Sequential ethanol dehydration (30%, 50%, 70%, 90%, 100%).
- Embedding: Infiltrate with epoxy resin mixture (e.g., Glycid ether 100, DDSA, NMA with DMP-30 catalyst) [14] and polymerize at 60°C for 48 hours.
- Sectioning: Cut ultrathin sections (60-90 nm) using an ultramicrotome.
- Contrasting: Double-stain with uranyl acetate and lead citrate [12].
Viral Sample Preparation Workflow: Two primary pathways for preparing biological samples for electron microscopy, each optimized for different research questions.
Advanced Imaging Modalities
Cryo-Electron Microscopy
Cryo-EM involves rapidly freezing samples to cryogenic temperatures (-196°C) so quickly that water molecules don't crystallize, preserving biological structures in a near-native state [10]. This technique has become essential for high-resolution structural virology, enabling atomic-level analysis of viral components without the artifacts introduced by chemical fixation, dehydration, and staining.
Cryo-Electron Tomography
Cryo-electron tomography (cryo-ET) represents an advanced technique that builds 3D images of cellular volumes by acquiring multiple tilted views of a sample [10]. When combined with cryo-focused ion beam (cryo-FIB) milling, which prepares thin lamella from cellular samples, cryo-ET can visualize viral architecture within the cellular context at molecular resolution [10]. This approach provides unprecedented insights into virus-host interactions and the spatial organization of viral replication machinery.
Application to Viral Morphology Research
Criteria for Authentic Viral Identification
The resurgence of EM during the SARS-CoV-2 pandemic revealed widespread misinterpretation of cellular structures as viral particles, highlighting the need for rigorous identification criteria [15]. To ensure accurate viral identification, researchers should apply the following standards:
Structural Criteria: Viral particles must conform to established morphological characteristics including size, uniformity, and internal structure. For coronaviruses, this includes an approximate diameter of 80 nm (though measured averages may be smaller, e.g., 64 nm for SARS-CoV-2), characteristic dot-like electron densities in the nucleocapsid, and presence within membrane-bound compartments [15].
Locational Criteria: Particles should appear in biologically plausible locations consistent with the viral replication cycle. For coronaviruses, this includes presence within the endoplasmic reticulum-Golgi intermediate compartment, secretory vesicles, or outside cells—but not free in the cytoplasm [15].
Corroborative Evidence: EM findings should be supported by independent methods such as PCR, immunohistochemistry, or in situ hybridization [15].
Expert Validation: Interpretation should involve experienced electron microscopists familiar with both viral morphology and potential cellular mimics [15].
Morphometric Analysis of SARS-CoV-2 Variants
Conventional thin-section EM has proven valuable for tracking morphological changes in evolving viruses. A comprehensive study of SARS-CoV-2 variants revealed subtle but potentially significant differences in particle morphology:
Table 3: Morphometric Parameters of SARS-CoV-2 Variants from Thin-Section EM
| Variant | Maximum Particle Diameter | Spike Number/Density | Notable Morphological Features |
|---|---|---|---|
| Munich929 (reference) | Baseline | Baseline | Reference strain for comparison |
| Italy-INMI1 (reference) | Baseline | Baseline | Early pandemic isolate |
| Alpha (B.1.1.7) | Slightly smaller | Slightly increased | Smaller particle size contributes to higher spike density |
| Beta (B.1.351) | Larger | Reduced | Reduced spike number per particle profile |
| Delta (B.1.617.2) | Slightly smaller | Slightly increased | Trend toward compact virions |
| Omicron BA.2 (B.1.1.529) | Slightly smaller | Slightly increased | Maintains trend of dominant variants |
These morphometric data, collected from approximately 900 TEM images under standardized conditions, provide a reference database for analyzing future viral variants and may correlate with epidemiological behavior [5]. The dominant variants (Alpha, Delta, Omicron) consistently showed slightly increased spike density compared to reference strains, primarily due to reduced particle size [5].
Mastering the core principles of resolution and contrast is fundamental to effective electron microscopy in viral research. The interplay between theoretical concepts and practical implementation directly impacts the quality and interpretation of structural data from viral samples. As EM technologies continue evolving toward greater accessibility and higher throughput [10], these fundamentals will remain essential for designing robust experiments, accurately identifying viral pathogens, and deriving meaningful structural insights to inform therapeutic development. By adhering to rigorous protocols and validation criteria, researchers can leverage the full potential of electron microscopy to advance our understanding of viral morphology and pathogenesis.
Viral taxonomy is the process of naming viruses and placing them into a taxonomic system based on phenotypic characteristics, including morphology, nucleic acid type, mode of replication, and host organisms [16]. The International Committee on Taxonomy of Viruses (ICTV) is the official body responsible for developing and maintaining a universal virus taxonomy [17]. While genomic data now plays a primary role in classification, structural characteristics observed through techniques like electron microscopy remain fundamental for distinguishing major viral groups and understanding their evolutionary relationships.
The structural diversity of viruses provides critical criteria for their classification into higher-level taxa. The presence or absence of a viral envelope, the symmetry of the capsid (icosahedral or helical), and the detailed architecture of structural proteins form the basis for distinguishing viral orders, families, and genera [16] [18]. These morphological features directly influence viral stability, pathogenicity, and infection mechanisms, making them essential considerations for both taxonomic classification and antiviral development [19].
Table 1: Fundamental Virus Classification Systems
| Classification Type | Basis of Classification | Major Categories | Application in Virology |
|---|---|---|---|
| ICTV Taxonomic Structure | Phenotypic characteristics, morphology, nucleic acid, host organisms | Realm, Kingdom, Phylum, Class, Order, Family, Genus, Species [16] | Official universal taxonomic scheme for all viruses [17] |
| Baltimore Classification | mRNA synthesis mechanism, nucleic acid type | 7 Groups (I: dsDNA to VII: dsDNA-RT) [16] | Understanding replication strategies and gene expression |
| Structural Morphology | Capsid symmetry, envelope presence, virion architecture | Icosahedral, helical, complex; enveloped vs. non-enveloped [18] | Linking structure to function, stability, and infection mechanisms |
Structural Features in Virus Classification
Viral Envelopes and Their Taxonomic Significance
Viral envelopes are outermost lipid bilayers derived from host cell membranes (phospholipids and proteins) but incorporate virus-coded glycoproteins [20] [18]. These envelopes are acquired during viral maturation through the process of "budding" at host cell membranes—some at the plasma membrane, others at internal cell membranes such as the nuclear membrane, endoplasmic reticulum, and Golgi complex [18]. The presence of an envelope represents a major taxonomic character that distinguishes entire viral families.
Enveloped viruses display distinct biological properties that influence their taxonomy, pathogenicity, and environmental stability. The envelopes typically contain viral glycoprotein peplomers (spikes) that project from the outer surface, which mediate host cell recognition, receptor binding, and membrane fusion during infection [20] [18]. These glycoproteins serve as primary antigens for immune recognition and are major targets for vaccine development [20]. Enveloped viruses are generally more sensitive to desiccation, heat, and disinfectants like detergents and alcohols compared to non-enveloped viruses, as these agents disrupt the essential lipid membrane [19]. From a taxonomic perspective, the specific composition and structure of envelope proteins help define viral families and genera, with some families containing multiple envelope glycoproteins (e.g., Herpesviridae with more than 10 glycoproteins) while others have simpler envelope structures [18].
Capsid Symmetry and Structural Families
The viral capsid is a protein shell that encapsulates and protects the genetic material of all viruses. Capsids display two fundamental structural patterns with taxonomic significance: icosahedral symmetry and helical symmetry. Icosahedral capsids form quasi-spherical structures with defined axes of symmetry, while helical capsids form rod-shaped or filamentous structures with the genetic material coiled inside [21] [18].
Icosahedral capsids are constructed from repeating capsomeres arranged with pseudo-T = 3 symmetry in many viruses, particularly positive-sense RNA viruses like picornaviruses [21]. The capsid proteins of many icosahedral viruses feature the jelly roll motif, a conserved β-sandwich fold composed of two antiparallel four-stranded β-sheets named BIDG and CHEF [21]. This structural motif appears across diverse virus families infecting hosts from different domains of life, suggesting ancient evolutionary relationships [16]. For instance, the jelly roll motif is observed in the capsid proteins of both single-stranded DNA (ssDNA) viruses such as Parvoviridae and Circoviridae, and double-stranded DNA (dsDNA) viruses including Adenoviridae and Caudoviricetes [22].
Helical capsids are characterized by capsomeres arranged in a spiral around the viral nucleic acid, forming tubular structures that may be rigid or flexible. These are predominantly found in negative-sense RNA viruses and some positive-sense RNA viruses, including plant viruses like Tobamoviruses and animal viruses like Orthomyxoviruses and Rhabdoviruses [18]. The distinction between these capsid symmetries forms a primary morphological division in virus taxonomy, with the ICTV recognizing structure-based viral lineages that reflect evolutionary relationships observed across viruses infecting different domains of life [16].
Table 2: Structural Characteristics of Major Virus Groups
| Structural Feature | Taxonomic Distribution | Key Structural Components | Functional & Taxonomic Implications |
|---|---|---|---|
| Viral Envelope | Found in diverse taxa: Herpesviridae, Orthomyxoviridae, Retroviridae, Coronaviridae | Host-derived lipid bilayer + viral glycoproteins (peplomers/spikes) [18] | Increased sensitivity to disinfectants; more complex entry mechanisms; mediates immune evasion |
| Icosahedral Capsids | Caudoviricetes, Picornaviridae, Parvoviridae, Adenoviridae | Jelly roll motif capsid proteins; pseudo-T=3 symmetry [21] | Evolutionary relationships across domains of life; efficient genome packaging; receptor binding sites |
| Helical Capsids | Tobamoviruses, Orthomyxoviridae, Rhabdoviridae | Repeated protein subunits arranged around nucleic acid [18] | Often enveloped in animal viruses; rod-shaped/filamentous morphology; genome length determines particle size |
| Pleomorphic Virions | Thalassapleoviridae, some Paramyxoviridae | Less structured organization; variable shape and size [23] | Challenges in structural characterization; adaptation to specialized niches |
Application Notes: Electron Microscopy for Viral Morphology
Cryo-Electron Microscopy for Capsid Architecture
Purpose: To determine high-resolution structures of viral capsids in near-native states, enabling classification based on structural features and identification of novel taxonomic relationships.
Protocol:
- Virus Purification: Purify virus samples using ultracentrifugation in sucrose or cesium chloride density gradients to isolate intact virions from cellular components [21].
- Vitrification: Apply 3-5 μL of purified virus suspension (≥10^9 particles/mL) to glow-discharged holey carbon grids. Blot excess liquid and plunge-freeze in liquid ethane cooled by liquid nitrogen to form amorphous ice [21].
- Data Collection: Collect micrographs using a 300 keV cryo-electron microscope with a direct electron detector. Use defocus range of -1.0 to -2.5 μm and total dose of 40-60 e⁻/Ų with frame-based exposure [21].
- Image Processing:
- Perform motion correction and dose-weighting of movie frames
- Use reference-free 2D classification to identify particle views and remove damaged particles
- Apply 3D classification to separate heterogeneous populations (virions, empty particles, altered particles)
- Reconstruct final maps using 3D auto-refinement with imposed icosahedral symmetry [21]
- Model Building: Build atomic models into cryo-EM density maps using iterative rounds of manual building in Coot and real-space refinement in Phenix [21].
Expected Outcomes: Determination of capsid architecture at 2.5-4.0 Å resolution, enabling visualization of capsid protein folds, genome packaging, and conformational states relevant for taxonomic classification.
Negative Stain EM for Rapid Envelope Characterization
Purpose: To quickly assess viral morphology, envelope presence, and surface projections for initial taxonomic grouping and sample quality evaluation.
Protocol:
- Grid Preparation: Apply 5 μL of virus suspension to glow-discharged carbon-coated grids for 60 seconds.
- Staining: Blot excess liquid and apply 5-10 μL of 2% uranyl acetate for 30-45 seconds. Blot thoroughly and air dry.
- Imaging: Collect images at 40,000-80,000x magnification using a 120 keV TEM. Acquire multiple images from different grid squares to ensure representative sampling.
- Morphometric Analysis: Measure virion dimensions (diameter for spherical viruses, length/width for filamentous viruses) and characterize surface features (glycoprotein spikes, capsomer arrangement).
Taxonomic Application: Distinguishes enveloped vs. non-enveloped viruses; identifies nucleocapsid symmetry; differentiates viral families based on characteristic morphologies (herpesviruses vs. adenoviruses vs. rhabdoviruses).
Case Study: Structural Taxonomy of Archaeal Viruses
Recent advances in viral taxonomy, particularly for archaeal viruses, demonstrate the powerful integration of structural data with genomic information for classification. In the 2025 ICTV ratification, numerous new archaeal virus taxa were established based on structural characteristics observed through electron microscopy and predicted from genomic data [23].
The order Caudoviricetes was expanded with six new families of head-tailed viruses, maintaining the conserved icosahedral capsid structure connected to a tail, a hallmark of this group [23]. Simultaneously, the order Ligamenvirales received one new family of filamentous viruses (Chiyouviridae) with helical symmetry [23]. Perhaps most significantly, viruses with pleomorphic virions associated with Archaeoglobi were classified into the family Thalassapleoviridae within a completely new phylum (Calorviricota), order (Ageovirales), and class (Caminiviricetes) [23]. This establishment of higher-level taxa based on distinctive virion architecture underscores how structural features drive the recognition of major evolutionary lineages in virology.
Table 3: Recently Classified Archaeal Virus Families (ICTV 2025)
| Virus Family | Host Range | Virion Morphology | Structural Classification | Higher Taxa |
|---|---|---|---|---|
| Apasviridae | Marine Group II Archaea (Poseidoniales) | Head-tailed | Icosahedral capsid with tail [23] | Order Magrovirales, Class Caudoviricetes |
| Thalassapleoviridae | Archaeoglobi | Pleomorphic, enveloped | Enveloped virions, no fixed symmetry [23] | New Phylum: Calorviricota, New Class: Caminiviricetes |
| Chiyouviridae | Bathyarchaeia | Filamentous | Helical symmetry [23] | Order Ligamenvirales, Realm Adnaviria |
| Nipumfusiviridae | Nitrososphaerales | Spindle-shaped | Elongated, lemon-shaped virions [23] | Unassigned to higher taxa |
| Usuviridae | Methanobrevibacter | Head-tailed | Icosahedral capsid with tail [23] | Order Methanobavirales, Class Caudoviricetes |
The Scientist's Toolkit: Essential Reagents and Materials
Table 4: Essential Research Reagents for Viral Structural Studies
| Reagent/Material | Application | Function in Research | Example Uses |
|---|---|---|---|
| Holey Carbon Grids | Cryo-EM sample preparation | Support film with holes for spanning vitreous ice | Preservation of native virus structure without staining [21] |
| Uranyl Acetate | Negative stain EM | Heavy metal contrast agent | Rapid morphological assessment and sample screening |
| Sucrose/Cesium Chloride | Virus purification | Density gradient medium | Isolation of intact virions from cell lysates [21] |
| Detergents (Triton X-100, SDS) | Envelope disruption | Lipid membrane solubilization | Differentiation of enveloped vs. non-enveloped viruses [19] |
| Proteinase K | Structural analysis | Protein digestion | Determining protein-protected genomic regions in virions |
| Lipid Raft Disruptors (MβCD) | Envelope function studies | Cholesterol depletion from membranes | Studying envelope fusion and infectivity mechanisms [24] |
Structural characteristics—including capsid symmetry, envelope properties, and overall virion architecture—remain foundational elements in viral taxonomy that complement genomic data. The integration of electron microscopy with bioinformatic analyses enables virologists to establish natural taxonomic groupings that reflect evolutionary relationships and functional adaptations. As demonstrated by the recent classification of diverse archaeal viruses, structural virology continues to reveal unexpected diversity in the virosphere and provides essential criteria for the recognition of novel viral taxa at all hierarchical levels. For researchers in drug development, these structural insights facilitate the rational design of antiviral agents that target essential virion components, from capsid-binding compounds to envelope-disrupting agents.
Electron microscopy (EM) remains an indispensable tool in virology, providing an unbiased "open view" for detecting and identifying viral pathogens without prior knowledge of their genetic sequence. This capability is crucial during the initial phases of outbreaks involving unknown or emerging viruses, where molecular assays do not yet exist [3] [25]. While molecular methods like PCR offer high sensitivity for known pathogens, EM's ability to visualize the entire infectious unit based on morphology alone makes it uniquely valuable for frontline viral detection and research [3]. The technique continues to evolve, integrating with modern technologies to maintain its relevance in contemporary virology and drug development pipelines.
The COVID-19 pandemic highlighted EM's ongoing importance, with numerous studies employing it to characterize SARS-CoV-2 ultrastructure and morphometric variations across variants [5]. This application note details the methodologies, quantitative findings, and practical protocols that demonstrate EM's critical role in viral morphology research, providing researchers and drug development professionals with the tools to implement these approaches in their investigative workflows.
Quantitative Morphometric Analysis of Viral Pathogens
Comparative Morphometry of SARS-CoV-2 Variants
Systematic morphometric analysis reveals subtle but potentially significant structural differences between SARS-CoV-2 variants. The table below summarizes key measurements from a comprehensive study of SARS-CoV-2 variants using conventional thin-section transmission electron microscopy:
Table 1: Morphometric Parameters of SARS-CoV-2 Variants from Thin-Section TEM
| Virus Variant | Maximum Particle Diameter (nm) | Particle Circumference (nm) | Spike Number per Virus Profile | Spike Density |
|---|---|---|---|---|
| Munich929 (Reference) | Data from study [5] | Data from study [5] | Data from study [5] | Reference value |
| Italy-INMI1 (Reference) | Data from study [5] | Data from study [5] | Data from study [5] | Reference value |
| Alpha (B.1.1.7) | Slightly smaller | Data from study [5] | Data from study [5] | Increased |
| Beta (B.1.351) | Larger | Data from study [5] | Reduced | Reduced |
| Delta (B.1.617.2) | Slightly smaller | Data from study [5] | Data from study [5] | Increased |
| Omicron BA.2 | Slightly smaller | Data from study [5] | Data from study [5] | Increased |
This data, collected from approximately 900 TEM images of different SARS-CoV-2 variants, shows that the more dominant variants (Alpha, Delta, Omicron BA.2) exhibited slightly increased spike density compared to reference strains, primarily due to smaller particle size [5]. In contrast, the less dominant Beta variant showed reduced spike density with larger particle size [5]. These findings align with similar tendencies observed in cryo-electron tomography studies, suggesting morphometric parameters may influence viral fitness [5].
Data Utilization in Electron Microscopy Studies
The volume of data generated in EM studies presents both challenges and opportunities for research. Analysis of EM data utilization reveals significant potential for maximizing research outputs:
Table 2: Electron Microscopy Data Generation and Utilization Analysis
| Parameter | Value | Implications |
|---|---|---|
| Total EM images analyzed | 152,097 images (403 GB) | Highlights substantial data generation capacity in core facilities |
| Average annual image acquisition | >10,000 images | Demonstrates consistent instrumentation usage across projects |
| Percentage of images published | Approximately 2% (3,577 images) | Indicates substantial "lost data" with research potential |
| Composition of archive | 74% SEM, 23% TEM, 3% STEM | Reflects specialization in surface versus internal structure analysis |
| Potential unused data | >90% | Represents opportunity for data mining and AI development |
This analysis of over 150,000 EM images from a core facility revealed that more than 90% of scientifically significant data remains unpublished, representing both a challenge in data utilization and an opportunity for mining existing datasets for new insights [26]. For virology research, this suggests that existing EM archives may contain valuable unanalyzed structural information about viral pathogens.
Diagnostic Electron Microscopy Methods and Protocols
Negative Staining EM for Suspension Samples
Negative staining transmission electron microscopy provides a rapid method for visualizing viral particles in suspensions from various sample types, including cell culture supernatants, respiratory secretions, or purified viral preparations [3].
Protocol: Negative Staining for Viral Detection
Sample Preparation:
- Grid Preparation: Use 300-400 mesh copper grids filmed with Formvar or Pioloform. Apply a thin carbon layer to enhance stability during imaging.
- Surface Treatment: Render the grid surface hydrophilic using either glow discharge plasma treatment or chemical conditioning with 0.1-0.5% Alcian blue for 10 minutes [3].
- Particle Adsorption:
- For dense particles (e.g., bacteria, poxviruses): Use Drop-On-Grid (DOG) method - apply 5-10 µL of sample suspension directly to grid surface for 1 minute [3].
- For less dense particles or samples with high background: Use Grid-On-Drop (GOD) method - float grid on 20-30 µL droplet of sample for 1-5 minutes [3].
- Washing: Rinse grid gently with 5-10 drops of distilled water or ammonium acetate buffer (pH 7.0) to remove salts and soluble contaminants.
- Staining: Apply 5-10 µL of 1-2% uranyl acetate (or 1-2% phosphotungstic acid neutralized to pH 6.5-7.0) for 10-30 seconds. Blot excess stain with filter paper [3].
- Drying: Air-dry grid completely before EM examination.
Imaging and Analysis:
- Examine grids at 20,000-50,000× magnification using TEM.
- Systematically scan grid squares at lower magnification to identify representative areas.
- Capture images of potential viral particles at higher magnification for morphometric analysis.
- Identify viruses based on characteristic morphological features: size, shape, surface structures, and assembly patterns [3].
Figure 1: Negative Staining Workflow for Viral Detection. This protocol provides rapid preparation of suspension samples for TEM visualization of viral particles.
Thin-Section EM for Infected Cells and Tissues
Conventional thin-section EM allows visualization of viral particles in the context of infected cells and tissues, providing information about replication sites, morphogenesis, and virus-host interactions [5] [3].
Protocol: Thin-Section EM for Virus-Cell Interaction Studies
Sample Preparation and Processing:
- Cell Culture Infection: Infect Vero E6 cells (or other permissive cells) with virus at MOI 0.01-1.0. Incubate for 24 hours at 37°C with 5% CO₂ [5].
- Fixation: Replace medium with primary fixative (2.5% glutaraldehyde in 0.05 M HEPES buffer, pH 7.2). For better membrane preservation, use combination fixative (2.5% glutaraldehyde + 1% paraformaldehyde in HEPES buffer). Fix for at least 1 hour at room temperature [5].
- Cell Harvesting: Scrape fixed cells from culture flasks and collect by centrifugation (3000 g for 10 minutes) [5].
- Embedding: Mix cell pellet with 3% low-melting point agarose (1:1 v/v) at 40°C. Centrifuge briefly to concentrate cells [5].
- Post-fixation and Staining: Treat with 1% osmium tetroxide in buffer for 1 hour, followed by en bloc staining with 0.5% uranyl acetate for 30 minutes [3].
- Dehydration: Process through graded ethanol series (30%, 50%, 70%, 90%, 100%) or acetone.
- Infiltration and Embedding: Infiltrate with epoxy resin (Epon, Spurr's) or LR White, then polymerize at appropriate temperature.
- Sectioning: Cut ultrathin sections (60-90 nm) using ultramicrotome, collect on EM grids.
- Section Staining: Stain with uranyl acetate and lead citrate for contrast enhancement.
Imaging and Morphometric Analysis:
- Acquire images at 10,000-40,000× magnification.
- For morphometric analysis, measure maximum particle diameter, circumference, and count spike proteins using appropriate software [5].
- Compare with reference datasets for variant identification and characterization.
Figure 2: Thin-Section EM Workflow for Viral Morphogenesis Studies. This protocol preserves architectural context of viral infection in host cells.
Essential Research Reagent Solutions for Viral EM
Successful electron microscopy of viral pathogens requires specific reagents and materials optimized for preserving and contrasting delicate viral structures. The following table details essential solutions for viral EM workflows:
Table 3: Essential Research Reagent Solutions for Viral Electron Microscopy
| Reagent/Material | Composition/Type | Function in Viral EM | Application Notes |
|---|---|---|---|
| Primary Fixative | 2.5% glutaraldehyde in 0.05 M HEPES buffer (pH 7.2) | Crosslinks and stabilizes viral and cellular structures | For thin-section EM; may include 1% paraformaldehyde for enhanced preservation [5] |
| Negative Stain | 1-2% uranyl acetate or 1-2% phosphotungstic acid (pH 6.5-7.0) | Creates negative contrast around viral particles | Uranyl acetate provides finer grain; neutral pH maintains structure [3] |
| Secondary Fixative | 1% osmium tetroxide in buffer | Stabilizes lipids and adds electron density | Essential for membrane preservation in thin sections [3] |
| Embedding Resin | Epon, Spurr's, or LR White epoxy resins | Provides structural support for ultrathin sectioning | Different resins offer varying hardness and sectioning properties |
| Section Stains | Uranyl acetate (0.5-2%) and lead citrate | Enhances contrast of cellular and viral components | Sequential application with thorough washing between [3] |
| Grid Support Films | Formvar or Pioloform with carbon coating | Provides electron-transparent support for samples | 300-400 mesh copper grids most common [3] |
| Surface Conditioner | 0.1-0.5% Alcian blue or glow discharge | Creates hydrophilic surface for sample adhesion | Alcian blue provides consistent particle adsorption [3] |
Application in Emerging Viral Disease Investigation
EM's open view capability makes it particularly valuable for initial identification of unknown viral pathogens during outbreak investigations. The approach has demonstrated effectiveness across multiple viral families:
Outbreak Investigation Protocol:
- Rapid Sample Triage: Apply negative staining EM to various sample types (respiratory secretions, tissue homogenates, cell culture supernatants) within hours of receipt [3].
- Morphological Categorization: Classify observed particles into major viral families based on size, shape, and structural characteristics:
- Contextual Analysis: For tissue samples, use thin-section EM to visualize viral particles in pathological context, identifying replication sites and cytopathic effects.
- Correlation: Combine EM findings with clinical presentation and epidemiology to prioritize further characterization using molecular methods.
This approach was instrumental during the early COVID-19 pandemic, where EM provided among the first images of SARS-CoV-2 and confirmed its classification as a coronavirus [5]. Similarly, EM has historically played crucial roles in identifying novel viruses during outbreaks of Ebola, SARS, and other emerging infections [25].
For drug development professionals, EM provides critical insights into virus-cell interactions that can inform therapeutic targets and assess antiviral mechanisms. The ability to directly visualize viral entry, assembly, and egress, as well as morphological changes induced by antiviral compounds, makes EM an invaluable tool throughout the drug development pipeline.
Future Directions and Advanced Methodologies
The field of diagnostic EM continues to evolve with technological advancements. Volume Electron Microscopy (vEM) techniques, including Serial Block-Face SEM (SBF-SEM), Focused Ion Beam SEM (FIB-SEM), and array tomography, now enable comprehensive 3D ultrastructural analysis of virus-infected cells and tissues [27]. These methods provide unprecedented views of viral replication cycles in their native cellular context.
Correlative Light and Electron Microscopy (CLEM) combines the dynamic capabilities of live-cell imaging with the high resolution of EM, allowing researchers to track specific viral components and events over time before examining their ultrastructural details [28] [29]. This approach is particularly powerful for studying the dynamics of viral entry and assembly.
Computational advances, including machine learning and automated image analysis pipelines, are addressing the challenge of data volume and complexity in viral EM [26] [29]. These tools enable rapid detection and classification of viral particles in complex samples, potentially increasing throughput and standardization of diagnostic EM.
While cryo-electron microscopy and cryo-electron tomography offer exceptional structural preservation for high-resolution studies of viral architecture [5], conventional EM methods remain more accessible and practical for routine diagnostic applications and rapid response to emerging threats [3]. The integration of these advanced methodologies with established EM protocols ensures that electron microscopy will maintain its essential role in viral detection and characterization for foreseeable future.
The field of structural virology has undergone a profound transformation, driven by the evolution of electron microscopy (EM) from a purely descriptive tool into a powerful platform for quantitative analysis. Due to their small size, viruses can only be clearly visualized by electron microscopy, making EM an indispensable technology for understanding viral replication and pathogenesis [30]. Early EM techniques provided the first glimpses of viral morphology, enabling the classification of viruses based on their physical structure. However, these traditional approaches were largely qualitative, limited to illustrating what viruses look like. The contemporary revolution in EM technologies has shifted this paradigm dramatically. Today, advanced EM methods facilitate precise three-dimensional structural determination, quantification of viral components within individual particles, and statistical analysis of structural heterogeneity across viral populations [31] [30]. This evolution has positioned EM as a cornerstone technology in virology, with critical applications in understanding viral life cycles, pathogenesis, and the development of antiviral therapeutics.
The journey from descriptive visualization to quantitative analysis represents a fundamental shift in how researchers investigate virus-cell interactions. Where conventional thin-section transmission electron microscopy (TEM) of plastic-embedded material revealed the basic architecture of viral assemblies, modern techniques like electron tomography, cryo-electron microscopy (cryo-EM), and volume electron microscopy (vEM) now enable researchers to quantify viral budding efficiencies, statistically analyze maturation states, and map the spatial distribution of viral components with nanometer precision [30] [27]. This application note details this technological evolution, providing structured protocols, analytical frameworks, and practical resources to harness the full quantitative potential of EM in viral research.
The Evolution of EM Techniques in Virology
From Qualitative Morphology to Quantitative Ultrastructure
The application of electron microscopy in virology has progressed through distinct technological phases, each expanding the quantitative capabilities available to researchers. The following table summarizes the key evolutionary stages and their impact on viral research:
Table 1: Evolutionary Stages of EM in Virology
| Technological Era | Key Methodologies | Primary Applications in Virology | Quantitative Capabilities |
|---|---|---|---|
| Descriptive Morphology | Thin-section TEM, Negative staining [30] [32] | Viral classification, Basic morphogenesis studies, Diagnostic identification | Dimensional measurements, Qualitative assessment of assembly stages |
| Immuno-EM | Immunolabeling of cryosections [30] | Subcellular localization of viral components, Trafficking pathways | Semi-quantitative localization frequency, Relative abundance of antigens |
| 3D Reconstruction | Electron tomography, Single-particle analysis [30] | Viral architecture, Conformational states | 3D spatial measurements, Resolution to sub-nanometer level |
| Quantitative Volume EM | Serial block-face SEM, FIB-SEM, Array tomography [27] | Host-pathogen interactions, Viral factories, Organelle remodeling | Spatial statistics, Volume renderings, Population heterogeneity analysis |
| Cryo-EM/ET | Cryo-electron microscopy, Cryo-electron tomography [31] | Native structure determination, Structural dynamics | Atomic-scale resolution, Structural ensemble analysis |
This progression has fundamentally transformed how virologists approach structural questions. While negative staining EM—which uses heavy metal salts to enhance contrast between the background and the virion's image—remains a valuable rapid technique for initial morphological assessment [32], the field has increasingly moved toward methods that preserve native structures and enable statistical analysis. Techniques like immunolabeling of cryosections allow not only the localization but also the quantification of viral components, even in individual virus particles, enabling comparisons between particles at different cellular locations or assembly stages [30]. Meanwhile, the development of volume electron microscopy (vEM), encompassing techniques including Serial Block Face SEM (SBF-SEM), Focused Ion Beam SEM (FIB-SEM), and array tomography, has opened new possibilities for capturing subcellular architecture across cells, tissues, and entire small model organisms [27].
Workflow: From Sample to Quantitative Insight
The modern quantitative EM workflow for structural virology integrates multiple specialized steps, each contributing to the reliability and statistical power of the final analysis:
Diagram 1: Quantitative EM Workflow for Virology
This integrated workflow highlights the critical pathway from biological specimen to quantitative insight. For enveloped viruses specifically, preservation of membrane structures is essential, achieved through specialized protocols such as post-fixation in reduced osmium (1% osmium tetroxide in 1.5% potassium ferricyanide) and treatment with tannic acid to enhance membrane contrast [30]. The computational analysis phase has become increasingly sophisticated, with tools like cryoDRGN using machine learning approaches to reconstruct heterogeneous ensembles of cryo-EM density maps, and emClarity providing GPU-accelerated processing for subtomogram averaging and classification at high resolution [31].
Detailed Experimental Protocols
Protocol 1: Epon Embedding for Ultrastructural Analysis of Viral Assembly
This protocol details the preparation of virus-infected cells for traditional transmission electron microscopy, enabling the qualitative assessment and quantitative analysis of viral morphogenesis and host-cell modifications [30].
Materials and Reagents
Table 2: Essential Reagents for Epon Embedding
| Reagent/Chemical | Specification/Purity | Primary Function in Protocol |
|---|---|---|
| Paraformaldehyde | Electron microscopy grade, 16% solution | Primary fixative: rapidly penetrates cells to stabilize proteins |
| Glutaraldehyde | EM grade, 25% aqueous solution | Cross-linking fixative: preserves ultrastructure and membranes |
| Phosphate Buffer | 0.2 M, pH 7.4 | Physiological buffer for fixation maintains cellular integrity |
| Osmium Tetroxide | Crystalline, 4% aqueous solution | Post-fixation: stabilizes and stains lipid membranes |
| Potassium Ferricyanide | ACS reagent grade, ≥99.0% | Reducing agent with OsO4 enhances membrane contrast |
| Tannic Acid | Low molecular weight (Gallotannin) | Mordant: improves contrast of membranes and fine structures |
| Sodium Cacodylate | 0.2 M, pH 7.4 | Buffer for post-fixation steps maintains tissue integrity |
| Ethanol Series | 30%, 50%, 70%, 90%, 100% | Dehydration: gradual water removal for resin infiltration |
| Propylene Oxide | Electron microscopy grade | Transition solvent: facilitates resin infiltration |
| Epon 812 Epoxy Resin | EM embedding kit | Infiltration and embedding: provides stable support for sectioning |
Step-by-Step Procedure
Primary Fixation: Prepare double-strength fixative (4% formaldehyde, 3% glutaraldehyde in 0.1 M phosphate buffer, pH 7.4). Add an equal volume of this fixative directly to the culture medium of virus-infected cells. Fix for 1-2 hours at room temperature. Note: For pathogenic viruses, this step inactivates pathogens for safe handling. [30]
Post-fixation and Membrane Contrast: Wash cells 3x with 0.1 M cacodylate buffer. Incubate cells with 1% osmium tetroxide in 1.5% potassium ferricyanide in 0.1 M cacodylate buffer for 1 hour on ice. This step is critical for preserving the membrane structures of enveloped viruses. [30]
Tannic Acid Treatment: Wash cells and incubate with 1% tannic acid in 0.05 M sodium cacodylate buffer for 45 minutes at room temperature. Follow with a brief rinse in 1% sodium sulfate for 5-10 minutes. This step acts as a mordant, dramatically improving the contrast and delineation of viral and cellular membranes. [30]
Dehydration: Perform graded ethanol dehydration: 30%, 50%, 70%, 90% (10 minutes each), followed by 3 changes of 100% ethanol (15 minutes each).
Resin Infiltration and Embedding: Infiltrate with Epon 812 resin using a progressive series of resin:ethanol mixtures (1:2, 1:1, 2:1) for 1-2 hours each, followed by pure resin overnight. Transfer to fresh resin in embedding molds and polymerize at 60°C for 48 hours.
Sectioning and Staining: Cut ultrathin sections (60-80 nm) using an ultramicrotome. Collect sections on EM grids. Contrast with lead citrate for 1-2 minutes before viewing in the TEM.
Applications in Virology
This protocol is particularly valuable for studying the assembly of complex viruses such as the beta-herpesvirus human cytomegalovirus (HCMV) and primate lentiviruses (SIV and HIV) [30]. It enables researchers to identify morphological features of various assembly stages, distinguish immature and mature particles, and analyze the acquisition of lipid membranes by enveloped viruses through budding processes.
Protocol 2: Negative Staining for Rapid Visualization of Viral Particles
This straightforward technique provides a rapid method for initial morphological assessment of viral preparations, using heavy metal salts to create a negative impression of viral particles [32].
Materials
- Formvar-coated EM grids
- Virus preparation (pelleted and resuspended in distilled water)
- Phosphotungstic acid (PTA), 2.0%, pH 7.0
- Filter paper
Procedure
- Place a drop of purified viral suspension on a clean petri dish.
- Carefully place a Formvar-coated EM grid (Formvar side down) on top of the virus drop for 1-3 minutes.
- Remove the grid and gently blot excess liquid with filter paper.
- Place the grid onto a drop of 2.0% phosphotungstic acid (pH 7.0) for one minute.
- Remove excess PTA by blotting and allow the grid to air dry completely before EM examination. [32]
Protocol 3: Immunogold Labeling for Quantification of Viral Components
This protocol enables the quantitative localization of specific viral antigens within infected cells and even within individual virions, providing statistical data on component distribution.
Materials
- Ultrathin cryosections of virus-infected cells (approximately 50-80 nm)
- Primary antibodies against viral antigens
- Protein A-gold or secondary antibody-gold conjugates (5-15 nm gold particles)
- Phosphate-buffered saline (PBS) with glycine
- PBS with 1% bovine serum albumin (BSA)
- Methyl cellulose/uranyl acetate solution
Procedure
- Collect ultrathin cryosections on EM grids coated with Formvar and carbon.
- Float grids on drops of PBS/glycine to quench free aldehyde groups.
- Incubate on drops of PBS/BSA to block non-specific binding.
- Incubate with primary antibody against viral antigen (diluted in PBS/BSA) for 30-60 minutes.
- Wash thoroughly with PBS/BSA.
- Incubate with Protein A-gold or immunogold conjugate for 20-30 minutes.
- Wash with PBS followed by distilled water.
- Contrast with uranyl acetate and embed in methyl cellulose/uranyl acetate.
- After drying, examine in TEM and quantify gold particle distribution per viral particle or cellular compartment. [30]
The Scientist's Toolkit: Essential Research Reagent Solutions
Successful implementation of quantitative EM in virology requires specialized reagents and tools. The following table details essential solutions for researchers in this field:
Table 3: Essential Research Reagent Solutions for Viral EM
| Reagent/Tool Category | Specific Examples | Function in Viral EM Research |
|---|---|---|
| Fixation Systems | 4% Formaldehyde/3% Glutaraldehyde blend, High-pressure freezing apparatus | Structural preservation of viral assemblies and host-cell ultrastructure |
| Contrast Enhancement | Osmium tetroxide/Potassium ferricyanide, Tannic acid, Uranyl acetate | Membrane stabilization and electron density for high-contrast imaging |
| Embedding Media | Epon 812, Lowicryl resins, LR White | Tissue support for ultrathin sectioning; antigen preservation for immuno-EM |
| Immunolabeling Reagents | Protein A-gold conjugates, Immunogold probes (5-15 nm) | Antigen localization and quantification within viral particles and cellular compartments |
| Cryo-EM Reagents | Quantifoil grids, Liquid ethane, Cryo-protectants | Vitrification for native-state structural analysis of virions |
| Software Solutions | CryoDRGN, emClarity, IMOD, SerialEM | Image processing, tomographic reconstruction, heterogeneity analysis, and segmentation |
| Volume EM Consumables | Diamond knives, GridTape, Conductive tape | Automated serial sectioning for large-volume vEM datasets |
Data Analysis and Interpretation Framework
Quantitative Analysis of Viral Morphogenesis
The transition to quantitative EM requires robust analytical frameworks for interpreting the rich datasets generated by modern instrumentation. For viral morphogenesis studies, this typically involves:
Morphometric Analysis of Assembly Intermediates: Precise measurement of viral particle dimensions, capsid thickness, and core condensation states across a population enables statistical classification of assembly intermediates. This is particularly valuable for distinguishing immature, intermediate, and mature forms of viruses like HIV, where maturation involves profound structural reorganization. [30]
Spatial Distribution Analysis: Quantitative mapping of viral particles and components within cellular compartments provides insights into replication strategies. This can include statistical analysis of preferential budding sites, association with specific organelles, or clustering patterns within viral factories.
Immunogold Quantification: Statistical analysis of gold particle distributions per viral particle or unit area of cellular compartment enables precise quantification of viral component localization, even revealing differential composition of particles at different cellular locations or assembly stages. [30]
Structural Heterogeneity Analysis
Advanced computational methods now enable the analysis of structural heterogeneity within viral populations, moving beyond single, static structures to understanding dynamic conformational ensembles:
Diagram 2: Viral Structural Heterogeneity Analysis
Machine learning approaches like cryoDRGN (Deep Reconstruction of Generative Networks) are particularly powerful for analyzing structural heterogeneity in viral complexes, reconstructing diverse ensembles of cryo-EM density maps from single-particle datasets [31]. This capability is crucial for understanding functional mechanisms in flexible viral glycoproteins, pleomorphic virions, or assembly intermediates that exist in multiple conformational states.
Application Notes: Case Studies in Viral Research
Case Study 1: Quantitative Analysis of HIV Morphogenesis
The application of quantitative EM to HIV research has revealed intricate details of the viral assembly and maturation process. Through careful morphometric analysis of plastic sections and immunogold labeling, researchers have quantified the distribution of viral components between immature and mature particles, the kinetics of Gag processing, and the spatial relationship between viral budding sites and cellular compartments. [30]
Key Quantitative Findings:
- Statistical analysis of capsid condensation states reveals intermediate maturation forms
- Gold particle quantification demonstrates differential incorporation of viral envelope glycoproteins
- Spatial analysis shows preferential budding at specific microdomains of the plasma membrane
Case Study 2: Volume EM of Viral Factories in Cytomegalovirus Infection
HCMV infection induces profound reorganization of cellular architecture, including the formation of elaborate viral assembly compartments. Volume EM approaches enable the quantitative three-dimensional analysis of these virus-induced structures, providing insights into their organization and functional significance. [30] [27]
Quantitative Volume Analysis:
- Segmentation and volumetric measurement of viral assembly compartments
- Spatial statistics of particle distribution within infected cells
- Membrane surface area calculations for organelle remodeling
The integration of these quantitative EM approaches continues to transform our understanding of viral replication strategies, host-pathogen interactions, and the structural basis of antiviral interventions. As EM technologies continue to evolve toward higher throughput, automation, and integration with complementary modalities, the capacity for quantitative analysis in structural virology will expand further, enabling increasingly sophisticated investigations into the nanoscale world of viruses.
From Sample to Structure: Methodological Workflows and Cutting-Edge Applications in Virology
In the field of viral morphology research, the quality of electron microscopy (EM) data is fundamentally determined by specimen preparation. The choice between chemical fixation and cryo-preservation represents a critical methodological crossroads, each pathway preserving cellular and viral ultrastructure through fundamentally different physical principles. Chemical fixation employs cross-linking agents to stabilize biomolecules, while cryo-preservation rapidly vitrifies water to arrest biological processes in a near-native state. For researchers investigating viral pathogenesis, replication organelle formation, and virus-host interactions, the selection of an appropriate preparation strategy directly influences the resolution and biological relevance of the resulting structural data. This application note provides detailed protocols and analytical frameworks for these cornerstone techniques, contextualized within the specific requirements of contemporary virology research.
Table 1: Core Specimen Preparation Methods in Viral Research
| Method | Primary Principle | Key Applications in Virology | Spatial Resolution | Key Artifacts/Considerations |
|---|---|---|---|---|
| Chemical Fixation | Aldehyde cross-linking of proteins; osmium tetroxide stabilization of lipids | Study of viral assembly sites, virus-induced membrane remodeling, and infected cell pathology [30] [33] | ~2-5 nm (plastic sections) | Membrane distortion, protein extraction, antigen masking [3] [33] |
| Cryo-Preservation (Vitrification) | Ultra-rapid cooling to form non-crystalline (vitreous) ice | Visualization of viral particles and replication complexes in near-native state; single-particle analysis [34] [35] | <3 Å (for high-resolution SPA) | Sample thickness limitations, beam-induced motion, requiring specialized equipment [34] [3] |
| Negative Staining | Heavy metal salt embedding of surface structures | Rapid diagnostic imaging of viral particles in suspensions, antibody binding studies (IEM) [3] [36] | ~1-2 nm | Stain penetration artifacts, flattening of particles, not suitable for internal structure [3] |
Chemical Fixation: Protocols for Structural Preservation in Viral Research
Chemical fixation remains a widely accessible and robust method for preserving viral-infected cells and tissues. The goal is to rapidly stabilize biological structures against the subsequent stresses of dehydration, embedding, and sectioning, while minimizing artifactual changes to the native state.
Standard Aldehyde-Osmium Protocol for Plastic Embedding
This protocol is optimized for preserving the membrane structures critical for studying enveloped viruses and viral replication organelles [30] [37].
Materials:
- Primary Fixative: 2% formaldehyde (from paraformaldehyde) + 1.5% glutaraldehyde in 0.1 M phosphate buffer, pH 7.4
- Post-fixative: 1% osmium tetroxide in 1.5% potassium ferricyanide
- Contrasting Agent: 1% tannic acid in 0.05 M sodium cacodylate buffer
- Dehydration Series: Ethanol or acetone (50%, 70%, 90%, 100%)
- Embedding Resin: Epon 812 or equivalent epoxy resin
Methodology:
- Primary Fixation: Prepare a double-strength fixative (4% formaldehyde/3% glutaraldehyde) and add it directly to the culture medium containing infected cells at a 1:1 ratio. Fix for at least 1 hour at room temperature. For tissue samples, perfuse or immerse small (<1 mm³) pieces in fixative [30].
- Washing: Rinse cells/tissue three times with 0.1 M phosphate buffer (5 minutes each) to remove excess aldehydes.
- Post-fixation: Incubate with 1% osmium tetroxide in 1.5% potassium ferricyanide for 1 hour on ice. This step specifically stabilizes lipid membranes, which is crucial for visualizing viral envelopes and modified intracellular membranes [30].
- Tannic Acid Treatment: Wash samples and incubate in 1% tannic acid in 0.05 M sodium cacodylate buffer for 45 minutes at room temperature. This acts as a mordant, enhancing membrane contrast and fine delineation of cellular structures [30].
- Dehydration: Process through a graded ethanol series (50%, 70%, 90%, 100%) with 10-15 minutes per step, followed by a second change of 100% ethanol.
- Embedding: Infiltrate with epoxy resin (e.g., Epon 812) using a progressive resin:ethanol ratio (e.g., 1:2, 1:1, 2:1), followed by pure resin changes. Polymerize at 60°C for 48 hours [30] [37].
- Sectioning: Cut ultrathin sections (60-80 nm thickness) using an ultramicrotome with a diamond knife. Collect sections on naked copper grids.
- Staining: Contrast sections with uranyl acetate (saturated solution in 50% ethanol, 10-20 minutes) followed by lead citrate (2-5 minutes) [37].
Rapid Embedding Protocol for Clinical Specimens
For time-sensitive diagnostic applications or processing small-volume samples (e.g., nasopharyngeal swabs), a rapid protocol can be employed [37].
Materials:
- Primary Fixative: 2.5% glutaraldehyde in 0.05 M HEPES buffer, pH 7.2
- Post-fixative: 1% osmium tetroxide in water
- Embedding Resin: LR White acrylic resin
Methodology:
- Sample Concentration: For swab suspensions or low-titer virus preparations, concentrate particles by desktop ultracentrifugation (e.g., Airfuge) at approximately 120,000×g for 10 minutes [37].
- Primary Fixation: Mix sample with equal volume of primary fixative for 30-60 minutes.
- Pellet Handling: Embed the resulting tiny pellet in low-melting point agarose (3%) to prevent dispersal during processing.
- Post-fixation: Treat with 1% osmium tetroxide for 30 minutes at room temperature.
- Dehydration and Embedding: Rapid dehydration through ethanol series and embed in LR White resin. Polymerize at 50°C for 24 hours or using chemical accelerators [37].
Diagram 1: Chemical fixation and embedding workflow for viral samples (6 characters)
Cryo-Preservation: Advanced Techniques for Near-Native State Analysis
Cryo-preservation through vitrification has revolutionized structural virology by preserving samples in a hydrated, near-native state, enabling high-resolution analysis of viral structures and their interactions with host cells.
Plunge Freezing for Thin Specimens
This method is ideal for virus suspensions, isolated viral complexes, or thin cellular monolayers.
Materials:
- Cryogen: Liquid ethane or ethane/propane mixture
- Sample Supports: Quantifoil or C-flat holy carbon grids (200-300 mesh)
- Plunge Freezer Device: Equipped with humidity and temperature control
- Blotting Paper: Whatman No. 1 or equivalent
Methodology:
- Grid Preparation: Plasma clean EM grids to render them hydrophilic immediately before use.
- Sample Application: Apply 3-5 µL of virus suspension (typically 10⁶-10⁸ particles/mL) to the grid. For cells, grow directly on grids or use focused ion beam (FIB) milling to create thin lamellae [34] [35].
- Blotting: Use filter paper to remove excess liquid, leaving a thin film (typically <1 µm thick) spanning the holes in the support film.
- Vitrification: Rapidly plunge the grid into liquid ethane cooled by liquid nitrogen. The rapid heat transfer vitrifies the water in the sample without forming crystalline ice [34].
- Storage and Transfer: Transfer grids under liquid nitrogen to storage boxes and subsequently into the electron microscope.
High-Pressure Freezing (HPF) for Thick Samples
HPF enables vitrification of samples up to 200-300 µm thick, such as tissue fragments or pelleted cells, by applying high pressure to suppress ice crystal formation [33].
Materials:
- High-Pressure Freezer: Leica EM ICE or equivalent
- Sample Carriers: Type A and B aluminum or copper carriers
- Cryoprotectant (optional): 20% dextran or Ficoll in culture medium
- Liquid Nitrogen for cooling
Methodology:
- Sample Loading: Fill the shallow cavity of a sample carrier with cell suspension or small tissue pieces. If necessary, add cryoprotectant to improve vitrification quality.
- Assembly: Close with the matching carrier and load into the HPF machine.
- Freezing: Apply high pressure (∼2100 bar) and rapidly inject with liquid nitrogen-cooled propane. The entire process from ambient temperature to vitrification occurs in ∼10-15 milliseconds.
- Recovery: Under liquid nitrogen, separate the carriers and transfer the frozen sample to storage tubes for subsequent processing.
Freeze Substitution and Embedding for Cryo-EM Tomography
For cryo-electron tomography (cryo-ET) of thick cellular samples, HPF followed by freeze substitution (FS) and embedding provides superior structural preservation, particularly for membrane-bound viral replication organelles [33].
Materials:
- Freeze Substitution Medium: 0.1-1% tannic acid + 0.5% uranyl acetate in anhydrous acetone
- FS Apparatus: Automated freeze substitution system (e.g., Leica AFS2)
- Embedding Resin: Lowicryl HM20 or LR White
Methodology:
- HPF: Vitrify samples as described in section 3.2.
- Freeze Substitution: Transfer frozen samples to FS medium at -90°C in the FS apparatus. Gradually raise the temperature to -50°C over 24-48 hours.
- Resin Infiltration: Infiltrate with resin at -50°C using progressive resin:acetone ratios.
- Polymerization: UV-polymerize at -50°C for 24-48 hours, then bring to room temperature.
- Sectioning: Cut ultrathin sections (100-250 nm) and collect on EM grids. For cryo-ET, sections can be left uncontrasted or lightly stained [33].
Table 2: Cryo-Preservation Methods for Different Viral Sample Types
| Sample Type | Recommended Method | Optimal Thickness | Key Applications | Resolution Limit |
|---|---|---|---|---|
| Virus Suspensions (AAV, HIV) | Plunge Freezing | <1 µm | Single-particle analysis, viral structure determination [34] [38] | ~2-3 Å [34] |
| Cell Monolayers (Vero, HEK293) | Plunge Freezing or HPF | <10 µm | Virus entry/egress studies, early infection events [35] | ~20-30 Å (tomography) [33] |
| Tissue Fragments | High-Pressure Freezing | ≤200 µm | Viral pathogenesis, tissue tropism studies [33] | ~30-50 Å (tomography) [33] |
| Thick Cellular Samples | HPF + Freeze Substitution | ≤300 µm | 3D architecture of replication organelles, immunolabeling [33] | ~40-60 Å (section tomography) [33] |
Sectioning Techniques: Bridging Resolution and Context
Sectioning enables the visualization of internal cellular structures and viral replication complexes that are inaccessible in whole mounts.
Conventional Ultrathin Sectioning
For resin-embedded samples (either chemically fixed or HPF-FS processed), ultrathin sectioning produces slices thin enough for electron transmission.
Materials:
- Ultramicrotome: Leica UC7 or equivalent
- Diamond Knives: 45° knife angle for sectioning, 35° for trimming
- Section Retrieval Tools: Eyelash probe, perfect loop
- Support Grids: Copper or nickel grids (200-400 mesh)
Methodology:
- Block Trimming: Using a glass or diamond knife, trim the resin block to create a small trapezoidal face (∼0.5 × 0.2 mm).
- Sectioning: Install a diamond knife with water-filled boat. Cut sections at 60-80 nm thickness, as indicated by interference colors (silver to gold).
- Section Collection: Float sections on water surface and pick up on support grids.
- Staining: For conventional TEM, stain with uranyl acetate and lead citrate as described in section 2.1.
Cryo-Ultrathin Sectioning (CEMOVIS)
This technique sections vitrified samples without dehydration or resin embedding, preserving the native state but requiring specialized equipment.
Materials:
- Cryo-Ultramicrotome: Equipped with cryo-chamber and antistatic device
- Cryo-Diamond Knives
- Low-Temperature Grid Storage
Methodology:
- Sample Preparation: Vitrify tissue or cell pellets by HPF as in section 3.2.
- Sectioning: Mount the frozen sample in the cryo-ultramicrotome pre-cooled to -140°C to -160°C. Cut sections at 50-100 nm thickness.
- Collection: Transfer sections to EM grids using a specialized cryo-transfer system.
- Imaging: Maintain samples at liquid nitrogen temperature during transfer and imaging.
Research Reagent Solutions: Essential Materials for Viral EM
Table 3: Key Reagents for Electron Microscopy of Viral Specimens
| Reagent/Category | Specific Examples | Function in Protocol | Virology Application Notes |
|---|---|---|---|
| Primary Fixatives | Formaldehyde (2-4%), Glutaraldehyde (1.5-2.5%) | Protein cross-linking, structural stabilization | Formaldehyde penetrates faster; glutaraldehyde provides better cross-linking [30] |
| Secondary Fixatives | Osmium Tetroxide (0.5-1%), Potassium Ferricyanide | Lipid preservation, membrane contrast | Critical for visualizing viral envelopes and replication organelles [30] [33] |
| Contrast Enhancers | Tannic Acid, Uranyl Acetate | Heavy metal binding, electron scattering | Tannic acid improves membrane delineation; uranyl acetate stabilizes nucleic acids [30] |
| Embedding Media | Epon 812, LR White, Lowicryl HM20 | Structural support for sectioning | Epon provides hardness; LR White preserves antigenicity for immunolabeling [37] |
| Cryoprotectants | Dextran, Ficoll, Sucrose | Ice crystal suppression during freezing | Essential for HPF of cellular samples; concentration optimization required [33] |
| Immunolabeling Reagents | Protein A-gold, Secondary Antibody-gold conjugates | Antigen localization | Critical for CLEM studies of viral protein distribution [35] [33] |
| Support Films | Formvar, Continuous Carbon | Sample support for TEM | Carbon films provide stability for high-resolution cryo-EM [3] |
Comparative Analysis and Method Selection Framework
The choice between chemical fixation and cryo-preservation involves balancing multiple factors including resolution requirements, antigen preservation, and technical feasibility.
Diagram 2: Method selection guide for viral EM (6 characters)
Technical Considerations:
- Chemical Fixation provides reliable results for most diagnostic applications and studies of viral-induced cellular changes, with the advantage of being compatible with archiving samples for long-term studies [3] [37].
- Cryo-Preservation is essential for high-resolution structural studies and when investigating delicate membrane structures that are compromised by chemical fixation, such as those found in viral replication organelles [34] [33].
- Hybrid Approaches such as HPF-FS combine the superior structural preservation of cryo-methods with the convenience of room-temperature sectioning and imaging, making them ideal for correlative light and electron microscopy (CLEM) studies of viral infection pathways [35] [33].
The expanding toolkit of specimen preparation methods enables virologists to address increasingly sophisticated questions about virus-host interactions. While chemical fixation remains a cornerstone for diagnostic EM and basic ultrastructural studies, cryo-preservation methods now enable near-atomic resolution analysis of viral structures and their functional assemblies within cells. The emerging trend toward correlative approaches, combining the strengths of multiple preparation and imaging modalities, provides unprecedented opportunities to bridge spatial scales from whole cells to atomic details. As viral research continues to confront new challenges—from emerging pathogens to optimizing viral vectors for gene therapy—precise application of these specimen preparation cornerstones will remain fundamental to advancing our understanding of viral morphology and pathogenesis.
Transmission electron microscopy (TEM) is an indispensable tool for viral morphology research and diagnostics, enabling visualization of viruses at nanometer resolution. For TEM imaging, staining with heavy metal salts is essential to create sufficient scattering contrast for organic biological specimens, which have low intrinsic contrast due to their composition of light elements [39]. Negative staining (nsTEM) and positive staining (psTEM) represent two cornerstone techniques with distinct mechanisms and applications in virology. Negative staining creates a reverse contrast where virus particles appear light against a dark background, while positive staining results in dark viral structures against a lighter background [39] [40]. These techniques have proven fundamental across scientific fields, from basic viral morphology studies to applied diagnostic scenarios, including recent use during the SARS‐CoV‐2 pandemic for rapid virus identification [39] [3]. Despite the development of molecular diagnostic methods, TEM staining remains valuable for its "open view" capability to detect all pathogens present in a clinical specimen without prior knowledge of the target [40] [25].
Negative Staining Transmission Electron Microscopy (nsTEM)
Fundamental Principles and Applications
Negative staining employs heavy metal salts to embed and surround viral particles, creating a reverse contrast where viruses appear electron-lucent against an electron-dense background [40]. When introduced into the electron microscope, beam electrons are strongly scattered at large angles by the high atomic number atoms in the stain and subsequently removed by the objective aperture, enhancing contrast between dark stain and light particles [39]. This technique is predominantly applied to viral suspensions and provides detailed tri-dimensional structural information about viral particles, including symmetry, presence of envelopes or spikes, and surface projections [40]. First introduced in the 1950s, negative staining has become the gold-standard for rapid, cost-effective nanometer-resolution screening and structure analysis at room temperature, providing immediate contrast without specialized cryo-equipment [39]. Its applications in virology are extensive, ranging from initial virus identification and classification to structural studies of viral assemblies and surface proteins [3] [40].
Detailed Protocol for Viral Suspensions
The standard negative staining protocol for viral diagnosis involves a three-step process: particle adsorption, washing, and heavy metal contrasting [3]. Sample Collection and Preparation: Viral suspensions can be obtained from cell culture supernatants, clinical specimens (e.g., vesicular fluid, respiratory secretions, feces), or purified virus preparations [3] [40]. Samples may require dilution or concentration to achieve optimal particle density. For concentration, methods such as ammonium-sulphate precipitation, gradient fractionation, or diffusion in an agarose layer can be employed [40]. Grid Preparation: TEM grids (typically 300-400 mesh copper grids filmed with Formvar or Pioloform) are preconditioned to create a hydrophilic, sticky surface for efficient particle adsorption [3]. This can be achieved through physical methods (glow discharge or UV irradiation) or chemical treatment with Alcian blue, poly-L-lysine, or Bacitracin [3]. Alcian blue treatment is particularly recommended for its robustness in capturing diverse particles, including larger viruses [3]. Particle Adsorption: Apply a small volume (typically 3-10 μL) of viral suspension to the pre-treated grid surface using either Drop-On-Grid (DOG - adding suspension directly on grid) or Grid-On-Drop (GOD - placing grid on droplet) methods [3]. For dense particles or those with high sedimentation rates (e.g., poxviruses), DOG provides better adsorption, while GOD helps reduce background contamination from denser irrelevant particles [3]. Incubate for 30-60 seconds. Staining Procedure: Carefully remove excess liquid with filter paper without touching the grid surface. Immediately apply heavy metal stain solution (e.g., 1% phosphotungstic acid pH 7.2, uranyl acetate, or commercial alternatives) for 10-60 seconds [3] [40]. Remove excess stain by wicking with filter paper and allow the grid to air-dry completely before TEM examination. For quality control, ensure even stain distribution without significant precipitation or crystallization.
Stain Selection and Advanced Applications
Traditional stains include uranyl acetate (UA), renowned for its reliable performance, small grain size (4-5 Å), and strong scattering, but limited by radioactivity and toxicity [39]. Recent developments have produced safer commercial alternatives like UranyLess, UAR, UA-Zero, PTA, STAIN 77, Nano-W, and NanoVan, which demonstrate comparable or superior performance to UA across diverse samples including Influenza-A viruses [39]. Advanced applications incorporate immunological techniques such as immune-electron microscopy, where specific antibodies help identify and aggregate viral particles for enhanced detection [40]. Solid-phase electron microscopy and affinity-based capture methods further improve specificity for low-abundance viruses in complex clinical samples [40].
Positive Staining Transmission Electron Microscopy (psTEM)
Fundamental Principles and Applications
Positive staining involves the direct binding of heavy metal salts to cellular and viral structures, creating direct contrast where stained components appear electron-dense against a lighter background [39] [40]. This technique is primarily applied to ultrathin sections of virus-infected tissues or cell cultures that have been resin-embedded, enabling visualization of intracellular viral replication cycles, assembly sites, and virus-host interactions [40]. Unlike negative staining, which reveals external viral architecture, positive staining provides insights into the spatial context of viral infection within cells, including the localization of viruses inside or around cellular compartments and the pathological changes induced in host cells [40]. Positive staining highlights organelles, chromatin, membranes, and viral inclusions, with cellular regions appearing darker than the surrounding resin due to preferential stain adhesion to biological material, particularly at section surfaces [39]. This technique is indispensable for studying viral pathogenesis, morphogenesis, and the cellular response to infection.
Detailed Protocol for Ultrathin Sections
The positive staining protocol for viral diagnosis is performed on ultrathin sections of resin-embedded infected samples. Sample Preparation and Fixation: Infect appropriate cell cultures (e.g., Vero E6 cells for SARS-CoV-2) at suitable multiplicity of infection (e.g., MOI 0.01-1) [5]. Terminate cultivation at desired timepoints (typically 24 hours post-infection for many viruses) by replacing medium with fixative (2.5% glutaraldehyde in 0.05M HEPES buffer, pH 7.2, sometimes with 1% paraformaldehyde) [5]. Fix for at least 1 hour at room temperature. Processing and Embedding: Wash fixed cells with buffer, then sediment by centrifugation (3000g, 10 minutes) [5]. Embed pellet in 3% low-melting point agarose at 40°C, then centrifuge briefly to concentrate material [5]. Process through standard dehydration series (ethanol or acetone) and embed in epoxy resin. Polymerize at appropriate temperatures (e.g., 60°C for 24-48 hours). Sectioning and Staining: Cut ultrathin sections (70-90 nm thickness) using an ultramicrotome and collect on TEM grids. For double-staining with uranyl acetate and lead citrate: prepare uranyl acetate solution in distilled water or ethanol; incubate grids for 15 minutes in uranyl acetate in dark conditions; wash thoroughly with distilled water; prepare lead citrate solution with CO₂-free environment (using NaOH pellets to trap CO₂); incubate grids for 4-5 minutes in lead citrate; wash extensively with distilled water and air-dry [40]. Quality Control: Ensure stain freshness to prevent precipitation; avoid CO₂ contamination during lead citrate staining; check for even staining without significant precipitate.
Stain Selection and Morphometric Analysis
Traditional positive stains include uranyl acetate and lead citrate, often used sequentially for comprehensive cellular and viral contrast [39] [40]. Uranyl acetate binds preferentially to nucleic acids and proteins, while lead citrate enhances membrane contrast. For morphometric analysis of viral parameters (e.g., particle diameter, spike density), systematic approaches have been developed for SARS-CoV-2 variants and other viruses [5]. These methodologies enable quantitative comparison of viral characteristics across variants, such as the observed slightly increased spike density in dominant SARS-CoV-2 variants (Alpha, Delta, Omicron BA.2) compared to early isolates, potentially relevant to infectivity and transmission dynamics [5].
Comparative Analysis: Applications and Technical Considerations
Direct Comparison of Negative and Positive Staining
Table 1: Technical Comparison of Negative and Positive Staining for Viral Diagnosis
| Parameter | Negative Staining (nsTEM) | Positive Staining (psTEM) |
|---|---|---|
| Sample Type | Viral suspensions, purified particles | Virus-infected tissues, cell cultures |
| Information Obtained | External structure, surface details, symmetry, particle morphology | Intracellular localization, replication sites, virus-host interactions |
| Resolution | ≈10-20 Å, sufficient for 2D/3D reconstructions [39] | Limited by section thickness (70-90 nm), lower than nsTEM |
| Processing Time | Rapid (minutes to few hours) | Lengthy (several days) |
| Primary Applications | Rapid diagnostics, virus identification, structural studies | Pathogenesis studies, morphogenesis, cellular pathology |
| Key Advantages | Speed, simplicity, high resolution of surface features | Contextual information, intracellular events |
| Main Limitations | No intracellular information, potential artifacts from dehydration | Complex processing, lower resolution of individual particles |
Stain Performance and Selection Guide
Table 2: Performance Characteristics of Common TEM Stains for Virology
| Stain Type | Contrast Quality | Resolution | Toxicity | Optimal for Viral Types | Key Considerations |
|---|---|---|---|---|---|
| Uranyl Acetate | Excellent [39] | High (4-5 Å grain size) [39] | High (radioactive) [39] | Broad spectrum, especially enveloped viruses | Regulatory restrictions, low pH (4-5) may cause artifacts [39] |
| Uranyl Formate | Excellent [39] | Very high [39] | High (radioactive) [39] | Delicate structures, proteins | Less artifacts than UA, but same regulatory burden [39] |
| Phosphotungstic Acid | Good [40] | Moderate | Low | General purpose, pH-sensitive viruses | Adjustable pH (often 7.2), less granular detail [40] |
| Lead Citrate | Good (membranes) [39] [40] | Moderate | Moderate | Intracellular structures, section staining | CO₂ sensitivity, often used combined with uranyl [40] |
| Commercial Alternatives | Good to excellent [39] | Comparable to UA [39] | Low to none | Broad spectrum (tested with Influenza-A, liposomes) [39] | No radioactivity concerns, variable performance by sample type [39] |
The Scientist's Toolkit: Essential Research Reagents and Materials
Table 3: Essential Research Reagent Solutions for Viral TEM Staining
| Reagent/Material | Function | Key Specifications | Application Notes |
|---|---|---|---|
| TEM Grids | Sample support | 300-400 mesh, copper, Formvar/Pioloform film | Carbon coating improves stability and thermal conduction [3] |
| Uranyl Acetate | Positive & negative stain | 1-2% aqueous solution, pH 4-5 | Gold standard but radioactive; requires licensing [39] |
| Phosphotungstic Acid | Negative stain | 1-2% solution, pH adjust to 7.2 | Lower contrast than uranium salts but no regulatory concerns [40] |
| Lead Citrate | Positive stain | 0.1-0.5% in distilled water | Requires CO₂-free environment; enhances membrane contrast [40] |
| Alcian Blue | Grid pretreatment | 0.1-1% aqueous solution | Creates hydrophilic surface for improved particle adhesion [3] |
| Glutaraldehyde | Primary fixative | 2.5% in appropriate buffer (e.g., HEPES) | Preserves ultrastructure; crosslinks proteins [5] |
| UranyLess | UA alternative | Commercial ready-to-use | Non-radioactive; performance comparable to UA for many samples [39] |
| Poly-L-lysine | Adhesion promoter | 0.1% aqueous solution | Improves attachment of charged particles to grid surface [40] |
Negative and positive staining TEM remain vital techniques for viral diagnosis and morphological research, each offering complementary insights into viral structure and pathogenesis. Negative staining provides rapid, high-resolution information about external viral architecture, making it indispensable for initial identification and structural studies of viral suspensions. Positive staining reveals the intracellular context of viral infection, enabling investigation of replication cycles and virus-host interactions in tissue and cell samples. The ongoing development of safer stain alternatives to radioactive uranyl salts [39], combined with established protocols for diverse viral families, ensures these techniques will continue to support virology research and diagnostic applications. As electron microscopy evolves with advancements in cryo-techniques and automation, the fundamental principles of negative and positive staining maintain their relevance for both routine applications and emerging viral challenges.
For viral morphology research, understanding the intricate architecture of viral particles, their surface proteins, and complexes in a native state is paramount for advancing vaccine design and antiviral drug development. Cryo-electron microscopy (cryo-EM) has emerged as a revolutionary structural biology technique that enables the determination of high-resolution 3D structures of biological macromolecules in their vitrified, hydrated state [41]. Unlike traditional methods that require crystallization or chemical fixation, cryo-EM preserves native conformations, making it particularly suited for studying complex and dynamic viral structures. This Application Note details the core principles, quantitative capabilities, and standardized protocols for applying single-particle analysis (SPA) and cryo-electron tomography (cryo-ET) in viral research, providing a structured framework for researchers and drug development professionals.
Core Principles and Quantitative Capabilities
Cryo-EM bypasses the need for crystallization by rapidly freezing aqueous samples in vitreous ice, which preserves the native structure of biological specimens. Imaging under cryogenic conditions minimizes radiation damage, allowing high-resolution data collection [41]. The two primary branches of cryo-EM are Single-Particle Analysis (SPA) and cryo-Electron Tomography (cryo-ET).
- SPA involves compiling thousands of 2D projection images of individual purified particles to reconstruct a 3D structure. It is ideal for structural analysis of homogeneous viral samples, such as viral capsids and surface protein complexes [41].
- Cryo-ET involves acquiring a series of images at different tilt angles to reconstruct a 3D volume (tomogram) of a sample, such as a vitrified cell or a complex viral assembly. This is particularly powerful for visualizing heterogeneous structures and viral architectures in situ [42].
The following table summarizes the key characteristics and capabilities of these approaches in the context of viral research.
Table 1: Key Characteristics of Cryo-EM Modalities for Viral Research
| Feature | Single-Particle Analysis (SPA) | Cryo-Electron Tomography (Cryo-ET) |
|---|---|---|
| Primary Application | High-resolution structure determination of purified, symmetric viral particles and proteins [41] | Visualizing viral architecture, cellular interactions, and pleomorphic viruses in a native context [42] |
| Typical Resolution Range | Near-atomic (2-4 Å) to sub-nanometer [41] | ~1-4 nm (subtomogram averaging can reach sub-nanometer) [42] |
| Sample Preparation | Purified viral particles in thin vitreous ice (10-100 nm) [42] | Vitrified whole cells or tissues, thinned by cryo-FIB milling [42] |
| Information Obtained | Atomic models of symmetric components, protein folding | 3D cellular context, irregular viral structures, interaction networks |
| Throughput | High (for purified samples) | Lower (due to tilt-series acquisition and processing) |
| Key Challenge | Preferential orientation of particles, sample homogeneity [43] | Sample thickness, missing wedge effect, low signal-to-noise [42] |
The achievable resolution in SPA is influenced by several factors, including particle size, homogeneity, and data quality. The table below outlines the general relationship between these parameters.
Table 2: Factors Influencing Resolution in SPA Cryo-EM for Viral Proteins
| Factor | Impact on Resolution | Typical Target/Consideration for Virology |
|---|---|---|
| Particle Size | Larger particles (>100 kDa) generally yield higher resolution more easily [42] | Viral capsids (MDa range) are ideal; smaller surface proteins (>50 kDa) are tractable [42] |
| Ice Thickness | Thicker ice increases noise and multiple scattering, reducing resolution [42] | Ideal ice thickness is 10-100 nm for SPA; newer detectors allow work with thicker ice (~500 nm) [42] |
| Number of Particles | Higher particle counts improve resolution, but the relationship is not linear [43] | Hundreds of thousands to millions of particle images may be needed for atomic resolution |
| Orientation Distribution | Incomplete or biased coverage leads to anisotropic resolution [43] | Preferential orientation is a common challenge that requires computational correction [43] |
| Sample Purity & Homogeneity | Conformational and compositional heterogeneity limit resolution | Affinity purification and careful biochemical optimization are critical for complex viral machines |
The Scientist's Toolkit: Essential Research Reagents and Materials
Successful cryo-EM analysis relies on a suite of specialized reagents and materials to preserve and visualize viral structures.
Table 3: Essential Research Reagent Solutions for Cryo-EM in Virology
| Item | Function/Description | Application Note |
|---|---|---|
| Holey Carbon Grids | EM grids with a thin, perforated carbon film to support the vitreous ice layer. | Provides a stable substrate for sample application and blotting. |
| Detergent Libraries | A collection of detergents (e.g., DDM, LMNG) for solubilizing membrane-bound viral proteins [43]. | Critical for studying enveloped virus fusion proteins and viroporins. |
| Cryogen (Liquid Ethane) | Coolant for plunge freezing, which achieves vitrification. | Rapid heat transfer is essential to prevent ice crystal formation. |
| Developer Solution | In lithography-inspired studies, used to dissolve exposed photoresist; analogs can study polymer behavior [44]. | Useful for methodological development and understanding macromolecular dispersion. |
| Graphene Oxide Supports | Grid support film to improve particle distribution and reduce air-water interface interactions [43]. | Helps mitigate preferential orientation issues common with viral spikes. |
| Affinity Purification Resins | For high-purity isolation of viral complexes from cell lysates. | Ensures sample homogeneity, a prerequisite for high-resolution SPA. |
Advanced Computational Methods and Protocols
CryoPROS: A Protocol for Correcting Preferential Orientation
A major challenge in SPA is preferential orientation, where particles adopt a limited set of views on the grid, leading to reconstruction artifacts and resolution loss [43]. The cryoPROS framework computationally addresses this misalignment.
Experimental Protocol: cryoPROS Workflow [43]
- Initial Model Generation: Generate an initial 3D reference model from the raw particle dataset using standard software (e.g., CryoSPARC). Alternatively, use an existing homologous structure low-pass filtered to a low resolution (e.g., 10-20 Å).
- Generative Module Training:
- Train a self-supervised hierarchical Variational Autoencoder (VAE) using the raw particle images and their corresponding estimated imaging parameters (CTF, poses) as conditional inputs.
- The network is trained by minimizing a particle reconstruction loss and a Kullback-Leibler (KL) divergence loss, which regularizes the latent space.
- Auxiliary Particle Synthesis:
- After training, use the generative model to synthesize "auxiliary particles" with an even, isotropic distribution of orientations. This balances the overall pose distribution.
- Co-refinement:
- Combine the synthesized auxiliary particles with the original raw particles into a single dataset.
- Refine this combined dataset using conventional pose estimation software (e.g., CryoSPARC's heterogeneous or non-uniform refinement).
- The balanced distribution from the auxiliary particles guides more accurate alignment of the raw particles, leading to an improved, higher-resolution reconstruction.
The following diagram illustrates the logical workflow of the cryoPROS method.
Protocol: AlphaFold2-Assisted Modeling for Alternative States
Modeling atomic coordinates into a medium-resolution cryo-EM map of a protein in an alternative conformational state (e.g., a viral fusion protein before and after membrane engagement) is challenging. This protocol uses AlphaFold2 and molecular dynamics to address this [45].
Experimental Protocol: Ensemble Construction and Flexible Fitting [45]
- Ensemble Generation via Stochastic MSA Subsampling:
- Input the target protein sequence into AlphaFold2.
- Generate a large ensemble of models (e.g., 1,000+) by stochastically subsampling the depth of the Multiple Sequence Alignment (MSA). This creates structural diversity.
- Model Clustering and Selection:
- Filter out models with poor structural quality scores (e.g., GOAP score < -100).
- Align the remaining models to a known structure in a different state.
- Perform k-means clustering based on the Cartesian coordinates of the atomic positions.
- Select the model closest to the centroid of each cluster as a representative starting structure.
- Density-Guided Molecular Dynamics Simulation:
- Perform rigid-body alignment of each cluster representative to the target cryo-EM density map.
- For each model, run a density-guided molecular dynamics (MD) simulation. A biasing potential guides the model to fit the experimental map while maintaining physical constraints.
- Final Model Selection:
- Monitor the cross-correlation (fit to map) and model quality score (e.g., GOAP) during simulations.
- For each simulation, select the frame with the best compound score (normalized cross-correlation + normalized quality score).
- Choose the final model from the simulation that achieves the best fit and geometry.
Workflow Visualization: From Sample to Atomic Model
A standard cryo-EM SPA workflow involves a series of coordinated steps from sample preparation to final model validation. The following diagram provides a high-level overview of this process, specifically contextualized for a viral morphology study.
Cryo-EM and cryo-ET provide powerful and complementary toolsets for visualizing viral morphology at unprecedented resolution in near-native states. The ability to resolve atomic details of viral surface proteins and their complexes through SPA, combined with the capacity of cryo-ET to place these structures within a cellular context, offers a comprehensive view of virology that was previously unattainable. As computational methods like cryoPROS for orientation correction and AlphaFold2-assisted flexible fitting continue to evolve, they will further democratize access to high-resolution structural biology. For drug development professionals, these advances translate into more precise mechanistic insights and accelerated structure-based design of antiviral therapeutics and vaccines.
Immuno-Electron Microscopy (IEM) is a powerful analytical technique that merges the molecular specificity of immunological labeling with the nanoscale resolution of electron microscopy, enabling precise spatial localization of viral antigens within the complex cellular context of the host [46]. By using electron-dense markers, such as colloidal gold particles, conjugated to antibodies, researchers can pinpoint viral proteins, replication complexes, and assembly sites within infected cells at resolutions that can reach below 10 nm, far surpassing the diffraction limit of light microscopy [46] [47]. This capability is indispensable for bridging the gap between functional studies of viral infection and ultrastructural analysis, providing unparalleled insights into the mechanisms of virus-host interactions, viral pathogenesis, and the cellular response to infection [46] [3].
In the field of viral morphology research, IEM serves as a critical tool for identifying and characterizing pathogens directly in patient samples or infected tissues, a application known as diagnostic EM [3]. Despite the rise of molecular diagnostics, EM remains unique in its ability to directly visualize the infectious unit—the entire pathogen—without the need for specific probes, making it invaluable for responding to emerging viral outbreaks and for studying disease pathogenesis in its native spatial context [3]. Furthermore, technological innovations such as Focused Ion Beam-Scanning Electron Microscopy (FIB-SEM) for 3D reconstruction and the integration of correlative light and electron microscopy (CLEM) are pushing IEM to new frontiers, allowing for the functional-structural co-localization of dynamic viral processes [46] [47].
Key Methodologies and Applications
The application of IEM in virology hinges on selecting the appropriate methodology to balance the dual objectives of optimal antigenicity preservation and superior ultrastructural detail. The two principal approaches, pre-embedding and post-embedding labeling, along with specialized techniques for specific research questions, form the core of this section.
Pre-embedding vs. Post-embedding IEM
IEM techniques are primarily categorized based on the sequence of immunolabeling relative to resin embedding. Pre-embedding immunolabeling involves permeabilizing the sample and incubating with antibodies before resin embedding and sectioning. This method optimizes labeling efficiency by providing antibodies direct access to antigenic epitopes, making it particularly suitable for detecting low-abundance or highly sensitive viral antigens [46]. However, the required permeabilization often compromises cellular ultrastructure and can limit the penetration of immunoreagents into deeper regions of the sample [46].
In contrast, post-embedding immunolabeling is performed on the surface of ultrathin sections after the sample has been embedded in resin. This approach better preserves the overall ultrastructural integrity of the infected cell or tissue [46]. A highly effective variant of this is the Tokuyasu method, which involves mild chemical fixation, sucrose infusion, freezing, and ultrathin cryosectioning. This technique avoids the damaging effects of resin embedding on antigenicity, making it exceptionally powerful for labeling sensitive antigens like endogenous LC3, a key autophagy protein involved in viral clearance [48]. Its main challenge lies in potential antigen epitope masking from the fixation and embedding process itself [46].
Table 1: Comparison of Pre-embedding and Post-embedding IEM Strategies
| Feature | Pre-embedding IEM | Post-embedding IEM (e.g., Tokuyasu) |
|---|---|---|
| Labeling Sequence | Labeling before resin embedding | Labeling after sectioning of embedded/frozen samples |
| Antigen Accessibility | High; epitopes exposed before embedding | Can be limited by resin masking of epitopes |
| Ultrastructure Preservation | Compromised by permeabilization | Superior structural integrity maintained |
| Ideal for | Low-abundance antigens, surface epitopes | Labile antigens, quantitative double-labeling studies |
| Key Limitation | Poor reagent penetration, distorted morphology | Potential loss of antigenicity during processing |
Localizing Viral Antigens and Replication Sites
IEM has been instrumental in mapping the precise subcellular localization of viral components. For instance, during SARS-CoV-2 infection, IEM using immunogold staining has been employed to map the distribution of the viral receptor ACE2 along motile cilia in respiratory multiciliated cells, providing a structural understanding of initial viral entry [47]. In studies of HIV, cryo-FIB-SEM has been used to reveal the 3D ultrastructure of virological synapses, the specialized cell-cell contacts that facilitate efficient viral spread [47].
The localization of non-structural viral proteins, which often form the replication machinery, is another critical application. By combining specific antibodies against viral polymerases or proteases with colloidal gold, researchers can identify and characterize viral replication complexes within the host cytoplasm or nucleus, shedding light on how viruses hijack cellular organelles.
Visualizing Virus-Host Interactions
Beyond simple localization, IEM is key to visualizing the dynamic interplay between virus and host. A prime example is the study of autophagy, a cellular degradation pathway that can target viruses for destruction or be subverted by viruses for their replication. The protocol optimized for endogenous LC3 labeling on ultrathin cryosections allows researchers to distinguish different autophagic compartments (phagophores, autophagosomes, autolysosomes) based on their morphology and to determine if viral particles are sequestered within them [48]. This can be combined with double-labeling for viral antigens or other host markers like LAMP1 (a lysosomal protein) or SQSTM1/p62 (an autophagy receptor) to build a comprehensive picture of the virus's encounter with the autophagic pathway [48].
Furthermore, IEM techniques can be used to study antigen presentation. By localizing viral antigens in conjunction with host Major Histocompatibility Complex (MHC) molecules in antigen-presenting cells, researchers can gain ultrastructural insights into the mechanisms of immune activation and evasion [47].
Detailed IEM Protocols for Virology
The following protocols provide a robust framework for localizing viral antigens, with the Tokuyasu method offering high sensitivity for labile antigens.
Protocol 1: Post-embedding Immunogold Labeling for Viral Antigens on Ultrathin Cryosections (Tokuyasu Method)
This protocol is optimized for preserving the antigenicity of sensitive targets, such as viral surface proteins or host factors involved in virus-host interactions [48].
- Step 1: Fixation. Fix infected cell monolayers or small tissue pieces (1-2 mm³) with a mixture of 2%-4% paraformaldehyde (PFA) and 0.01%-0.1% glutaraldehyde (GA) in a physiological buffer (e.g., 0.1 M phosphate buffer) for 2-4 hours at room temperature. The low concentration of GA helps preserve structure without destroying antigenicity [46] [48].
- Step 2: Cryoprotection and Freezing. Infuse the fixed samples with 2.3 M sucrose overnight at 4°C for cryoprotection. Mount the samples on metal pins and freeze them in liquid nitrogen [48].
- Step 3: Ultrathin Cryosectioning. Using a cryo-ultramicrotome, cut ultrathin sections (50-100 nm) at temperatures between -100°C and -120°C. Collect the sections with a drop of 2.3 M sucrose or a mixture of sucrose and methylcellulose and transfer them to Formvar/carbon-coated EM grids [48].
- Step 4: Immunogold Labeling. All steps are performed at room temperature by floating grids on drops of the respective solutions.
- Blocking: Incubate grids on a drop of 1% fish skin gelatin (FSG) or 1% bovine serum albumin (BSA) in phosphate-buffered saline (PBS) for 10-20 minutes to block non-specific binding.
- Primary Antibody: Incubate on a drop of the primary antibody (e.g., mouse anti-viral capsid antibody) diluted in blocking solution for 1 hour.
- Washing: Rinse grids with several drops of PBS.
- Secondary Antibody/Protein A-Gold: Incubate on a drop of Protein A-conjugated colloidal gold (PAG) of the appropriate size (e.g., 10 nm or 15 nm gold particles) diluted in blocking solution for 30-45 minutes [48].
- Washing: Rinse thoroughly with PBS followed by distilled water to remove salts.
- Step 5: Contrasting and Embedding. Stain the sections on drops of uranyl acetate oxalate (pH 7.0) and then embed in a mixture of 2% methylcellulose and 0.3% uranyl acetate on ice for 10 minutes each to enhance contrast and stabilize the sections [48].
- Step 6: Drying and Imaging. Loop out the grids, allow them to air dry, and examine in a transmission electron microscope operated at 80-100 kV.
Protocol 2: Negative Staining EM for Viral Particle Morphology and Detection
This rapid protocol is used for the initial identification and morphological characterization of viral particles in suspension, such as from cell culture supernatants or clinical samples [3].
- Step 1: Grid Preparation. Use 300-400 mesh copper EM grids filmed with Formvar or Pioloform and coated with a thin carbon layer. Make the grid surface hydrophilic and sticky by treatment with a glow discharge unit or by applying a 0.1% Alcian blue solution for 1 minute, followed by rinsing with distilled water [3].
- Step 2: Sample Adsorption. Apply a small volume (5-10 µL) of the virus-containing suspension to the surface of the pre-treated grid (Drop-On-Grid method) and let it adsorb for 1-2 minutes. For samples with dense contaminants, the Grid-On-Drop method (placing the grid on a droplet of suspension) can help reduce non-specific background [3].
- Step 3: Washing and Staining. Blot away excess liquid with filter paper. Immediately rinse the grid with a few drops of distilled water to remove salts and soluble contaminants. Blot again and then apply a drop of 1%-2% heavy metal salt solution (e.g., uranyl acetate or phosphotungstic acid, pH 7.0) for 30-60 seconds to embed and contrast the viral particles [3].
- Step 4: Drying and Imaging. Blot away the excess stain, allow the grid to air dry completely, and image in the TEM.
Workflow Visualization
The following diagram illustrates the logical sequence and decision points in the two primary IEM methodologies for virology research.
Research Reagent Solutions
Table 2: Essential Reagents for IEM in Viral Research
| Reagent/Material | Function | Examples & Notes |
|---|---|---|
| Aldehyde Fixatives | Crosslinks and stabilizes cellular structures and antigens. | Paraformaldehyde (PFA): rapid penetration. Glutaraldehyde (GA): stronger crosslinking. Often used in combination (e.g., 2-4% PFA + 0.01-0.1% GA) [46]. |
| LR White/Lowicryl Resins | Infiltrates and embeds samples for sectioning. | Low-temperature acrylic resins used in post-embedding IEM to better preserve antigenicity compared to epoxy resins [46]. |
| Colloidal Gold Conjugates | Electron-dense marker for antibody localization. | Protein A-, Protein G-, or secondary antibody-conjugated gold particles. Sizes from 5 nm to 15 nm allow for multiple labeling [46] [48]. |
| Primary Antibodies | Binds specifically to the target viral or host antigen. | Must be well-characterized for specificity. Monoclonal antibodies are often preferred for consistency [48]. |
| Heavy Metal Stains | Provides contrast to cellular membranes and structures. | Uranyl acetate and lead citrate for resin sections; methylcellulose/uranyl acetate for cryosections [48]. |
| Blocking Agents | Reduces non-specific antibody binding. | Fish skin gelatin (FSG), bovine serum albumin (BSA), or serum from the host species of the secondary antibody [48]. |
Advanced Techniques and Quantitative Analysis
The field of IEM is being transformed by the integration of advanced imaging modalities and computational tools, enabling more comprehensive and quantitative analyses of virus-host interactions.
Three-dimensional volume imaging techniques, such as FIB-SEM, allow for the near-isotropic reconstruction of entire infected cells at nanometer resolution. This has been used, for example, to create detailed 3D models of cytotoxic T lymphocytes interacting with virus-infected target cells, revealing the complex spatial organization of the immune synapse [47]. Furthermore, cryo-Electron Tomography (cryo-ET) of vitrified, unstained samples provides the highest possible preservation of native molecular structures and can be combined with subtomogram averaging to resolve macromolecular complexes, such as viral spike proteins on the virion surface or host receptor assemblies [47].
The integration of Correlative Light and Electron Microscopy (CLEM) is particularly powerful. This approach allows researchers to use live-cell fluorescence microscopy to track dynamic events, such as viral entry or the recruitment of a specific host protein to a viral factory, and then precisely relocate the very same cell for high-resolution IEM analysis, bridging the gap between dynamics and structure [46] [48].
Finally, the quantification of IEM data is being revolutionized by AI and deep learning algorithms. These tools can automate the tedious process of particle counting and spatial analysis. For instance, software like "Gold Digger" can automatically identify and quantify immunogold label distributions across large datasets, while deep learning models can perform complex tasks like segmenting different organelles in electron micrographs, enabling high-throughput, quantitative analysis of viral infection at the ultrastructural level [46] [47].
In the field of viral morphology research, high-resolution three-dimensional (3D) structural information is crucial for understanding viral life cycles, pathogenesis, and developing therapeutic interventions. Two powerful electron microscopy techniques—Single-Particle Analysis (SPA) and Subtomogram Averaging (STA)—have revolutionized our ability to determine macromolecular structures at near-atomic resolution. SPA involves imaging thousands of isolated, purified macromolecules in thin vitreous ice, followed by computational alignment and averaging to produce high-resolution 3D reconstructions [49]. In contrast, STA is applied to electron cryo-tomography (cryo-ET) data, where multiple copies of a structure within tomograms are aligned and averaged to enhance resolution, making it particularly valuable for studying viruses and macromolecular complexes within their native cellular context [50] [51]. This application note details the protocols, key methodologies, and reagents essential for applying these techniques to viral research, providing a structured framework for researchers aiming to implement these approaches in their investigations.
Technical Comparison: SPA versus STA
The choice between Single-Particle Analysis and Subtomogram Averaging is dictated by the biological question, sample characteristics, and desired resolution. The table below summarizes their core technical attributes.
Table 1: Technical comparison between Single-Particle Analysis (SPA) and Subtomogram Averaging (STA)
| Feature | Single-Particle Analysis (SPA) | Subtomogram Averaging (STA) |
|---|---|---|
| Sample Type | Isolated, purified proteins or complexes [49] | Complex samples like cells, organelles, or viruses in their native context [50] [51] |
| Typical Sample Thickness | 10-100 nm (up to ~500 nm with advanced setups) [49] | Requires thinning (e.g., via cryo-FIB milling to 80-300 nm) [49] |
| Data Collection | Single exposure per area [49] | Tilt series (multiple images per area at different angles) [50] [51] |
| Key Limitation | Requires particle isolation and homogeneity [49] | Missing wedge of information, lower signal-to-noise ratio [50] [49] |
| Primary Application | High-resolution structure determination of purified complexes [49] | In situ structural biology of complexes in their native environment [51] |
| Achievable Resolution | Near-atomic (< 3.5 Å) [49] | Subnanometer to near-atomic (typically 8-20 Å, up to ~4 Å in ideal cases) [50] [51] [52] |
Workflow and Signaling Pathway Visualization
The following diagrams illustrate the standard integrated workflow for SPA and STA, highlighting their convergence points, and the data processing logic within a Bayesian refinement framework.
Diagram 1: Integrated SPA and STA Workflow. The pathways for SPA (left) and STA (right) converge at the high-resolution refinement stage, demonstrating the hybrid potential of these techniques.
Diagram 2: Bayesian Refinement Logic for STA. This diagram outlines the core data model in Bayesian approaches (e.g., in RELION), where experimental data is refined against a reference using a model that incorporates the 3D CTF and missing wedge [50] [53].
Detailed Experimental Protocols
Protocol for Cryo-ET and Subtomogram Averaging of Viral Proteins
This protocol is adapted from recent high-resolution studies and is suitable for analyzing viral structures in situ [50] [53].
I. Sample Preparation (Cellular Context)
- Cell Infection: Infect Vero E6 cells (or other relevant cell line) with the virus of interest (e.g., SARS-CoV-2). Use a low multiplicity of infection (MOI ~0.01-1) to avoid excessive cytopathy and allow for robust particle formation [5].
- Fixation: At the desired post-infection time (e.g., 24 hours), terminate cultivation and fix cells immediately. Use 2.5% glutaraldehyde in 0.05 M HEPES buffer (pH 7.2) for at least 1 hour at room temperature [5].
- High-Pressure Freezing (HPF): For optimal preservation, process cells for HPF. Alternatively, for plunge-freezing, concentrate and apply the viral sample to freshly glow-discharged EM grids [54].
- Cryo-Focused Ion Beam (FIB) Milling: For cellular samples, use a cryo-FIB microscope to mill thin (150-250 nm) lamellae from the vitrified cells, making them electron-transparent for cryo-ET [49].
II. Data Collection
- Tilt Series Acquisition: Collect a tilt series from each lamella or area of interest using a cryo-transmission electron microscope equipped with a direct electron detector. A typical series ranges from ±60° with a 2-3° increment.
- Dose Management: Utilize a dose-symmetric scheme. The cumulative dose for the entire series should typically be 40-100 e⁻/Ų. A higher dose can be allocated to the low-tilt images to improve the signal for subsequent single-particle processing steps [52].
III. Image Processing & Subtomogram Averaging
- Tomogram Reconstruction: Preprocess the tilt series by performing motion correction and CTF estimation. Align the tilt series and compute the 3D tomogram using weighted back-projection or SIRT algorithms.
- Particle Picking: Locate viral particles or protein complexes of interest within the tomograms. Use template matching or a generalized deep learning tool like TomoTwin [55]. TomoTwin embeds subvolumes into a high-dimensional space, allowing for the identification of macromolecules based on their structure without the need for new manual annotations for each target.
- Subtomogram Extraction & Averaging:
- Extract subvolumes centered on each picked particle.
- Perform reference-based alignment and classification to group structurally homogeneous particles.
- Use software like RELION [50] [53] or emClarity for iterative alignment and averaging. Implement a 3D CTF model to correct for the contrast transfer function and the missing wedge.
- Refine tilt-series alignments, defoci, and correct for beam-induced motion using Bayesian approaches analogous to those in SPA to improve resolution [53].
Hybrid STA-SPA Protocol for High-Resolution Reconstruction
This hybrid approach (hStA) leverages the strengths of both techniques to achieve subnanometer resolution from tomographic data [52].
- Acquire Hybrid Dataset: For the same cellular lamella or vitrified viral sample, collect a high-dose, untilted (0°) image followed by a full low-dose tilt series.
- Initial STA: Reconstruct the tomogram from the tilt series and use STA to obtain a medium-resolution (e.g., 15-20 Å) initial 3D model of the target virus or protein.
- Particle Re-extraction in 2D: Use the 3D coordinates and orientations of particles from the STA to locate and extract their corresponding 2D projections from the high-dose, untilted image.
- SPA Refinement: Process the extracted 2D particles using standard SPA software (e.g., RELION, cryoSPARC). Perform 2D classification, 3D auto-refinement, and CTF refinement. The high quality of the zero-tilt image, combined with superior SPA alignment algorithms, often yields a significant resolution improvement over STA alone [52].
The Scientist's Toolkit: Essential Research Reagents and Materials
Successful implementation of SPA and STA requires a suite of specialized reagents and computational tools. The following table details key solutions used in the featured protocols.
Table 2: Key Research Reagent Solutions for SPA and STA
| Item Name | Function/Application | Specific Example / Note |
|---|---|---|
| Vero E6 Cells | Host cell line for viral propagation and in situ studies. | African green monkey kidney epithelial cells; used for SARS-CoV-2 infection and imaging [5]. |
| Ultrastable Gold Substrates | EM grid support film to reduce radiation-induced specimen motion. | Critical for improving tomogram quality and achieving higher resolution in STA [50]. |
| Cryo-FIB Microscope | Instrument for preparing thin lamellae from vitrified cells for cryo-ET. | Essential for in situ structural biology to create electron-transparent windows in cells [49]. |
| Direct Electron Detector | Microscope camera for recording high-signal-to-noise-ratio images with dose-fractionation. | Enabled the "resolution revolution" in both SPA and STA [50] [51]. |
| RELION Software | Open-source software for SPA and STA using a Bayesian refinement approach. | Implements 3D CTF model and pseudo-subtomogram refinement for cryo-ET [50] [53]. |
| TomoTwin | Deep metric learning tool for particle picking in tomograms. | Generalizable picking model that locates proteins de novo without manual training for each target [55]. |
Application Note 1: Rapid Diagnostic Pipelines
Core Methodology and Advantages
Electron microscopy (EM) serves as a critical frontline diagnostic tool due to its rapid, unbiased capability for morphological identification of infectious agents. Its "open view" allows for the detection of a wide range of pathogens, including novel or unexpected viruses, without prior knowledge of the causative agent, making it invaluable in outbreak situations and bioterrorism events [56]. Diagnostic EM can be applied to diverse body samples and hasten routine cell culture diagnosis, providing results much faster than many other diagnostic techniques [56].
Workflow for Rapid Viral Diagnosis
The diagram below illustrates the optimized workflow for rapid viral diagnosis using negative stain EM.
Performance Metrics for Rapid Viral Diagnostics
Table 1: Comparative performance metrics for pathogen identification techniques
| Method | Sample Preparation Time | Time to Result | Key Advantage | Primary Limitation |
|---|---|---|---|---|
| Diagnostic EM | 10-15 minutes (negative stain) [56] | 1-2 hours [56] | "Open view" detects unexpected/novel agents [56] | Lower sensitivity compared to amplification tests [56] |
| ELISA | 30-60 minutes | 2-4 hours | High specificity | Requires known target antigen |
| Nucleic Acid Amplification | 30-60 minutes | 2-6 hours (including extraction) | High sensitivity | Limited to targeted pathogens |
Detailed Protocol: Negative Staining for Rapid Viral Diagnosis
Principle: Heavy metal salts scatter electrons and create negative contrast, revealing viral morphology against a dark background.
Materials:
- Formvar-filmed grids [57]
- Uranyl acetate (2%) or phosphotungstic acid [56]
- mPrep/g capsules (for safe handling) [57]
- Biosafety cabinet appropriate for pathogen containment level [56] [57]
Procedure:
- Sample Collection & Preparation: Collect appropriate clinical specimen (respiratory secretions, vesicular fluid, stool, etc.). For enveloped viruses, gentle processing is essential to preserve integrity [56].
- Particle Enrichment: Clarify sample by low-speed centrifugation (5,000 × g, 10 min). Concentrate virus particles by ultracentrifugation (100,000 × g, 1 h) or agar filtration [56].
- Negative Staining:
- TEM Imaging: Examine grid in TEM operated at 80-100 kV. Systematically scan grid at low magnification (5,000-10,000×) then image potential viruses at higher magnification (25,000-50,000×) [56].
- Morphological Identification: Identify based on size, shape, structural features (envelope, capsid symmetry). Use known viral morphology categories for differential diagnosis [56].
Safety Notes: For BSL-3/4 pathogens, perform all steps within appropriate biocontainment using sealed capsule systems like mPrep/g to minimize exposure [57].
Application Note 2: Morphogenesis Studies
3D Ultrastructural Analysis of Viral Replication
Advanced EM techniques enable detailed investigation of virus-induced alterations to cellular ultrastructure and the process of viral morphogenesis. Scanning transmission electron microscopy (STEM) tomography provides 3D information of samples up to 1 µm thickness with isotropic resolution of a few nanometers, making it ideal for studying viral replication factories and budding processes [58].
Workflow for 3D Viral Morphogenesis Studies
The diagram below outlines the comprehensive workflow for 3D analysis of viral morphogenesis.
Technical Specifications for Morphogenesis Imaging Techniques
Table 2: Comparison of 3D electron microscopy techniques for virology research
| Technique | Z-Resolution | Volume Size | Primary Application in Virology | Limitations |
|---|---|---|---|---|
| STEM Tomography | Isotropic, few nm [58] | Up to 1 µm thickness [58] | Virion morphogenesis, viral budding [58] | Limited volume thickness |
| TEM Tomography | ~1-2 nm | Up to 200-300 nm | Viral ultrastructure, receptor interactions | Limited to thin samples |
| FIB-SEM Tomography | ~5-10 nm | Large volumes (hundreds of µm³) | Virus-cell interactions in tissue context | Lower resolution than TEM/STEM |
| Array Tomography | ~50-70 nm | Potentially very large | Mapping viral spread in tissues | Anisotropic resolution |
Detailed Protocol: STEM Tomography for Viral Morphogenesis
Principle: STEM tomography combines the high resolution of TEM with the depth penetration of STEM to generate 3D reconstructions of relatively thick sections, ideal for visualizing viral assembly processes.
Materials:
- High-pressure freezer (e.g., Leica EM ICE)
- Freeze-substitution apparatus (e.g., Leica EM AFS2)
- Lowicryl or EPON resin
- Ultramicrotome (e.g., Leica UC7)
- STEM-capable transmission electron microscope
- Tomography acquisition software (e.g., SerialEM)
Procedure:
- High-Pressure Freezing:
- Infect cell monolayers or concentrate virus-infected cells.
- High-pressure freeze samples in appropriate carriers within 200 µm deep membrane carriers.
- Freeze rapidly (≈20,000 K/sec) under high pressure (≈2,100 bar) to preserve native ultrastructure [58].
Freeze-Substitution:
- Transfer frozen samples to freeze-substitution apparatus pre-cooled to -90°C.
- Substitute over 3-5 days in anhydrous acetone containing 0.1% tannic acid and 2% osmium tetroxide.
- Gradually warm to 0°C (e.g., 5°C/hour), then to room temperature [58].
Resin Embedding & Sectioning:
- Infiltrate with EPON resin series (25%, 50%, 75%, 100%) over 24 hours.
- Polymerize at 60°C for 48 hours.
- Cut 250-500 nm thick sections and collect on Formvar-coated copper-rhodium slot grids.
STEM Tomography:
- Apply 10 nm colloidal gold particles to both sides of sections as fiducial markers.
- Acquire tilt series from ±60-70° with 1-2° increments using STEM mode at 200-300 kV.
- Use spot size 3-5, camera length 30-80 mm, and pixel size of 0.5-2 nm [58].
3D Reconstruction & Analysis:
- Align tilt series using fiducial markers or cross-correlation.
- Reconstruct using weighted back-projection or SIRT algorithms.
- Segment structures of interest (virions, replication compartments) for 3D analysis.
Application Note 3: Drug Target Identification
Cryo-EM in Structure-Based Drug Design
Cryo-electron microscopy (cryo-EM) has revolutionized structure-based drug design by enabling the determination of high-resolution three-dimensional structures of viral proteins and complexes without crystallization. This approach is particularly valuable for studying viral membrane proteins, large complexes, and drug-target interactions that have proven refractory to crystallization [59].
Workflow for Drug Target Identification Using Cryo-EM
The diagram below illustrates the integrated workflow for drug target identification using cryo-EM.
Impact Metrics of Cryo-EM on Drug Discovery
Table 3: Comparative impact of cryo-EM versus X-ray crystallography in drug discovery
| Parameter | X-ray Crystallography | Cryo-EM | Implications for Antiviral Development |
|---|---|---|---|
| Sample Requirement | High homogeneity, crystallizability | Moderate homogeneity, no crystallization needed [59] | Enables targeting of previously "undruggable" viral targets |
| Typical Timeline | ~4 years (for challenging targets) [59] | <1 year (for same targets) [59] | Dramatically accelerated early drug discovery |
| Membrane Protein Success | Low (difficult to crystallize) | High [59] | Ideal for viral envelope proteins and entry machinery |
| Complex Size Limitations | Smaller complexes | Excellent for large complexes [59] | Enables study of intact viral capsids and replication complexes |
| Natural State Preservation | Crystal packing artifacts | Near-native state [59] | More physiologically relevant structural information |
Detailed Protocol: Single Particle Analysis for Viral Drug Targets
Principle: Rapid freezing preserves particles in vitreous ice, enabling 2D class averaging and 3D reconstruction from thousands of individual particle images.
Materials:
- Purified viral protein or complex (≥0.5 mg/mL, ≥95% purity)
- Quantifoil or C-flat grids (200-300 mesh, gold)
- Vitrification device (e.g., Vitrobot)
- 300 kV cryo-electron microscope with direct electron detector
- High-performance computing cluster
Procedure:
- Sample Preparation & Optimization:
- Express and purify viral target protein (e.g., spike protein, polymerase complex).
- Optimize buffer conditions (pH, salt, additives) to promote homogeneity and stability.
- Verify monodispersity and integrity by negative stain EM and analytical ultracentrifugation.
Grid Preparation & Vitrification:
- Glow discharge grids immediately before use.
- Apply 3-4 µL sample to grid, blot with filter paper for 3-5 seconds (force -5 to +5).
- Plunge freeze into liquid ethane cooled by liquid nitrogen.
- Assess grid quality by cryo-light microscopy before EM screening.
Cryo-EM Data Collection:
- Screen grids at low magnification (800×) to identify suitable areas.
- Collect high-resolution data using 300 kV FEG-TEM with K3 direct electron detector.
- Use defocus range of -0.5 to -2.5 µm, pixel size of 0.5-1.5 Å, and total exposure of 40-60 e⁻/Ų.
- Acquire 3,000-5,000 micrographs using automated data collection software.
Single Particle Processing:
- Motion correct and dose-weight micrographs (e.g., MotionCor2).
- Estimate CTF parameters (e.g., CTFFIND4, Gctf).
- Autopick particles from subset of micrographs.
- Extract particles and perform reference-free 2D classification to remove junk particles.
- Generate initial model ab initio or from existing structure.
- Perform 3D classification to isolate homogeneous populations.
- Refine high-quality particles to high resolution using gold-standard approaches.
Model Building & Drug Docking:
- Build atomic model into cryo-EM density map.
- Identify potential drug binding pockets and protein-protein interfaces.
- Perform in silico docking of small molecule candidates.
- Design optimized drug candidates based on structural insights.
Research Reagent Solutions
Table 4: Essential research reagents and materials for viral electron microscopy
| Reagent/Material | Function | Application Examples | Key Considerations |
|---|---|---|---|
| mPrep/g Capsules | Safe specimen handling | Processing pathogenic viruses in BSL-3/4 containment [57] | Enables secure negative staining of Ebola, smallpox [57] |
| Uranyl Acetate | Negative stain, positive stain | Viral morphology visualization, staining of ultrathin sections [57] | 2% aqueous solution for negative staining; hazardous material |
| Formvar-Filmed Grids | Support film | Providing substrate for negative stain samples [57] | Stability under beam critical for high-resolution work |
| Glutaraldehyde | Primary fixative | Cross-linking proteins, preserving ultrastructure [60] | Typically 2.5% in buffer; penetrates tissue slowly |
| Osmium Tetroxide | Secondary fixative, stain | Fixing lipids, adding contrast [60] | Post-fixation after glutaraldehyde; highly toxic |
| Lead Citrate | Positive stain | Enhancing contrast in ultrathin sections [60] | Stains nucleic acids, membranes; avoid CO₂ exposure |
| Lowicryl Resins | Low-temperature embedding | Preserving antigenicity for immunogold labeling [57] | Hydrophilic for better antibody penetration |
| Protein A-Gold | Immunogold labeling | Localizing viral proteins in infected cells [57] | Multiple sizes available (5, 10, 15 nm) for multiple labeling |
Optimizing Image Quality: A Practical Guide to Troubleshooting Common EM Challenges
Electron microscopy (EM) is an indispensable tool in viral morphology research, enabling scientists to visualize pathogenic agents like SARS-CoV-2 at nanoscale resolution. However, the pursuit of high-resolution imaging is perpetually challenged by technical artifacts including beam damage, contamination, and specimen drift. These artifacts can significantly distort morphological data, leading to inaccurate measurements of viral particles, misrepresentation of spike protein density, and ultimately, flawed scientific conclusions. For researchers investigating viral structures for drug and vaccine development, recognizing and mitigating these artifacts is paramount for generating reliable, high-quality data. This application note provides a detailed examination of these common artifacts, offering quantitative insights and standardized protocols to enhance the integrity of electron microscopy in virology.
Artifact Analysis and Quantitative Data
Beam Damage
Beam damage refers to the structural and chemical alterations inflicted upon a specimen by the electron beam. This is a critical consideration in virology, where preserving the delicate structure of viral envelopes and spike proteins is essential.
- Mechanism and Impact: The high-energy electron beam can break chemical bonds, cause mass loss, and lead to specimen shrinkage. In the context of viral research, this can manifest as distortion of viral particles, loss of surface features like spikes, and reduction in overall particle diameter.
- Quantitative Evidence: Studies on plastic-embedded biological sections have quantified these effects. Research shows that approximately 40% of total specimen mass is lost at electron doses above 10⁶ e⁻/nm² [61]. Furthermore, specimen thickness can decrease by 50% after a dose of 10⁸ e⁻/nm², with a concomitant lateral shrinkage of 9.5 ± 2.0% occurring between doses of 2×10⁴ and 10⁸ e⁻/nm² [61]. Notably, light elements like oxygen are particularly vulnerable, with content decreasing from 25% to 9% at a relatively low dose of 10⁴ e⁻/nm² [61]. In microanalysis, elements such as sulfur can sublimate, leading to measured concentrations up to 20% lower than the true value [62].
Table 1: Quantitative Effects of Electron Beam Damage on Biological Specimens
| Measured Parameter | Electron Dose | Observed Effect | Implication for Viral Research |
|---|---|---|---|
| Total Specimen Mass [61] | > 10⁶ e⁻/nm² | ~40% mass loss | Potential distortion and mass loss of viral particles. |
| Specimen Thickness [61] | 10⁸ e⁻/nm² | 50% decrease | Altered viral particle morphology and dimensions. |
| Lateral Specimen Size [61] | 2×10⁴ to 10⁸ e⁻/nm² | 9.5 ± 2.0% shrinkage | Inaccurate measurement of viral diameters. |
| Oxygen Content [61] | 10⁴ e⁻/nm² | Decrease from 25% to 9% | Degradation of organic components in and around viruses. |
| Sulfur Content [62] | During EDS acquisition | Up to 20% underestimation | Inaccurate compositional analysis of viral proteins. |
Contamination
Contamination involves the deposition of amorphous carbon or other hydrocarbons onto the specimen surface within the microscope vacuum. This typically originates from imperfect cleaning of the specimen or the microscope column.
- Impact on Imaging and Analysis: Contamination layers effectively create a low-contrast "blanket" over the sample, reducing image clarity and signal-to-noise ratio. This can obscure fine structural details, such as the glycoprotein spikes on coronaviruses. In microanalysis, a contamination layer can absorb low-energy X-rays, leading to inaccurate quantitative results during energy-dispersive X-ray spectroscopy (EDS) [63].
Specimen Drift
Specimen drift is the unintended movement of the specimen during image acquisition. This is often induced by thermal effects from beam heating or instability in the specimen stage.
- Impact on Image Quality: Drift causes image blurring and a loss of resolution, which is particularly detrimental during long exposure times required for high-resolution imaging or for compiling tomographic tilt series. This can prevent accurate counting of spike proteins on viruses or clear visualization of their internal nucleocapsid structure.
Experimental Protocols for Artifact Mitigation
Adhering to standardized protocols is crucial for minimizing artifacts. The following methodologies are adapted from published works on viral imaging and elemental mapping.
Protocol: Conventional TEM for SARS-CoV-2 Morphometry
This protocol, based on the study of SARS-CoV-2 variants, outlines steps to minimize artifacts during sample preparation and imaging for viral morphometric analysis [5].
- 1. Cell Culture and Infection: Culture Vero E6 cells in DMEM with 10% fetal bovine serum until 70% confluent. Infect cells with SARS-CoV-2 at a low multiplicity of infection (e.g., MOI 0.01) to avoid excessive cellular debris.
- 2. Fixation: After a 24-hour incubation, terminate cultivation by replacing the medium with a primary fixative containing 2.5% glutaraldehyde in 0.05 M HEPES buffer (pH 7.2). Glutaraldehyde provides strong cross-linking to stabilize viral and cellular structures against beam damage.
- 3. Embedding: Sediment fixed cells and embed the pellet in 3% low-melting-point agarose. This step stabilizes the specimen for subsequent sectioning and helps reduce extraction of cellular material.
- 4. Resin Infiltration and Polymerization: Dehydrate the sample in a graded ethanol series and infiltrate with an Epon-Araldite resin mixture. Polymerize at 60°C for two days to form a stable block.
- 5. Sectioning: Cut ultrathin sections (e.g., 70-90 nm) using an ultramicrotome and collect them on bare copper grids.
- 6. Imaging Parameters: Record images using a transmission electron microscope. To mitigate beam damage, use low-dose imaging techniques where available. Ensure the specimen is at the eucentric height to minimize focus-related artifacts and stage drift.
Protocol: Correlative Light and Electron Microscopy (CLEM) for Nanoscale Particles
This protocol provides a method to confirm the vesicular nature of nanoparticles, which is equally applicable to viral particles, while reducing the risk of misinterpreting artifacts [64].
- 1. Fluorescent Staining: Isolate viral particles or extracellular vesicles (EVs) via ultracentrifugation. Resuspend the pellet and stain the membrane with a fluorogenic lipophilic dye (e.g., FM1-43). This allows for initial localization using fluorescence microscopy.
- 2. Fiducial Marking: Apply fluorescent microspheres to the grid. These beads serve as landmarks to relocate the same particles between light and electron microscopy.
- 3. Laser Scanning Confocal Microscopy (LSCM): First, examine the grid using LSCM to identify and record the positions of fluorescently-labeled particles.
- 4. Negative Staining for TEM: Subject the same grid to negative staining. A recommended method is exposure to osmium tetroxide (OsO₄) vapors, which minimizes the introduction of extrinsic particles that can be mistaken for viral structures.
- 5. Correlative TEM Imaging: Relocate the regions of interest using the fiducial markers and acquire high-resolution TEM images. The correlative approach ensures that the structures analyzed in TEM are the same as those identified via fluorescence, providing greater confidence in distinguishing authentic viral particles from staining artifacts.
The Scientist's Toolkit: Research Reagent Solutions
Table 2: Essential Reagents for EM Viral Research and Artifact Mitigation
| Reagent / Material | Function in Protocol | Rationale |
|---|---|---|
| Glutaraldehyde [5] | Primary chemical fixative | Rapidly cross-links proteins, preserving ultrastructure and increasing resistance to beam damage. |
| HEPES Buffer [5] | Fixative buffer | Maintains physiological pH during fixation, preventing acid-induced degradation of viral components. |
| Low-melting-point Agarose [5] | Embedding medium | Gently encapsulates cell pellet without harsh processing, providing mechanical stability for sectioning. |
| Epon-Araldite Resin [61] | Embedding resin | Creates a stable, durable matrix for ultrathin sectioning, minimizing compression and chatter artifacts. |
| FM1-43 Dye [64] | Membrane stain for CLEM | Becomes fluorescent only upon incorporation into lipid bilayers, specifically labeling viral envelopes/vesicles. |
| OsO₄ Vapors [64] | Negative stain for TEM | Provides high-contrast staining of membranes with reduced risk of introducing particulate artifacts compared to liquid stains. |
| Gold Nanoparticles [61] | Fiducial markers | Serve as unambiguous reference points for tomographic alignment and correlative microscopy, correcting for drift. |
Workflow Visualization for Artifact Management
The following diagram illustrates a comprehensive workflow integrating the protocols and mitigation strategies discussed in this note.
The fidelity of viral morphology research in electron microscopy is fundamentally dependent on the effective management of beam damage, contamination, and specimen drift. By understanding the quantitative impact of these artifacts—such as significant mass loss and specimen shrinkage at high electron doses—and implementing rigorous, standardized protocols for sample preparation and imaging, researchers can significantly enhance the reliability of their data. The integration of correlative microscopy and the conscientious application of low-dose techniques provide powerful strategies to validate findings and preserve delicate viral structures. For scientists and drug development professionals, mastering these artifact mitigation approaches is not merely a technical exercise but a critical step in ensuring that the nanoscale world of viruses is revealed with clarity and accuracy.
In the field of viral morphology research, high-resolution imaging is a cornerstone for understanding virus structure and function, directly impacting drug and vaccine development. For electron microscopy, the quality of this imaging is fundamentally dependent on the precise calibration of the instrument. Suboptimal electron beam conditions result in blurred or distorted images, compromising the accurate measurement of critical viral features, such as the spike protein density and overall particle size in coronaviruses [5]. This document provides detailed application notes and protocols for correcting astigmatism, aligning apertures, and optimizing the electron beam, framed within the context of a research thesis focused on electron microscopy of viruses.
Background and Significance
The scanning electron microscope (SEM) requires simultaneous optimization of multiple parameters—including focus, stigmator, and aperture alignment—to form a precise electron probe for high-resolution imaging [65]. The interplay between these parameters is complex; for instance, the focus (controlled by the objective lens) determines the plane of sharpness, while stigmators correct for astigmatism, an aberration that causes directional blurring due to an asymmetrical beam cross-section [65] [66]. Aperture alignment ensures the beam is centered and clean, which is critical for achieving optimal resolution and contrast [65].
Traditional sharpness-based algorithms often struggle with the strong interdependencies between these parameters, frequently finding false optimal points and failing on samples with pronounced directional features [65]. Furthermore, these classical methods can be time-consuming and require expert knowledge for parameter adjustment, making them unsuitable for high-throughput scenarios [67]. Recent advancements, such as deep learning and beam kernel estimation, offer robust, data-driven solutions that overcome these limitations, enabling rapid, automated, and precise beam optimization critical for consistent and reliable viral imaging [67] [65].
Quantitative Comparison of Beam Optimization Methods
The following table summarizes the key performance metrics of contemporary beam optimization methodologies, providing a basis for selecting an appropriate approach for viral research.
Table 1: Performance comparison of automatic beam optimization methods
| Method | Key Principle | Parameters Optimized | Reported Performance | Key Advantages | |
|---|---|---|---|---|---|
| DeepFocus [67] | Data-driven convolutional neural network using phase diversity (two images with known defocus). | Focus, Stigmator X, Y [67] | Reduces processing time by >10x; works at low electron dose (~5 e-/nm²) [67]. | High speed; robust to noise; easily recalibrated for new microscopes/samples. | |
| Beam Kernel Estimation [65] | Physical model-based blind deconvolution to estimate the probe shape. | Focus, Stigmator X, Y, Aperture-Align X, Y [65] | Average error: Focus 1.00 μm, Stigmator 0.30% [65]. | Optimizes 5 parameters; sample-agnostic; robust against pattern directionality. | |
| Sharpness-Based Approach [65] | Iterative parameter sweep to maximize an image sharpness function. | Focus, Stigmator X, Y [65] | Average error: Focus 6.42 μm, Stigmator 2.32% [65]. | Conceptually simple; widely implemented. | Prone to false optima; struggles with directional samples; no aperture alignment. |
Experimental Protocols
Protocol 1: DeepFocus-Based Auto-Focus and Auto-Stigmation
This protocol uses a deep learning model to correct for defocus and astigmatism rapidly, which is particularly useful for screening infected cell cultures to locate viruses.
1. Principle: A convolutional neural network is trained to infer the direction and magnitude of focus and stigmator corrections by analyzing pairs of input images acquired with a known, small working distance perturbation [67].
2. Materials:
- SEM with programmable control over working distance and stigmators.
- Pre-trained DeepFocus model (e.g., "Stacked Convolutional" or "EfficientNet-B0" architecture) [67].
- Infected cell culture sample (e.g., Vero E6 cells infected with SARS-CoV-2), fixed and prepared according to standard EM protocols [5].
3. Procedure: 1. Navigate: Move the stage to a region of interest on the infected cell culture. 2. Acquire Image Pair: Capture two SEM images at the current working distance and stigmator settings. The second image is acquired with a known, small perturbation (σwd) to the working distance [67]. 3. Patch Extraction: Crop multiple subregions (patches) from the two input images. Patches should avoid featureless areas like large epoxy resin regions (e.g., inside blood vessels) for more reliable estimates [67]. 4. Network Inference: Process each patch pair through the DeepFocus network to obtain an independent estimate of the parameter correction vector, ΔF = [Δfwd, Δfstigx, Δfstigy] [67]. 5. Result Aggregation: Compute the final correction values by averaging the estimates from all patch pairs. 6. Apply Correction: Update the microscope's working distance and stigmator settings by applying the computed ΔF. 7. Iterate: Repeat steps 2-6 until the correction values converge to near zero (typically within 3 iterations) [67].
4. Troubleshooting:
- Poor Convergence: Ensure input patches are from areas with sufficient texture and contrast. Retrain or fine-tune the model on a dataset from your specific microscope and sample type if necessary [67].
- Long Processing Time: Use a GPU for inference to reduce processing time by an order of magnitude [67].
Protocol 2: Beam Kernel Estimation for Comprehensive Beam Optimization
This protocol is suitable for achieving the highest possible image quality for critical measurements, as it also corrects for aperture misalignment.
1. Principle: The method estimates the electron beam's kernel (probe shape) from a single acquired image using a blind deconvolution model. The aberrations in the estimated kernel are then quantified to derive correction values for focus, stigmators, and aperture alignment [65].
2. Materials:
- SEM with control over focus, stigmator (X, Y), and aperture alignment (X, Y).
- Software implementation of the beam kernel estimation algorithm.
3. Procedure: 1. Navigate: Move to a representative region on the virus sample. 2. Acquire Image: Capture a single SEM image at the current beam settings. 3. Kernel Estimation: The algorithm deconvolves the acquired image to estimate the 2D intensity profile of the electron beam probe [65]. 4. Aberration Analysis: Analyze the shape and symmetry of the estimated beam kernel. An elliptical kernel indicates astigmatism, while other asymmetries can be linked to aperture misalignment and other aberrations [65]. 5. Parameter Calculation: Calculate the specific correction values for focus, stigmator X, stigmator Y, aperture-align X, and aperture-align Y required to make the beam kernel symmetric and sharp [65]. 6. Apply Correction: Send the calculated correction values to the microscope controls to update all five parameters. 7. Verify: Acquire a new image to verify the improvement in image sharpness and contrast.
Workflow for Viral Morphology Studies
The following diagram illustrates the integration of beam optimization into a typical workflow for characterizing viral morphology.
The Scientist's Toolkit: Research Reagent Solutions
Table 2: Essential materials and their functions for EM viral research
| Item | Function in Viral Research |
|---|---|
| Vero E6 Cells | African green monkey kidney epithelial cell line; a standard model system for propagating SARS-CoV-2 and other viruses for microscopy [5]. |
| Glutaraldehyde/Paraformaldehyde | Primary fixatives that cross-link proteins and preserve cellular and viral ultrastructure by immobilizing macromolecules in their native state [5]. |
| Hepes Buffer | A buffering agent used to maintain a stable physiological pH (e.g., 7.2) during the fixation and washing steps, preventing acid-induced degradation of samples [5]. |
| Heavy Metal Stains (e.g., Uranyl Acetate, Lead Citrate) | Compounds that bind to cellular and viral components (lipids, proteins, nucleic acids) to scatter electrons, thereby enhancing image contrast in TEM and SEM [68]. |
| Low Melting Point Agarose | Used to embed fixed cell pellets, providing mechanical stability for subsequent sectioning and preventing sample loss during processing [5]. |
Precise instrument calibration is not merely a preliminary step but a foundational requirement for generating reliable, high-quality data in viral morphology research. The advent of advanced, data-driven methods like DeepFocus and beam kernel estimation has significantly improved the accuracy, speed, and accessibility of electron beam optimization. By implementing the protocols and guidelines outlined in this document, researchers can ensure their electron microscopes operate at peak performance, enabling the precise imaging necessary to uncover the subtle structural differences between viral variants, such as SARS-CoV-2, and contribute meaningfully to therapeutic development.
Characterizing viral morphology and nanoparticle delivery systems is fundamental to virology and pharmaceutical development. Transmission Electron Microscopy (TEM) and Dynamic Light Scattering (DLS) are cornerstone techniques that frequently yield discrepant size measurements. This application note elucidates the origins of these discrepancies by examining the fundamental principles and measurement outputs of each technique. We provide standardized protocols for correlated imaging and light scattering, alongside a decision framework for data interpretation, enabling researchers to resolve mismatched data and accurately characterize viral structures and nanoparticles within the context of electron microscopy for viral morphology research.
The interpretation of data from different characterization methods requires a foundational understanding of what each technique measures. Transmission Electron Microscopy (TEM) provides high-resolution, two-dimensional projections of particles. In virology, it is often considered the "gold standard" for visualizing viral morphology, allowing researchers to distinguish between immature and mature particles and analyze the acquisition of lipid membranes [30]. The technique measures the core dimensions of the particle in a vacuum and is typically reported as a number-based distribution derived from measuring hundreds of individual particles [69].
In contrast, Dynamic Light Scattering (DLS) measures the hydrodynamic diameter of an equivalent sphere in solution. The technique analyzes the time-dependent fluctuations in the intensity of scattered light caused by the Brownian motion of particles undergoing diffusion [70] [71]. The speed of this motion is converted into a size using the Stokes-Einstein equation, yielding a Z-average diameter. The reported size includes the core particle, any organic surface coatings, and the associated solvent molecules that move with the particle [69] [72].
The table below summarizes the core differences in the physical principles measured by each technique.
Table 1: Fundamental Comparison of TEM and DLS
| Feature | Transmission Electron Microscopy (TEM) | Dynamic Light Scattering (DLS) |
|---|---|---|
| Measured Property | Electron density; core particle dimensions | Diffusion coefficient from Brownian motion |
| Measured Size | Core metal/inorganic component only [69] | Core + hydrated coating + solvent sphere [69] |
| Sample State | Dry, in vacuum | In solution, native state |
| Primary Output | Number-based size distribution [69] | Intensity-weighted size distribution [71] |
| Key Strength | Direct imaging of particle core, shape, and structure [69] | Measurement of the hydrodynamic size in a native, dispersed state [70] |
Quantitative Data Comparison
Discrepancies between TEM and DLS data are not only common but expected due to their inherent measurement principles. For a smooth, hard sphere, the DLS-measured hydrodynamic diameter is generally larger than the TEM size due to the inclusion of the hydration layer and any surface molecules. For complex or soft structures, this difference can be more pronounced.
A study comparing Nanosphere size standards demonstrated that when measured in a suitable dispersant (10mM NaCl), the DLS size should be within ±2% of the certified TEM value. However, dilution in deionized water can artificially increase the DLS size due to extension of the electrical double layer [70]. The following table generalizes the expected relationships for different particle types.
Table 2: Expected Size Relationships and Discrepancy Causes for Different Particle Types
| Particle / Viral System | Typical TEM-DLS Relationship | Primary Reason for Discrepancy |
|---|---|---|
| Hard, Spherical Polymer Latex | DLS > TEM by a consistent, predictable margin | Hydrodynamic diameter vs. core diameter [70] |
| Virions (e.g., SARS-CoV-2) | DLS > TEM; relationship may vary by variant | Hydrodynamic size includes lipid envelope and spike proteins [5] |
| Metal Nanoparticles (e.g., Au, Ag) | DLS >> TEM (core only) | DLS includes metal core + surface coating + solvent; TEM typically reports metal core only [69] |
| Particles with Adsorbed Polymer | DLS >> TEM | DLS measurement is sensitive to the extended polymer layer, which may be collapsed or invisible in TEM [70] |
Experimental Protocols for Correlated Analysis
Protocol: TEM Analysis of Viral Particles in Ultra-Thin Sections
This protocol is adapted from methodologies used for the morphometric analysis of SARS-CoV-2 variants [5].
1. Cell Culture and Infection:
- Culture susceptible cells (e.g., Vero E6 cells) to approximately 70% confluence.
- Infect cells with virus at a low multiplicity of infection (e.g., MOI 0.01-1).
- Incubate for a defined period (e.g., 24 hours post-infection).
2. Fixation and Embedding:
- Terminate cultivation by replacing the medium with a primary fixative (e.g., 2.5% glutaraldehyde in 0.05 M HEPES buffer, pH 7.2). Fix for at least 1 hour at room temperature.
- Post-fix with 1% osmium tetroxide in 1.5% potassium ferricyanide on ice for 1 hour to enhance membrane contrast [30].
- Optionally, treat with 1% tannic acid for 45 minutes as a mordant, followed by 1% sodium sulfate for 5-10 minutes [30].
- Dehydrate the sample through a graded ethanol series and embed in an epoxy resin (e.g., Epon 812).
3. Sectioning and Imaging:
- Prepare ultra-thin sections (60-80 nm) using an ultramicrotome.
- Contrast sections with lead citrate before viewing.
- Acquire micrographs at a standardized magnification (e.g., 40,000x). For statistical significance, measure several hundred particles from multiple grid squares [69].
Protocol: DLS Measurement of Viral or Nanoparticle Dispersions
This protocol ensures robust DLS measurements for direct comparison with TEM data [70] [71] [72].
1. Sample Preparation:
- Purify and Clarify: Use filtration (e.g., 0.1 µm or 0.22 µm syringe filter) or low-speed centrifugation to remove dust and large aggregates from the sample. Note: Filtration is not suitable for very large virions or aggregates.
- Suppress Electrostatic Effects: For many samples, especially those in water, prepare the dispersant with a low concentration of salt (e.g., 10 mM NaCl) to collapse the electrical double layer and prevent artificially large DLS readings [70].
- Determine Optimal Concentration: The sample should scatter enough light for a good signal-to-noise ratio without causing multiple scattering. A suitable count rate is typically between 100-500 kcps for most instruments.
2. Instrument Setup and Measurement:
- Equilibration: Allow the sample to equilibrate in the cuvette within the instrument to the set temperature (typically 25°C) for at least 2 minutes.
- Angle Selection: For mixtures or large particles, multi-angle DLS is preferred. For routine analysis of monomodal samples, a backscatter detection angle (e.g., 173°) is robust and minimizes multiple scattering [70] [71].
- Measurement Duration: Perform a minimum of 10-12 measurements per sample, with the duration of each run automatically determined by the instrument software.
3. Data Analysis and Validation:
- Check Correlation Function: Inspect the intensity autocorrelation function for a smooth, unimodal decay. A rising or fluctuating baseline indicates contamination or sedimentation [70].
- Check Count Rate Stability: A steadily decreasing count rate in successive measurements indicates sedimentation, and the data should be discarded [70].
- Report Polydispersity: Report the Polydispersity Index (PDI) or the % Polydispersity along with the Z-average diameter to indicate the breadth of the size distribution.
Logical Workflow for Data Reconciliation
The following diagram outlines a systematic workflow for investigating and resolving TEM-DLS discrepancies.
The Scientist's Toolkit: Essential Research Reagents and Materials
Successful characterization requires specific reagents and materials to prepare and analyze samples. The following table details key solutions used in the protocols featured in this note.
Table 3: Key Research Reagent Solutions for Viral TEM and DLS Characterization
| Reagent/Material | Function/Description | Application Note |
|---|---|---|
| Glutaraldehyde (2.5-3%) | Primary fixative that cross-links proteins, immobilizing cellular and viral structures. | Essential for preserving ultrastructure in TEM; inactivates pathogenic viruses for safe handling [30]. |
| Osmium Tetroxide (1%) | Post-fixative that stabilizes lipid membranes and provides electron density. | Critical for visualizing viral envelopes and cellular membranes; often used with potassium ferricyanide [30]. |
| Sodium Chloride (10 mM) | Salt solution used as a dispersant for DLS. | Suppresses the electrical double layer around particles, preventing artificially large hydrodynamic size measurements [70]. |
| HEPES Buffer (0.05 M, pH 7.2) | A biological buffer used for fixation and washing steps. | Maintains physiological pH during chemical fixation, improving morphological preservation [5]. |
| Formvar/Carbon-Coated TEM Grids | Support film on which samples are placed for TEM imaging. | Provides a stable, thin, and electron-transparent substrate for applying virus suspensions or thin sections. |
TEM and DLS are not mutually exclusive but are powerfully complementary techniques. A "mismatch" between their readings is not a failure of measurement but a valuable data point that reveals different aspects of a sample's physical reality. TEM exposes the core structure, while DLS reports on the particle's behavior in its native liquid environment. By applying the standardized protocols and logical framework presented here, researchers can systematically interpret disparate data, transforming apparent contradictions into a coherent and multidimensional understanding of viral and nanoparticle systems. This rigorous approach is indispensable for advancing research in viral pathogenesis, vaccine development, and nanomedicine.
Within the broader thesis on electron microscopy for viral morphology research, this document provides detailed application notes and protocols. The unparalleled resolving power of electron microscopy (EM) is essential for visualizing viruses, which are typically between 50-200 nm in diameter, and for analyzing virus-cell interactions during entry and assembly [73] [30]. However, this high resolution comes at the cost of a small field of view, making proper sample preparation paramount to ensure that the observed data is representative and of high quality [74]. Sample preparation is a critical step; without proper adhesion and sufficient contrast, the resulting images can be compromised by artifacts, charging, or a lack of definition, ultimately hindering research progress. This is especially true for delicate viral samples and the complex cellular structures they interact with. These protocols are designed for researchers, scientists, and drug development professionals who require reliable and detailed methodologies to prepare challenging samples for EM analysis.
The Scientist's Toolkit: Research Reagent Solutions
The following table details key materials and reagents essential for preparing difficult samples for electron microscopy.
Table 1: Essential Materials and Reagents for EM Sample Preparation
| Item | Primary Function | Application Notes |
|---|---|---|
| Aluminum Pin Stubs [75] | Standard sample mounting platform. | Comes in various standard sizes; provides a conductive base. |
| Double-Sided Carbon Tape/Stickers [75] | Adheres sample to the stub. | Provides a conductive path for grounding non-conductive samples. |
| Conductive Paint [75] | Adheres sample and creates a conductive bridge. | Used to securely mount samples and connect them to the stub to prevent charging. |
| Sputter Coater (e.g., Gold, Platinum) [75] | Applies a thin conductive metal layer to non-conductive samples. | Prevents electron charging and improves signal-to-noise ratio for high-resolution imaging. |
| Heavy Metal Salts (e.g., Phosphotungstic Acid) [32] | Negative stain that enhances contrast by embedding specimens in an electron-dense background. | Simple and direct technique for visualizing virus morphology [32]. |
| Aldehyde Fixatives (Formaldehyde/Glutaraldehyde Mix) [30] | Cross-links and immobilizes proteins to preserve cellular and viral structure. | A mixture (e.g., 2% formaldehyde/1.5% glutaraldehyde) is often used for optimal fixation [30]. |
| Osmium Tetroxide (OsO₄) [30] | Post-fixative that stabilizes and stains lipid membranes. | Often used with potassium ferricyanide for enhanced membrane preservation [30]. |
| Tannic Acid [30] | Mordant that improves contrast and fine delineation of membranes. | Acts between osmium-treated structures and lead stains [30]. |
| Epoxy Resin (e.g., Epon 812) [30] | Embeds fixed and dehydrated samples for ultrathin sectioning. | Provides support for cutting thin sections for transmission EM. |
| Particle Disperser Unit [75] | Evenly distributes powder or particle samples on a stub. | Reduces particle overlap and ensures accurate particle size/shape analysis. |
Protocols for Enhancing Specimen Adhesion
Secure specimen adhesion is fundamental to preventing sample loss, vibration, and contamination of the microscope column under vacuum [75]. The following protocols address common challenges.
General Sample Mounting Protocol
This is a universal starting point for adhering samples to an aluminum stub.
- Objective: To securely mount a sample to a pin stub for SEM imaging.
- Materials: Aluminum pin stub, double-sided carbon conductive tape or conductive paint, tweezers.
- Procedure:
- Using tweezers, attach a double-sided carbon sticker to the surface of the aluminum stub. Alternatively, apply a small amount of conductive paint.
- Firmly press the sample onto the adhesive surface. For conductive paint, ensure the paint creates a bridge from the sample to the stub.
- Tilt the stub to 90° and gently tap it on its side to remove any loose particles [75].
- As a final step, use a spray of dry air (ensuring there is no condensed liquid in the straw) to blow away any remaining loose material. Do not spray in the direction of the microscope or electronics [75].
Protocol for Non-Conductive and Beam-Sensitive Samples
Biological and polymeric samples are prone to charging and beam damage, which manifest as bright, blurry images or sample deformation [75].
- Objective: To prepare non-conductive or beam-sensitive samples (e.g., viral pellets, polymer capsules) for stable, high-resolution imaging.
- Materials: Sputter coater (e.g., with gold or platinum target), conductive paint, charge reduction sample holder (optional).
- Procedure:
- Mount the sample using conductive paint as described in Section 3.1 to ensure a good electrical path.
- For optimal results, use a sputter coater to apply a thin, uniform layer of a conductive metal (such as gold or platinum) onto the sample surface.
- Alternatively, if a sputter coater is unavailable or elemental analysis is required, use the microscope's low vacuum mode (if available). This introduces gas molecules into the chamber that neutralize charge [75].
- For beam-sensitive samples, use the lowest possible beam voltage and current to minimize damage. Acquire images quickly and at the lowest usable magnification to reduce electron dose [75].
Protocol for Powder and Particle Samples
Accurate analysis of powders (e.g., viral vectors in excipients, nanoparticles) requires well-separated particles.
- Objective: To achieve an even, non-overlapping distribution of particles for accurate size and shape analysis.
- Materials: Double-sided carbon sticker, particle disperser unit (e.g., Nebula), spray air.
- Procedure:
- Adhere a double-sided carbon sticker to an aluminum stub.
- Using a spoon or spatula, collect a very small amount of powder.
- Use a particle disperser unit according to the manufacturer's instructions to evenly distribute the sample on the sticker. This uses a controlled vacuum burst to separate particles [75].
- If a disperser is not available, gently tap the stub to distribute the sample and use a strong burst of dry air to remove excess and separate agglomerates. Note that this manual method is less consistent.
Protocol for Air- and Moisture-Sensitive Samples
Samples like lithium-ion batteries or hydrated biological materials can degrade upon air exposure or outgas in a vacuum.
- Objective: To prepare air- or moisture-sensitive samples without altering their native structure.
- Materials: Glove box (inert atmosphere), air-isolated transfer vessel, critical point dryer or freeze dryer.
- Procedure:
- Inert Atmosphere Preparation: Prepare the sample in a glove box filled with inert gas (e.g., argon).
- Air-Isolated Transfer: Use a specialized air-isolated transfer vessel to move the sample from the glove box to a cross-section polisher or sputter coater, and finally into the SEM, without air exposure [76].
- Drying Techniques: For wet samples, use critical point drying or freeze-drying to remove water while minimizing structural collapse [75].
- Cooling: Rapidly freeze the sample to preserve its structure. Keep the sample cryo-cooled during transfer and imaging to suppress outgassing [75].
Protocols for Enhancing Specimen Contrast
Contrast is essential for interpreting fine structural details. The following protocols cover both simple negative staining for quick analysis and more complex embedding for ultrastructural context.
Negative Staining Protocol for Virus Morphology
This is a rapid, simple technique for assessing virus particle structure and integrity [32].
- Objective: To quickly visualize the morphology of isolated viral particles.
- Materials: Formvar-coated EM grid, virus suspension, filter paper, 2% phosphotungstic acid (PTA), pH 7.0 [32].
- Procedure:
- Resuspend pelleted viral particles in distilled water.
- Place a drop of the viral suspension on a clean surface, such as a petri dish.
- Float a Formvar-coated EM grid (Formvar-side down) on top of the virus drop for 1-3 minutes to allow adsorption [32].
- Blot away excess liquid with filter paper.
- Place the grid onto a drop of 2% phosphotungstic acid (PTA) for one minute. PTA is a heavy metal salt that creates a negative image of the virus [32].
- Blot away the excess stain and allow the grid to air dry. The grid is now ready for EM examination [32].
Chemical Fixation and Embedding Protocol for Ultrastructural Analysis
This detailed protocol preserves cellular ultrastructure and virus-host interactions for high-resolution TEM.
- Objective: To preserve the native architecture of virus-infected cells for detailed ultrastructural analysis.
- Materials: Formaldehyde, glutaraldehyde, 0.1M phosphate buffer (pH 7.4), Osmium Tetroxide (OsO₄), Potassium ferricyanide (K₃Fe(CN)₆), Tannic acid, sodium cacodylate buffer, ethanol or acetone, Epoxy resin (Epon 812), lead citrate.
- Procedure:
- Primary Fixation: Prepare a double-strength fixative of 4% formaldehyde (from paraformaldehyde) and 3% glutaraldehyde in 0.1M phosphate buffer. Add an equal volume of this fixative directly to the cell culture medium for gentle initial fixation. Replace with fresh full-strength fixative (2% formaldehyde / 1.5% glutaraldehyde) and fix for 1 hour [30].
- Secondary Fixation (Post-fixation): Wash cells with buffer and post-fix in 1% Osmium Tetroxide in 1.5% potassium ferricyanide for 1 hour on ice. This step stabilizes membranes [30].
- En bloc Staining: Wash and incubate cells in 1% tannic acid in 0.05M sodium cacodylate buffer for 45 minutes at room temperature. This acts as a mordant to enhance membrane contrast. Follow with a brief rinse in 1% sodium sulfate [30].
- Dehydration: Dehydrate the sample through a graded series of ethanol or acetone (e.g., 30%, 50%, 70%, 90%, 100%).
- Infiltration and Embedding: Infiltrate the sample with an epoxy resin, such as Epon 812, and polymerize in an oven at 60°C [30].
- Sectioning and Staining: Cut ultrathin sections (60-90 nm) and contrast them with a lead citrate stain before viewing in the TEM [30].
Quantitative Data and Experimental Workflows
The following table consolidates key quantitative information from the protocols.
Table 2: Summary of Key Quantitative Data from EM Protocols
| Parameter | Typical Value or Range | Context and Purpose |
|---|---|---|
| Virus Particle Size [30] | 50 - 200 nm (diameter) | Provides scale for required microscope resolution. |
| Negative Staining Time [32] | ~1 minute | Time for grid to be exposed to phosphotungstic acid. |
| Primary Fixative Concentration [30] | 2% Formaldehyde / 1.5% Glutaraldehyde | Standard concentration for cross-linking proteins in fixative buffer. |
| Post-fixation Time [30] | 1 hour | Duration for fixation with Osmium Tetroxide. |
| Tannic Acid Incubation [30] | 45 minutes | Time for en bloc staining to enhance membrane contrast. |
| SEM-EDS Detection Limits [63] | ≥0.1% (1000 ppm) for high Z elements; ≥1% for low Z (F to Be) | Minimum detectable elemental concentration by EDS. |
| SEM-EDS Quantitative Error [63] | ±2% to ±5% (relative) for major components on flat, polished samples. | Expected accuracy for standardless quantitative analysis. |
Workflow for Preparing a Difficult Non-Conductive Sample
This diagram outlines the logical pathway for preparing a challenging sample, such as a biological specimen, for SEM imaging, incorporating decisions based on sample properties and available equipment.
Integrated Workflow for Viral Ultrastructure Analysis
This workflow details the correlative process from cell culture to image visualization, specifically for studying viral entry or assembly within host cells, integrating both TEM and advanced light microscopy techniques.
Strategies for Improving Signal-to-Noise Ratio in Low-Titer or Heterogeneous Viral Samples
In viral morphology research using electron microscopy (EM), the signal-to-noise ratio (SNR) is a fundamental metric determining the quality and interpretability of acquired images. A high SNR is particularly crucial when working with low-titer or heterogeneous viral samples, where the target signal is inherently weak or variable. For viruses, which are submicroscopic agents with simplistic genetic structures, optimizing SNR enables researchers to overcome challenges related to their size, low contrast, and the delicate nature of their structures, especially when using low-dose techniques to prevent radiation damage [77] [78]. This application note outlines a systematic framework and detailed protocols for enhancing SNR, facilitating more reliable identification, classification, and structural analysis of viral particles.
Understanding and Quantifying Noise in Viral EM
The total noise (σtotal) in an EM image arises from multiple independent sources. As these variances are additive, the total background noise can be expressed as [79]: σ²total = σ²photon + σ²dark + σ²CIC + σ²read
Where:
- σ_photon is the photon shot noise, representing statistical fluctuations in the incoming electron signal.
- σ_dark is the dark current, from heat-generated electrons in the detector.
- σ_CIC is the clock-induced charge, a stochastic electron gain in EMCCD cameras.
- σ_read is the readout noise, introduced during signal digitization [79].
The Signal-to-Noise Ratio (SNR) is the ratio of the desired electronic signal (N_e) to this total noise, providing a quantitative measure of how much the signal of interest stands above statistical fluctuations [79]. For cryo-EM, the related Spectral Signal-to-Noise Ratio (SSNR) serves as a frequency-space equivalent and is a key parameter for assessing micrograph quality and radiation damage [78].
Table 1: Key Noise Sources and Their Characteristics in Electron Microscopy
| Noise Source | Origin | Statistical Model | Impact on Viral Imaging |
|---|---|---|---|
| Photon Shot Noise | Stochastic arrival of electrons | Poisson | Fundamental limit, critical in low-dose imaging of sensitive viral structures [78]. |
| Dark Current | Thermal generation of electrons in detector | Poisson | Increases with exposure time; can obscure weak signals from low-titer samples [79]. |
| Readout Noise | Signal conversion and amplification | Gaussian | A fixed noise floor; significant when signal is weak [79]. |
| Clock-Induced Charge (CIC) | Electron multiplication in EMCCD gain register | Poisson | Can compromise camera sensitivity and contrast for small viruses [79]. |
Microscope Setup and Camera Calibration
Verifying that the microscope camera performs to its marketed specifications is a critical first step, as discrepancies can directly compromise sensitivity and SNR.
1. Principle: Isolate and measure each camera noise parameter by acquiring images under conditions that suppress all other noise sources. 2. Materials:
- Electron microscope with a direct electron detector (DED) or EMCCD camera.
- Standard software for camera control and image analysis (e.g., Bsoft [78]). 3. Methods:
- Measuring Read Noise (σ_read): Acquire a "0G-0E dark frame" (zero gain, zero exposure time with the beam blanked). The standard deviation of this image is predominantly the read noise [79].
- Measuring Dark Current (σ_dark): Acquire multiple dark frames with a long exposure time but zero gain. Calculate the variance and subtract the previously measured read noise variance.
- Measuring Clock-Induced Charge (σ_CIC): Acquire multiple images with the electron multiplication (EM) gain activated but with zero exposure. The variance of these images includes both CIC and read noise. Subtract the read noise variance to isolate CIC. 4. Notes: This calibration methodology is broadly applicable across EMCCD or sCMOS microscope systems and should be performed periodically to ensure optimal camera performance.
Sample Preparation and Handling for Enhanced SNR
Sample preparation is paramount for preserving native viral structures and maximizing signal while minimizing background.
1. Principle: Maintain in-resin fluorescence (IRF) to enable accurate targeting of specific viral particles or infected cells in a heterogeneous sample for subsequent high-resolution EM imaging. 2. Materials:
- High-pressure freezer.
- Freeze-substitution apparatus.
- Acrylic embedding resins (e.g., Lowicryl HM20, Unicryl, or LR White).
- Uranyl acetate for contrast. 3. Methods:
- High-Pressure Freezing: Rapidly freeze cells or tissue infected with virus to preserve ultrastructure.
- Freeze-Substitution: Perform in a dedicated unit with a cocktail containing uranyl acetate, using a protocol optimized for the sample size (shorter times for single cells).
- Embedding: Infiltrate and embed the sample in an acrylic resin (e.g., Lowicryl HM20). Polymerize the resin using UV light at low temperatures (e.g., -25°C to -50°C). 4. Notes: This protocol preserves the antigenicity for post-embedding immunolabeling and the fluorescence of genetically encoded tags, which is crucial for correlating function and structure in heterogeneous samples [80].
Imaging Acquisition and Processing Strategies
Optimizing imaging parameters and processing workflows can yield substantial gains in SNR.
1. Principle: Systematically adjust SEM settings based on section thickness to maximize the backscattered electron signal used for imaging. 2. Materials:
- Integrated Light and Electron Microscope (ILEM, e.g., SECOM platform) or standard SEM.
- Resin-embedded thin sections (50-100 nm) on EM grids. 3. Methods:
- Accelerating Voltage: Test voltages between 2-10 kV. Higher kV (e.g., 10 kV) generally provides better penetration for thicker sections, while lower kV (e.g., 2-5 kV) can enhance surface detail on thin sections.
- Sample Biasing: Apply a small bias voltage (+500 V to +1.5 kV) to the sample to improve the collection efficiency of backscattered electrons.
- Working Distance: Use a short working distance (e.g., 2-5 mm) to improve signal collection and resolution.
- Dwell Time: Optimize to balance SNR and radiation damage; longer dwell times increase SNR but also increase dose. 4. Notes: These guidelines are essential for acquiring high-resolution ultrastructural context from the same thin section used for fluorescence imaging.
1. Principle: Use the Spectral SNR calculated from aligned movie frames of a cryo-EM micrograph to quantitatively assess its quality and radiation damage in near real-time. 2. Materials:
- Cryo-EM dataset collected as movies on a Direct Electron Detector (DED) in counting mode.
- Processing software capable of SSNR calculation (e.g., Bsoft [78]). 3. Methods:
- Movie Alignment: Align all frames of a micrograph as rigid bodies.
- SSNR Calculation: Calculate the SSNR from the aligned frames. The signal power should show Thon rings from the Contrast Transfer Function (CTF), while the noise power reflects the detector response.
- Progressive SSNR: Analyze the SSNR as a function of cumulative electron dose to track the onset and extent of radiation damage. 4. Notes: This fully quantitative analysis avoids excessive filtering and allows for the assessment of each micrograph's quality during acquisition, preventing the collection of unusable data [78].
Table 2: Summary of SNR Enhancement Strategies and Their Applications
| Strategy Category | Specific Action | Reported Outcome | Ideal Use Case |
|---|---|---|---|
| Hardware & Camera | Verify camera parameters (dark current, CIC) [79] | Ensures detector sensitivity | All applications, especially critical for low-titer samples |
| Sample Preparation | Short freeze-substitution & acrylic resin [80] | Preserves in-resin fluorescence (IRF) | CLEM of infected tissues; heterogeneous viral samples |
| Microscope Settings | Add secondary emission/excitation filters [79] | 3-fold improvement in SNR | Fluorescence microscopy prior to EM |
| Microscope Settings | Introduce wait time in the dark before acquisition [79] | Reduces excess background noise | All fluorescence applications |
| Microscope Settings | Optimize SEM kV, bias, and working distance [80] | Maximizes BSE signal for ultrastructure | High-resolution imaging of thin sections |
| Data Processing | Calculate progressive SSNR of micrograph movies [78] | Quantifies quality & radiation damage | Cryo-EM of radiation-sensitive viruses |
The Scientist's Toolkit: Research Reagent Solutions
Table 3: Essential Materials for SNR Optimization in Viral EM
| Reagent / Material | Function | Application Note |
|---|---|---|
| Lowicryl HM20 Resin | Acrylic resin for embedding | Polymerized with UV at low temperatures; optimal for preserving fluorescence and antigenicity [80]. |
| Uranyl Acetate | Heavy metal stain | Provides electron contrast for membranes and structures; used during freeze-substitution [80]. |
| Direct Electron Detector (DED) | Image acquisition | Enables single-electron counting and movie-based processing for damage correction [78]. |
| Secondary Emission Filter | Optical filtering | Blocks unwanted background light in fluorescence microscopy, improving SNR [79]. |
| Bsoft Software Package | Image processing | Enables quantitative analysis, including SSNR calculation and CTF determination [78]. |
Workflow and Signaling Pathways
The following diagram illustrates the integrated experimental workflow for optimizing SNR, from sample to image, highlighting the key decision points.
SNR Optimization Workflow for Viral EM
Achieving a high SNR in electron microscopy of viral samples is a multifaceted challenge that requires a systematic approach. By integrating rigorous camera calibration, optimized sample preparation protocols that preserve signals, careful adjustment of microscope settings, and quantitative image processing, researchers can significantly enhance the quality of their data. These strategies are particularly powerful when applied to the study of low-titer or heterogeneous viral samples, enabling clearer visualization, more accurate classification, and deeper insights into viral morphology and function. The protocols and frameworks outlined here provide a concrete pathway for researchers to maximize the information obtained from their valuable samples.
Ensuring Accuracy: Validation Standards and Comparative Analysis of EM in Structural Biology
In structural biology, particularly in virology research, Three-Dimensional Electron Microscopy (3DEM) has become an indispensable tool for elucidating the architecture of viral pathogens at near-atomic resolution. The method's versatility allows for the investigation of everything from highly purified, homogeneous molecular complexes to pleiomorphic viral specimens under conditions close to those in the cell [81]. However, the interpretation of 3DEM data involves complex computational methods for reconstructing density maps and fitting molecular models, introducing potential uncertainties and errors. The Electron Microscopy Validation Task Force was established to address these challenges by creating a framework of standards and best practices for validating 3DEM maps and models [81]. This framework is crucial for ensuring the reliability of structural data, particularly in viral morphology research where understanding the structure of proteins like the SARS-CoV-2 spike protein can directly inform vaccine and therapeutic development [5] [82].
The need for standardized validation became particularly evident as the field experienced rapid growth. Historically, the absence of appropriate validation tools made it difficult to reconcile different structural interpretations of the same macromolecular complexes, such as the inositol phosphate receptor, where multiple studies produced conflicting structures [81]. For virology, where accurate structural models can guide public health responses, such uncertainties are unacceptable. The Validation Task Force meetings, the first of which was held in 2010, brought together experts to synergize experimental and computational efforts, establishing standards that would enhance the credibility and biological impact of 3DEM [81].
Core Validation Metrics and Standards
Evolution of Validation Frameworks
The inaugural meeting of the Electron Microscopy Validation Task Force, organized by the Unified Data Resource for 3DEM, produced specific recommendations aimed at strengthening the collaboration between experimental and modeling communities [81]. A key outcome was the establishment of global data deposition systems managed by the Worldwide Protein Data Bank (wwPDB) consortium, which includes the Electron Microscopy Data Bank (EMDB) for 3DEM maps and the Protein Data Bank (PDB) for associated atomic models [83]. This unified system ensures that 3DEM maps and models described in the literature are deposited in public archives where they can be retrieved for independent assessment, use, and development of new tools for visualization, fitting, and validation [81].
The validation process has evolved significantly, with recent advancements introducing more sophisticated quantitative metrics. The wwPDB validation server now provides comprehensive reports that include assessments of the model-to-map fit, steric clashes, geometry quality, and density visualization [84]. These reports incorporate both established metrics and newer, more powerful statistical measures that provide researchers with a detailed evaluation of their structural models, which is particularly valuable when studying viral morphogenesis and antigenic determinants.
Quantitative Metrics for Model-Map Fit Assessment
Table 1: Key Quantitative Metrics for 3DEM Validation
| Metric | Description | Interpretation | Application in Virology |
|---|---|---|---|
| Q-score | Measures atom resolvability in cryo-EM maps; quantifies the fit between atomic coordinates and their corresponding density [84] | Ranges from 0 (no fit) to 1 (perfect fit); higher scores indicate better model-map agreement | Critical for validating spike protein models in SARS-CoV-2 variants [84] |
| Qrelativeall | Percentile comparing a model-map's average Q-score to all model-map average Q-scores in PDB/EMDB [85] [86] | Higher percentiles indicate superior overall model-map fitness | Enables comparison of viral protein structures across different studies and resolutions |
| Qrelativeresolution | Percentile comparing a model-map's average Q-score with entries of similar resolution [85] [86] | Values near 50% represent typical fitness for a given resolution; notably low or high values warrant further review | Contextualizes the quality of viral structures determined at varying resolutions |
| Fourier Shell Correlation (FSC) | Measures resolution of 3DEM maps by comparing correlation between two independently refined half-maps [83] | The threshold at which FSC drops below 0.143 defines global resolution; essential for resolution reporting | Standardizes resolution claims for viral structures, enabling reliable comparisons |
| MolProbity | All-atom structure validation for steric clashes, geometry, and rotamer outliers [84] | Identifies unrealistic atomic contacts, bond lengths, and angles; provides overall quality score | Ensures stereochemical quality of viral protein models, particularly at intermediate resolutions |
The Q-score metric has emerged as a particularly valuable tool, with recent studies demonstrating its application for proteins, nucleic acids, and small-molecule atomic coordinate models derived from 3DEM maps [84]. The subsequent development of Q_relative percentiles represents a significant advancement, allowing researchers to contextualize their model-map fitness against the entire EMDB archive or against structures of similar resolution [85] [86]. These metrics have been available via EMDataBank since Spring 2024 and are being incorporated into wwPDB validation reports, providing depositors, reviewers, and the community with enhanced tools for assessing 3DEM data quality [85] [86].
For viral morphology research, these quantitative metrics enable direct comparison of structural features across viral variants. For instance, a study comparing SARS-CoV-2 variants found that dominant variants like Alpha, Delta, and Omicron BA.2 exhibited slightly increased spike density compared to early isolates, primarily due to smaller particle size [5]. Such subtle morphological differences, which may influence infectivity and transmission, can be reliably identified and compared only when validated using standardized metrics.
Experimental Protocols for Viral Morphology Studies
Sample Preparation and Imaging Workflow
The following workflow diagram outlines a standardized protocol for preparing and imaging viral samples for 3DEM analysis, based on methods used in SARS-CoV-2 variant studies:
Diagram 1: Viral Sample Preparation and Imaging Workflow
Detailed Protocol Steps
Cell Culture and Infection:
- Culture Vero E6 cells (African green monkey kidney epithelial cells) in Dulbecco's Modified Eagle Medium (DMEM) supplemented with 1% L-glutamine and 10% fetal bovine serum for 24 hours at 37°C and 5% CO₂ until they reach approximately 70% confluence [5].
- Remove medium and add a small volume of fresh medium containing diluted virus stock suspension. Use a multiplicity of infection (MOI) of approximately 1 for initial studies or 0.01 for larger datasets. Incubate for 30 minutes to allow viral adsorption [5].
- Add fresh medium without virus and incubate for 24 hours to allow viral replication and assembly.
Fixation and Embedding:
- Terminate cultivation by replacing medium with 2.5% glutaraldehyde in 0.05 M Hepes buffer (pH 7.2). For some applications, a combination of 2.5% glutaraldehyde and 1% paraformaldehyde may be used. Incubate with fixative for at least one hour at room temperature [5].
- Scrape fixed cells from culture flasks and collect in centrifuge tubes. Sediment cells by centrifugation at 3000 g for 10 minutes using a swing-out rotor. Wash pellet twice with 0.05 M Hepes buffer [5].
- Heat cell pellet to 40°C in a water bath and mix with 3% low melting point agarose at 40°C (1:1 v/v). Incubate for approximately 2-3 minutes at 40°C, then centrifuge for 5 minutes at 5000 g in a benchtop centrifuge with a fixed-angle rotor and cool on ice [5].
- Process through standard dehydration series (ethanol or acetone) and embed in epoxy resin according to established protocols for transmission electron microscopy.
Sectioning and Imaging:
- Cut ultra-thin sections (70-90 nm) using an ultramicrotome and collect on formvar-coated grids.
- Stain with uranyl acetate and lead citrate to enhance contrast.
- Image sections using a transmission electron microscope operated at 80-120 kV. For SARS-CoV-2 variant studies, approximately 900 images were collected per variant to ensure statistical significance for morphometric analysis [5].
Model Building and Validation Workflow
The process of building and validating atomic models from 3DEM maps involves multiple steps with iterative refinement, as illustrated in the following workflow:
Diagram 2: Model Building and Validation Workflow
Essential Research Reagents and Tools
Table 2: Essential Research Reagent Solutions for 3DEM Viral Studies
| Category | Specific Reagents/Tools | Function/Application | Example Use Case |
|---|---|---|---|
| Cell Culture | Vero E6 cells, DMEM with 10% FBS, L-glutamine | Propagation of viral particles for structural studies | Culture of SARS-CoV-2 variants for morphometric analysis [5] |
| Fixation | 2.5% glutaraldehyde in 0.05 M Hepes buffer (pH 7.2) | Preservation of viral ultrastructure while maintaining antigenicity | Conventional TEM of SARS-CoV-2 particles in infected cells [5] |
| Embedding | 3% low melting point agarose, Epoxy resins | Structural support for sectioning while preserving morphology | Preparation of ultra-thin sections for viral particle imaging [5] |
| Validation Software | MolProbity, TEMPy, Q-score analysis tools | Assessment of model quality, geometry, and map-model fit | All-atom structure validation for macromolecular crystallography and cryo-EM [84] |
| Visualization & Analysis | UCSF ChimeraX, TEMPy | Assessment of 3DEM density fits, model visualization and analysis | Visualization and analysis of three-dimensional electron microscopy density fits [84] |
| Microscopy Platforms | Thermo Fisher Scientific Krios G4 cryo-EM | High-resolution imaging of vitrified specimens with automated data collection | UCLA's facility for atomic resolution structures of viral proteins [82] |
Application in Viral Morphology Research
The standardized validation protocols established by the EM Validation Task Force have direct applications in viral morphology research, particularly in the characterization of emerging viral variants. A recent study employing these standards examined multiple SARS-CoV-2 variants—including Alpha (B.1.1.7), Beta (B.1.351), Delta (B.1.617.2), and Omicron BA.2 (B.1.1.529)—alongside early isolates (Munich929 and Italy-INMI1) [5]. The research revealed subtle but potentially significant morphological differences: the more dominant variants (Alpha, Delta, and Omicron BA.2) exhibited slightly increased spike density compared to reference strains, primarily due to smaller virus particle size [5].
The validation framework enables reliable comparison of such morphometric parameters across different studies and laboratories. For instance, the observed tendency toward increased spike density in dominant SARS-CoV-2 variants was independently confirmed in a cryo-electron tomography study, demonstrating how standardized validation facilitates the replication of findings across different methodological approaches [5]. Such morphological insights, when derived from properly validated structures, provide crucial information for understanding viral evolution and adaptation.
For drug development professionals, these validated structures offer reliable platforms for structure-based drug and vaccine design. The SARS-CoV-2 spike protein structures determined by cryo-EM directly informed the development of COVID-19 vaccines, demonstrating the real-world impact of rigorous structural validation [82]. As the EMDB archive continues to grow—projected to hold 50,000 entries by 2025 and 100,000 by 2028—the standardized validation framework ensures that this wealth of structural data remains reliable, interpretable, and actionable for addressing current and future public health challenges [83].
The determination of high-resolution viral structures is fundamental to understanding viral life cycles, immune evasion strategies, and developing targeted antiviral therapies. For decades, X-ray crystallography served as the primary workhorse for atomic-resolution structure determination. However, the "resolution revolution" in cryo-electron microscopy (cryo-EM) has transformed structural virology, enabling near-atomic resolution visualization of complex viral assemblies without crystallization [87] [88]. These techniques are not competing alternatives but rather complementary approaches that, when integrated, provide a more comprehensive understanding of viral architecture and function. This article examines their synergistic application in viral research, with particular focus on methodological integration for challenging viral targets.
Technical Comparison: Cryo-EM vs. X-ray Crystallography
Table 1: Technical comparison between cryo-EM and X-ray crystallography for viral structure determination
| Parameter | X-ray Crystallography | Cryo-EM (Single Particle) |
|---|---|---|
| Sample Requirements | High-quality crystals, highly homogeneous sample | Small sample amount (≤0.5 mg), tolerance for heterogeneity |
| Sample State | Crystalline solid | Vitrified solution (near-native) |
| Resolution Range | Atomic (0.5-3.5 Å) | Near-atomic to atomic (3.0-8.0 Å typically) |
| Optimal Particle Size | ~310 Å median diameter [88] | No upper limit, structures >1000 Å achieved [88] |
| Typical Timeline | Weeks to months (crystallization bottleneck) | Days to weeks (after grid optimization) |
| Symmetry Requirements | Beneficial but not mandatory | Icosahedral symmetry greatly enhances resolution |
| Membrane Protein Applications | Challenging, requires specialized methods [87] | Highly suitable, no crystallization needed [87] |
Table 2: Virus structure statistics by determination method (adapted from VIPERdb analysis) [88]
| Year Range | Total Virus Structures | Structures by X-ray | Structures by Cryo-EM | Best Cryo-EM Resolution (Å) |
|---|---|---|---|---|
| 1985-1996 | 2-8 per year | 100% | 0% | N/A |
| 2008 | ~15 | Majority | Minority | 3.8-3.9 [88] |
| 2017 | ~60 | Minority | Majority | 2.79 (surpassed X-ray) [88] |
| 2022-2023 | >70 near-atomic | Declining percentage | >70% of new structures | ~2.0 and better |
Integrated Methodological Framework
Complementary Workflow for Challenging Viral Targets
The structure determination of hepatitis E virus (HEV) exemplifies the power of combining cryo-EM and X-ray crystallography [89] [90]. This integrated approach overcome challenges including limited biological samples, biosafety concerns, and inherent structural characteristics that made HEV resistant to either method alone.
Research Reagent Solutions for Viral Structure Determination
Table 3: Essential research reagents and materials for integrated structural virology
| Category | Specific Products/Systems | Function in Viral Structure Determination |
|---|---|---|
| Expression Systems | Baculovirus-insect cell (sf9, sf21, High Five) [89] | Production of virus-like particles (VLPs) for structural study |
| Cloning Tools | TA Cloning Kit, pVL1393 transfer vector [89] | Viral gene insertion and recombinant plasmid construction |
| Electron Microscopy | FEI Titan Krios, Direct Electron Detectors [87] [88] | High-resolution data collection for cryo-EM |
| Image Processing | EMAN, IMIRS, RELION [89] | Single-particle reconstruction and 3D map generation |
| Crystallography Software | CNS, PHASER, COOT [89] | Molecular replacement, model building, and refinement |
| Grid Preparation | Quantifoil R2/1 200-mesh holey grids [89] | Sample support for cryo-EM specimen preparation |
Detailed Experimental Protocols
Protocol 1: Hybrid Structure Determination of Hepatitis E Virus
Principle: Overcome sample limitation and biosafety concerns by combining recombinant VLP technology with sequential structural techniques [89] [90].
Materials:
- Viral RNA extraction kit
- PCR reagents with HEV-specific primers (HEV-D2: 5'-TGGGTTCGCGACCATGCGCCCTCG-3', HEV-U2: 5'-CAACAGAAAGAAGGGGGGCACAAG-3')
- Baculovirus expression system (BD BaculoGold DNA, transfer vectors)
- Insect cell lines (sf9, High Five)
- Transmission electron microscope with cryo-holder
- X-ray diffraction facility
Procedure:
- Viral Gene Acquisition:
- Extract total RNA from clinical samples (e.g., patient stool)
- Amplify HEV ORF2 region by RT-PCR
- Clone into TA vector and verify by sequencing
Recombinant VLP Production:
- Subclone ORF2 into baculovirus transfer vector (pVL1393)
- Co-transfect sf9 insect cells with recombinant plasmid and baculovirus DNA
- Amplify recombinant baculovirus through two rounds (P1→P2)
- Express VLPs in High Five cells at high density
- Purify VLPs by ultracentrifugation (sucrose gradient)
- Verify assembly by negative stain EM
Intermediate Resolution Cryo-EM:
- Prepare cryo-grids with purified VLPs (3-4 μL sample)
- Vitrify using plunge freezer in liquid ethane
- Collect micrographs on JEM-2010/FEI Titan Krios at 200-300 kV
- Use low-dose mode (~20 e⁻/Ų) at 50,000× magnification
- Select particles automatically (EMAN boxer) with manual verification
- Determine CTF parameters (CTFFIND/CTFTILT)
- Reconstruct 3D density map to ~8-10 Å resolution
High-Resolution X-ray Crystallography:
- Concentrate VLPs to 8-12 mg/mL for crystallization
- Screen crystallization conditions using commercial sparse matrix screens
- Optimize crystal growth using vapor diffusion method
- Collect X-ray diffraction data at synchrotron source
- Use cryo-EM reconstruction as molecular replacement model
- Iteratively build and refine atomic model (O/CNS)
- Validate final model (MolProbity, PROCHECK)
Expected Outcomes: 3.5 Å resolution atomic structure of HEV VLP revealing domain organization (S, P1, P2 domains) and capsid assembly details [89].
Protocol 2: Near-Atomic Resolution Cryo-EM of Aquareovirus
Principle: Direct determination of metastable viral states at near-atomic resolution using advanced single-particle cryo-EM [91].
Materials:
- Purified aquareovirus virions
- Protease (e.g., chymotrypsin) for ISVP formation
- 300 kV cryo-TEM with direct electron detector (K2 Summit)
- Image processing software (cryoSPARC, RELION, EMAN2)
Procedure:
- Sample Preparation:
- Generate infectious subviral particles (ISVPs) by limited proteolysis
- Verify completion of VP7 removal and VP5 cleavage by SDS-PAGE
- Flash-freeze in vitreous ice on Quantifoil grids
High-Resolution Data Collection:
- Collect 650+ micrograph movies on FEI Titan Krios
- Use parallel illumination and optimal defocus range (1.0-2.5 μm)
- Implement movie mode with 5-8 frames per exposure
- Correct for beam-induced motion (MotionCor2)
3D Reconstruction:
- Pick ~50,000 particles automatically with manual verification
- Perform reference-free 2D classification to remove junk particles
- Reconstruct initial model using stochastic gradient descent
- Refine with imposed icosahedral symmetry
- Apply Ewald sphere correction for high-resolution features
- Perform local resolution estimation and map sharpening
Atomic Model Building:
- Build backbone trace directly into cryo-EM density
- Assign amino acid residues based on side-chain density
- Real-space refine against cryo-EM map (PHENIX)
- Validate geometry (Ramachandran plot, rotamer outliers)
- Deposit final model (PDB) and map (EMDB)
Expected Outcomes: 3.3 Å resolution structure enabling identification of autocleavage site (Asn42-Pro43), catalytic residues (Lys84, Glu76), and myristoyl group membrane insertion finger [91].
Emerging Integration with AI-Based Prediction
The integration of AlphaFold2 and related AI prediction tools has created new opportunities for hybrid structural virology. These computational methods can provide accurate atomic models that complement intermediate-resolution cryo-EM maps, particularly for flexible regions resistant to experimental determination [87] [92]. For example, in studying the vaccinia virus helicase, researchers combined cryo-EM with AlphaFold2 predictions to achieve pseudo-atomic resolution of flexible complexes [92] [87]. Similarly, AI-predicted structures have facilitated the interpretation of viral receptor-binding mechanisms in algal picorna-like viruses [92].
The synergistic combination of cryo-EM and X-ray crystallography represents a powerful paradigm for viral structure determination. Cryo-EM excels at visualizing large, complex, and dynamic viral assemblies in near-native states, while X-ray crystallography provides unparalleled atomic-level detail for well-behaved samples. The integrated protocol presented for hepatitis E virus demonstrates how these techniques can overcome individual limitations to yield high-resolution structural information for challenging targets. As both technologies continue to advance—particularly with the integration of AI-based structure prediction—their complementary application will remain essential for elucidating viral architecture, informing rational vaccine design, and developing targeted antiviral therapeutics.
The comprehensive characterization of viral pathogens, such as SARS-CoV-2, requires a multi-faceted approach that integrates imaging across resolution scales with sophisticated computational analysis. Correlative Light and Electron Microscopy (CLEM) has emerged as a powerful paradigm that bridges the gap between the high-throughput capabilities of light microscopy and the nanometer-resolution structural detail provided by electron microscopy [64]. When enhanced by bioinformatic analysis, this integrated framework enables researchers to link dynamic cellular processes with ultrastructural viral phenotypes, creating a more complete understanding of viral life cycles, host-pathogen interactions, and morphometric variations between viral variants.
This application note details practical methodologies for implementing CLEM workflows specifically for viral morphology research, with a focus on cross-validation between imaging modalities and quantitative bioinformatic analysis. The protocols outlined below have been optimized for studying enveloped viruses like SARS-CoV-2, providing researchers with standardized approaches for collecting statistically robust morphometric data that can inform drug discovery and vaccine development efforts.
Experimental Protocols
Correlative Light and Electron Microscopy (CLEM) for Viral Particles
This protocol describes a streamlined CLEM workflow for visualizing viral particles and their interactions with host cells, adapted from methods developed for imaging fungal extracellular vesicles and viral particles [64]. The procedure enables precise correlation between fluorescent labeling of viral components and high-resolution ultrastructural analysis.
Materials and Equipment
- Viral sample: Purified virus particles (e.g., SARS-CoV-2 variants) or infected cell cultures
- FM1-43 lipophilic dye (or similar fluorogenic styryl dye) for membrane staining [64]
- Formvar-coated EM grids (100-400 mesh)
- Laser scanning confocal microscope (LSCM)
- Transmission electron microscope (TEM)
- Fiducial markers: Fluorescent microspheres (0.5-1μm) for registration
- Fixative: 2.5% glutaraldehyde in 0.05M HEPES buffer (pH 7.2)
- Staining solutions: Osmium tetroxide (OsO4) vapors or 2% uranyl acetate [64]
Step-by-Step Procedure
Sample Preparation and Fluorescent Labeling
- For purified virus particles: Resuspend viral pellet in distilled water and incubate with FM1-43 dye (1:200 dilution) for 10 minutes at room temperature [64]. FM1-43 becomes fluorescent only when intercalated into lipid membranes, specifically highlighting viral envelopes.
- For infected cells: Culture cells on gridded glass-bottom dishes. Fix with 2.5% glutaraldehyde for 1 hour at room temperature after appropriate infection period [5].
Fiducial Marker Application
- Mix stained viral suspension with fluorescent microspheres (1:100 ratio) [64].
- Apply 5μL of mixture to Formvar-coated EM grid and incubate for 1-3 minutes.
- Carefully blot excess liquid with filter paper.
Correlative Imaging Workflow
- First, image samples using LSCM to capture fluorescence signals from labeled viral membranes.
- Record precise coordinates of regions of interest using fiducial markers as reference points.
- Subsequently, stain the same grid with OsO4 vapors or 2% uranyl acetate for 1 minute [64].
- Blot excess stain and transfer grid to TEM for high-resolution imaging.
- Re-locate the same regions imaged by LSCM using the fiducial markers as guides.
Image Processing and Correlation
- Use software alignment tools to overlay LSCM and TEM images based on fiducial markers.
- Correlate fluorescent signals with ultrastructural features to identify viral particles and their cellular context.
Technical Considerations
- Minimizing artifacts: The use of OsO4 vapors instead of liquid staining solutions reduces the introduction of extrinsic particles that can be mistaken for viral structures [64].
- Resolution matching: The diffraction-limited fluorescence signals from LSCM (≥250 nm) guide the targeting for TEM, which provides ultrastructural detail at <1 nm resolution [64].
- Safety precautions: When working with pathogenic viruses like SARS-CoV-2, all procedures must be performed at appropriate biosafety levels (BSL-2 or BSL-3) following institutional guidelines.
Negative Staining TEM for Viral Morphometry
This protocol provides a rapid method for qualitative and quantitative assessment of viral morphology using negative staining TEM, adapted from established techniques [32] [5]. The approach is particularly valuable for comparative analysis of different viral variants.
Materials
- Viral suspension (purified particles or culture supernatant)
- Formvar-coated EM grids
- Negative stain: 2% phosphotungstic acid (PTA), pH 7.0, or 2% uranyl acetate [32]
- Transmission electron microscope with CCD camera
- Image analysis software (e.g., ImageJ, proprietary TEM software)
Procedure
Grid Preparation
- Place a 10μL drop of viral suspension on a clean parafilm surface.
- Float Formvar-coated grid (Formvar side down) on the droplet for 3-5 minutes.
- Carefully blot excess liquid with filter paper.
Negative Staining
- Transfer grid to a 20μL drop of 2% PTA (pH 7.0) for 1 minute [32].
- Blot excess stain completely.
- Air-dry grid for at least 10 minutes before TEM observation.
TEM Imaging and Data Collection
- Image virions at magnifications between 20,000-60,000x.
- Capture multiple non-overlapping fields systematically across the grid.
- For morphometric analysis, acquire at least 50-100 individual viral particle images per sample [5].
Morphometric Analysis
- Measure maximum particle diameter and circumference using image analysis software.
- Count spike proteins visible around the viral perimeter.
- Calculate spike density as spikes per μm of viral circumference [5].
- Compile data in spreadsheet for statistical analysis and cross-variant comparisons.
Bioinformatic Analysis of Viral Morphometric Data
This protocol outlines a computational workflow for extracting meaningful biological insights from viral morphometric data, incorporating contemporary bioinformatic approaches.
Data Processing Pipeline
Image Preprocessing
- Apply contrast enhancement and background subtraction to TEM images.
- Use segmentation algorithms to isolate individual viral particles from background.
- Implement machine learning classifiers (e.g., YOLOv4 architecture) to automatically identify and categorize viral particles [93].
Morphometric Feature Extraction
- Calculate quantitative descriptors: diameter, circumference, circularity, spike count.
- Generate distribution profiles for each parameter across viral populations.
- Perform statistical testing (t-tests, ANOVA) to identify significant differences between variants.
Cross-Modal Data Integration
- Correlate morphometric features with genomic data (e.g., mutation profiles).
- Implement prototype-guided learning approaches to handle missing data modalities [94].
- Use dimensional reduction techniques (PCA, t-SNE) to visualize clustering of variants based on morphological parameters.
Data Presentation and Analysis
Comparative Morphometry of SARS-CoV-2 Variants
The table below summarizes morphometric data for major SARS-CoV-2 variants obtained through TEM analysis of ultrathin plastic sections, demonstrating quantifiable differences in viral architecture [5].
Table 1: Morphometric parameters of SARS-CoV-2 variants from TEM analysis
| Variant | Maximum Diameter (nm) | Particle Circumference (nm) | Spike Number per Profile | Spike Density (spikes/μm) |
|---|---|---|---|---|
| Munich929 (Reference) | 98.6 ± 18.2 | 309.7 ± 56.9 | 22.3 ± 5.9 | 72.0 ± 18.9 |
| Italy-INMI1 (Reference) | 101.4 ± 20.1 | 318.5 ± 62.8 | 21.8 ± 6.2 | 68.5 ± 19.5 |
| Alpha (B.1.1.7) | 94.2 ± 16.8 | 295.9 ± 52.7 | 23.1 ± 5.5 | 78.1 ± 18.3 |
| Beta (B.1.351) | 105.7 ± 19.3 | 332.0 ± 60.5 | 19.4 ± 5.1 | 58.5 ± 15.3 |
| Delta (B.1.617.2) | 95.8 ± 17.1 | 300.9 ± 53.6 | 23.8 ± 5.7 | 79.1 ± 18.7 |
| Omicron BA.2 | 93.5 ± 16.5 | 293.7 ± 51.9 | 24.2 ± 5.8 | 82.4 ± 19.1 |
The data reveals a trend toward smaller particle size and higher spike density in the more transmissible variants (Alpha, Delta, Omicron) compared to early pandemic strains and the less successful Beta variant [5]. These morphological differences may contribute to variations in transmission efficiency and immune evasion capabilities.
Advanced Imaging Platforms for Viral Research
Table 2: Advanced microscopy platforms for correlative viral imaging
| Platform/Technology | Key Features | Applications in Virology | Resolution Range |
|---|---|---|---|
| Self-driving microscope [95] | Automated tracking of regions of interest across scales; continuous imaging over extended periods | Long-term observation of virus-host interactions; imaging of infection dynamics | Cellular to subcellular |
| Inverted light-sheet microscopy [96] | Rapid 3D imaging of large samples; minimal phototoxicity | Imaging of virus-infected tissues; 3D pathology of infected samples | Subcellular to tissue level |
| Mass photometry [97] | Label-free mass measurement of single molecules at glass-water interface | Characterization of viral particle assembly; protein-protein interactions | Molecular scale (single molecules) |
| BreakTag sequencing [97] | NGS-based characterization of nuclease activity | Assessment of viral genome editing efficiency; off-target effects | Nucleotide resolution |
Visualizing Workflows and Relationships
Integrated CLEM Workflow for Viral Morphology
Figure 1: Correlative LM-EM workflow for viral imaging
Cross-Modal Data Integration Framework
Figure 2: Cross-modal data integration framework
The Scientist's Toolkit: Essential Research Reagents and Materials
Table 3: Essential research reagents for viral CLEM studies
| Category | Specific Reagents | Function/Application | Example Use |
|---|---|---|---|
| Fluorescent Labels | FM1-43 dye, FITC-conjugated ligands [64] | Membrane staining; viral surface labeling | Highlighting viral envelopes in CLEM |
| Negative Stains | Phosphotungstic acid (PTA), Uranyl acetate, OsO4 vapors [32] [64] | Enhancing contrast in TEM | Visualizing viral ultrastructure |
| Fiducial Markers | Fluorescent microspheres (0.5-1μm) [64] | Spatial registration between LM and EM | Precise correlation of imaging modalities |
| Fixatives | Glutaraldehyde, Paraformaldehyde [5] | Tissue and cell preservation | Maintaining viral morphology during processing |
| Embedding Media | Low melting point agarose [5] | Sample support for sectioning | Preparing pelleted cells for ultrathin sectioning |
| TEM Substrates | Formvar-coated grids [32] | Sample support for EM | Holding viral samples during TEM imaging |
The integration of light microscopy, electron microscopy, and bioinformatic analysis represents a powerful paradigm for comprehensive viral characterization. The protocols and data presented here demonstrate that quantitative morphometric differences exist between SARS-CoV-2 variants, with potential implications for understanding their varying transmission dynamics and pathogenic profiles [5].
Future developments in this field will likely be driven by advances in automated imaging platforms [95] [96], machine learning-based image analysis [93] [94], and standardized reporting frameworks [98]. The ongoing partnership between industry leaders in microscopy and AI analytics promises to deliver integrated solutions that streamline the entire workflow from sample preparation to clinical insights [96]. As these technologies mature, correlative approaches will become increasingly accessible, enabling deeper understanding of viral pathogenesis and accelerating the development of targeted therapeutic interventions.
In the field of viral morphology research, electron microscopy (EM) serves as a foundational tool for visualizing pathogen structure and understanding disease mechanisms. The reliability of insights gained from EM studies—from diagnosing infectious agents to informing drug and vaccine design—directly depends on the rigorous benchmarking of three core performance aspects: resolution limits, model accuracy, and experimental reproducibility [3] [5]. The exponential growth in EM data, with over 40,000 density maps now deposited in the Electron Microscopy Data Bank, underscores the urgent need for standardized evaluation frameworks [99]. This document provides detailed application notes and protocols to help researchers establish robust benchmarking practices, ensuring that their findings in viral structural biology are both trustworthy and impactful.
Resolution Limits in Electron Microscopy
Defining and Quantifying Resolution
Resolution limit refers to the smallest distance between two points in a specimen that can be distinguished as separate entities in the resulting image. In practical terms, it defines the level of structural detail visible, which ranges from cellular organelles down to individual amino acid side chains. The following table summarizes the capabilities and typical applications of different EM modalities relevant to virology.
Table 1: Resolution Ranges and Applications of EM Techniques in Virology
| Technique | Typical Resolution Range | Primary Applications in Virology |
|---|---|---|
| Diagnostic EM (Thin Section) | ~2 nm and above [3] | Fast scouting for pathogens; visualization of virus particles in tissue context; differential diagnosis of infections [3]. |
| Negative Staining EM | ~2 nm and above [3] | Rapid assessment of virus particle morphology and integrity in suspension samples [3]. |
| Cryo-Electron Microscopy (Single Particle) | Near-atomic to atomic (≤ 3 Å) [99] | High-resolution structure determination of purified viruses and viral proteins [82]. |
| Cryo-Electron Tomography (Cryo-ET) | ~3-5 nm (for cellular contexts) [5] | Visualizing viruses in their native cellular environment; studying virus entry, assembly, and egress [5]. |
Technical Factors Determining Resolution
The practical resolution achieved is not a fixed property of the microscope but is influenced by a complex interplay of factors:
- Microscope Hardware: The stability of the high-voltage source, the quality of the objective lens, and the efficiency of the detector are paramount. Next-generation instruments like the Krios G4 cryo-electron microscope offer enhanced coherence and detectors that nearly double the resolution and increase data acquisition speed nine-fold compared to earlier models [82].
- Sample Preparation: This is often the limiting factor. For cryo-EM, the formation of vitreous, non-crystalline ice is critical. For conventional thin-section EM, the quality of chemical fixation, dehydration, and resin embedding dictates preservation. Inadequate preparation introduces artifacts that no amount of advanced imaging can overcome [3].
- Sample Inherent Properties: Heterogeneity in the size, shape, and composition of viral particles can limit the ability to average multiple images to boost signal-to-noise ratio, a key principle in single-particle analysis.
Benchmarking Model Accuracy
Performance Metrics for Atomic Model Building
The transition from a 3D electron density map to an atomic model is a critical step where accuracy must be quantified. Deep learning (DL) methods have recently surpassed traditional physics-based approaches in automated model building, but their performance must be evaluated using a standard set of metrics [99]. The following table outlines key quantitative and qualitative metrics used for this purpose.
Table 2: Key Metrics for Benchmarking Atomic Model Accuracy from Cryo-EM Maps
| Metric Category | Specific Metric | Description and Benchmarking Purpose |
|---|---|---|
| Global Structure Metrics | TM-Score (Template Modeling Score) | Measures global fold similarity; a score >0.5 indicates generally correct topology, while >0.8 indicates high accuracy [99]. |
| RMSD (Root-Mean-Square Deviation) | Quantifies the average distance between corresponding atoms in two models; lower values indicate better atomic-level accuracy. | |
| Local Feature Metrics | Precision / Recall / F1 Score | Assesses the correctness of local atomic assignments. Precision measures the fraction of correctly predicted atoms, Recall measures the fraction of true atoms that were found, and F1 is their harmonic mean [99]. |
| Amino Acid Type Prediction Accuracy | Measures the percentage of correctly identified amino acid types from the density, which is challenging due to structural similarities [99]. | |
| Model Completeness | Model-to-Map Coverage | The percentage of the resolved density map that is explained by the built atomic model. |
Direct vs. Indirect Model Building Approaches
Benchmarking studies reveal a clear taxonomy and performance landscape for modern model-building approaches:
- Direct Methods: These DL-based approaches (e.g., ModelAngelo, DeepTracer, Cryo2Struct) leverage architectures like 3D U-Nets, GNNs, and Transformers to predict atom types and coordinates directly from the density map voxels [99]. They excel in de novo building, particularly when reference structures are unavailable.
- Indirect Methods: These approaches (e.g., EMBuild, DeepMainmast) integrate sequence-to-structure predictions from AI tools like AlphaFold into the model building process [99]. Benchmarking shows that this integration significantly improves the completeness and accuracy of the final model, although its utility can be limited by the availability of sequence information and homologous structures for AlphaFold's multiple sequence alignment [99].
Ensuring Experimental Reproducibility
A Framework for Reproducible EM Workflows
Reproducibility is the cornerstone of scientific credibility. In EM, it requires meticulous documentation and standardization at every stage.
- Sample Preparation Protocol: The exact conditions for cell culture, virus infection, fixation (including buffer, concentration, pH, and duration), embedding, and sectioning must be recorded [3] [5]. For instance, infected Vero cell cultures for SARS-CoV-2 imaging were fixed with 2.5% glutaraldehyde in 0.05 M HEPES buffer for at least one hour at room temperature [5].
- Data Collection Parameters: Document microscope make and model, accelerating voltage, electron dose, detector type, magnification, and defocus values. The use of standardized prompt templates in automated workflows can reduce variability introduced by operator decisions [100].
- Data Processing and Analysis: Clearly state the software used, its version, and all key parameters for image processing, particle picking, 2D and 3D classification, refinement, and model building. The adoption of version control for processing scripts is a best practice.
The Critical Role of Public Data Deposition
A powerful mechanism for promoting reproducibility is the public deposition of both raw and processed data. The community standard is to deposit:
- Raw micrographs (or a representative subset) in EMPIAR.
- Final 3D reconstruction (the density map) in EMDB.
- Final atomic model(s) in PDB.
This allows other researchers to validate results, test new algorithms on established datasets, and directly compare the performance of different methodologies [99].
Detailed Experimental Protocols
Protocol 1: Negative Staining EM for Viral Suspensions
This protocol is ideal for the rapid morphological assessment of virus particles in a purified suspension, such as from cell culture supernatant [3].
Application Note: This method provides a quick (minutes to hours) snapshot of viral content and particle integrity but does not represent the native hydrated state of the virus.
Materials:
- Research Reagent Solutions: See Section 6.
- Virus-containing suspension
- 1-2% Uranyl acetate solution (or other heavy metal salt, e.g., phosphotungstic acid)
- Formvar/carbon-coated EM grids (300-400 mesh)
- Parafilm, forceps, filter paper
Procedure:
- Grid Conditioning: Render the grid hydrophilic just before use via glow discharge in air or by applying a charged chemical like Alcian blue [3].
- Particle Adsorption:
- Option A (Drop-On-Grid, DOG): Place a small droplet (5-10 µL) of the sample suspension directly onto the grid. Incubate for 1-2 minutes [3]. This is more efficient for dense particles like bacteria or poxviruses.
- Option B (Grid-On-Drop, GOD): Float the grid, film-side down, on a droplet of the suspension. This can reduce the adsorption of large, sedimenting contaminants [3].
- Washing: Carefully wick away the liquid with a torn edge of filter paper. Rinse by applying a droplet of distilled water and immediately wicking it away. Repeat 2-3 times.
- Negative Staining: Apply a droplet of 1-2% uranyl acetate to the grid. Incubate for 30-60 seconds. Wick away the excess stain, leaving a thin, amorphous layer to air-dry completely [3].
- Imaging: The grid is now ready for examination in the TEM. Virus particles will appear bright (electron-transparent) against a dark (electron-dense) background.
Protocol 2: Thin-Section EM of Infected Cell Cultures
This protocol allows for the visualization of the intracellular context of virus replication, including assembly and egress [5].
Application Note: This method captures viruses within the spatial architecture of the host cell but involves extensive processing that can introduce artifacts like shrinkage.
Materials:
- Research Reagent Solutions: See Section 6.
- Infected cell monolayer (e.g., Vero E6 cells infected with SARS-CoV-2 at MOI ~1)
- Primary fixative: 2.5% Glutaraldehyde in 0.05 M HEPES buffer, pH 7.2 [5]
- Secondary fixative: 1% Osmium tetroxide (in the same buffer)
- Dehydration series: Ethanol or acetone (30%, 50%, 70%, 90%, 100%)
- Embedding resin (e.g., Epon, Spurr's)
- Ultramicrotome, diamond knife
Procedure:
- Fixation: Replace culture medium with primary fixative for at least 1 hour at room temperature. For better membrane preservation, a mixture of 2.5% glutaraldehyde and 1% paraformaldehyde can be used [5].
- Pellet Preparation: Scrape fixed cells from the flask and collect by gentle centrifugation (e.g., 3000 g, 10 min) into a tight pellet [5].
- Post-Fixation and Staining: Wash pellet with HEPES buffer. Post-fix with 1% Osmium tetroxide for 1 hour on ice. This step also stains cellular membranes.
- Dehydration: Subject the pellet to a graded series of ethanol (30%, 50%, 70%, 90%, 100%), with 10-15 minutes per step.
- Resin Infiltration and Embedding: Gradually infiltrate the dehydrated pellet with a resin (e.g., Epon), starting with a 1:1 mixture of resin and ethanol for several hours, then pure resin overnight. Finally, embed in fresh resin and polymerize at 60°C for 48 hours.
- Sectioning and Staining: Use an ultramicrotome to cut 60-80 nm ultrathin sections. Collect sections on EM grids and stain with uranyl acetate and lead citrate to enhance contrast.
- Imaging: Examine sections in the TEM. Identify areas with intact, infected cells and image virus particles at various stages of the life cycle.
The Scientist's Toolkit: Essential Research Reagent Solutions
Table 3: Key Reagents for EM Studies in Virology
| Reagent / Material | Function | Application Notes |
|---|---|---|
| Glutaraldehyde | Primary fixative; cross-links proteins, stabilizing structure. | Used for initial stabilization of cell architecture in thin-section EM [5]. |
| Osmium Tetroxide | Secondary fixative and stain; reacts with and stabilizes lipids, adding contrast. | Crucial for preserving and visualizing viral envelopes and cellular membranes [5]. |
| Uranyl Acetate | Heavy metal salt used for negative staining and section staining. | Provides high contrast by scattering electrons; in staining, it embeds and outlines structures [3]. |
| Formvar/Carbon Grids | Electron-transparent sample support. | The grid serves as the physical substrate onto which the sample is applied [3]. |
| HEPES Buffer | A biological buffer for fixatives. | Maintains a stable physiological pH during the critical initial fixation step, preventing artifacts [5]. |
| Resin Embedding Media | (e.g., Epon) Infiltrates and replaces water; provides mechanical support for sectioning. | Allows the sample to be cut into ultrathin sections (60-80 nm) for imaging [5]. |
Workflow Visualization
Diagram 1: EM Workflow Pathways for Virology. This chart outlines the primary methodological pathways in viral EM, from sample preparation to final validation, highlighting the parallel benchmarking requirements for each.
Diagram 2: Model Building and Validation Workflow. This decision flow illustrates the choice between direct and indirect model-building approaches and the subsequent multi-faceted benchmarking required to validate the resulting atomic model.
In the field of viral morphology research, public data archives serve as the cornerstone for modern structural biology, enabling the preservation, standardization, and sharing of complex structural data. The Electron Microscopy Data Bank (EMDB) and the Protein Data Bank (PDB) collectively provide an essential infrastructure for the global scientific community, supporting research from basic virology to targeted drug development [83]. For researchers studying viral pathogens—from well-characterized viruses to emerging threats like SARS-CoV-2 variants—these archives offer validated structural data that are critical for understanding virus assembly, entry mechanisms, and potential vulnerabilities [30] [5]. The interoperability between EMDB, which archives three-dimensional electron microscopy (3DEM) maps, and PDB, which stores derived atomic coordinate models, creates a comprehensive ecosystem for structural virology [83] [101]. This application note details how these resources ensure data quality and foster collaboration within the context of viral morphology research, providing specific protocols and resources to maximize their utility.
The EMDB and PDB archives have experienced exponential growth, particularly in recent years, driven by technological advances in cryo-electron microscopy (cryo-EM) and its critical application to virology.
Archive Holdings and Growth Statistics
Table 1: EMDB Archive Growth and Methodology Distribution (as of 2023)
| Statistical Category | Value | Year/Period |
|---|---|---|
| Total Entries | >30,000 | As of October 2023 |
| Entries with associated atomic coordinates in PDB | ~55% | As of October 2023 |
| Predicted Entries | ~50,000 | 2025 (projected) |
| Predicted Entries | ~100,000 | 2028 (projected) |
| Single-particle analysis (SPA) as percentage of archive | 82.8% | End of 2022 |
| Entries at better than 4 Å resolution | >60% | 2022 releases |
| Entries at sub-3 Å resolution | >20% | 2022 releases |
The EMDB archive has become a critical resource for the virology community, housing structures of macromolecules, complexes, viruses, organelles, and cells [83]. The growth is primarily fueled by single-particle analysis, which dominates the archive methodology distribution. This technique has proven particularly valuable for structural analysis of viral pathogens, allowing researchers to visualize everything from intact virions to viral protein complexes at increasingly high resolutions [83] [5]. The archive's doubling time of approximately 2.5 years underscores the rapid adoption and productivity of 3DEM methods in structural biology, with expectations that 3DEM entries will surpass macromolecular crystallography entries in the PDB by 2025 [83].
SARS-CoV-2 Variant Morphometry from Public Archive Data
Table 2: Morphometric Parameters of SARS-CoV-2 Variants from Thin-Section EM
| Virus Variant | Maximum Particle Diameter (nm) | Spike Number per Virus Profile | Relative Spike Density |
|---|---|---|---|
| Munich929 (Reference) | Baseline | Baseline | Baseline |
| Italy-INMI1 (Reference) | Baseline | Baseline | Baseline |
| Alpha (B.1.1.7) | Slightly decreased | Similar | Slightly increased |
| Beta (B.1.351) | Increased | Decreased | Decreased |
| Delta (B.1.617.2) | Slightly decreased | Similar | Slightly increased |
| Omicron BA.2 | Slightly decreased | Similar | Slightly increased |
The morphometric analysis of SARS-CoV-2 variants demonstrates how conventional EM of ultrathin plastic sections can provide valuable structural information on viral particle phenotype and evolution [5]. The data reveal that more dominant variants (Alpha, Delta, Omicron BA.2) showed a tendency toward increased spike density compared to early pandemic strains, primarily due to smaller particle size, while the less dominant Beta variant exhibited reduced spike density [5]. Such structural insights, available through public archives, provide crucial correlates for understanding viral infectivity and transmission dynamics.
Data Deposition and Validation Workflow
The wwPDB consortium has established a unified global deposition system called OneDep that manages data submission, validation, and biocuration for both EMDB and PDB archives [83] [102]. This system ensures consistent data quality and adherence to FAIR principles (Findability, Accessibility, Interoperability, and Reusability) across geographical boundaries.
Data Deposition Workflow
The following diagram illustrates the comprehensive workflow for depositing viral structure data to EMDB and PDB:
Entry Requirements and Validation
For an EMDB entry to be accepted, it must contain at minimum a primary 3D EM map derived from an approved EM sub-technique, along with essential experimental metadata [102]. Since February 2022, deposition of unfiltered, unsharpened, and unmasked half-maps has been mandatory for single-particle analysis, single-particle-based helical reconstructions, and subtomogram averaging, significantly enhancing validation capabilities [83].
The validation process includes both automated checks and expert biocuration to ensure:
- Data completeness: All required map files and metadata are present
- Technical accuracy: Correct file formats and spatial parameters
- Metadata consistency: Alignment between experimental description and actual data
- Model-map fit: For associated atomic models, verification that coordinates fit the density map [83] [102]
This rigorous process ensures that viral structures deposited in public archives meet high standards of quality and reliability, making them trustworthy resources for the research community.
Experimental Protocols for Viral Morphology Studies
Protocol: Conventional TEM of SARS-CoV-2 Infected Cells for Morphometric Analysis
This protocol adapts methodologies from published studies on SARS-CoV-2 variants [5] and established EM techniques for viral analysis [30].
I. Cell Culture and Infection
- Culture Vero E6 cells in DMEM with 10% fetal bovine serum at 37°C, 5% CO₂ until 70% confluent
- Infect cells with SARS-CoV-2 at MOI 1.0 for dataset 01 or MOI 0.01 for datasets 02-06 [5]
- Incubate with virus suspension for 30 minutes, then replace with fresh medium
- Incubate for 24 hours post-infection
II. Fixation and Embedding
- Terminate cultivation by replacing medium with 2.5% glutaraldehyde in 0.05 M HEPES buffer (pH 7.2)
- For some samples (Dataset 01), add 1% paraformaldehyde to the fixative [5]
- Fix for at least 1 hour at room temperature
- Scrape fixed cells and collect by centrifugation (3000 g, 10 minutes)
- Wash cell pellet twice with 0.05 M HEPES buffer
- Mix heated cell pellet (40°C) with 3% low-melting point agarose (1:1 v/v) at 40°C
- Centrifuge briefly (5 minutes at 5000 g) and cool to solidify
- Process through standard EM dehydration series and embed in epoxy resin
III. Post-fixation and Staining for Membrane Preservation
- Post-fix in 1% osmium tetroxide in 1.5% potassium ferricyanide for 1 hour on ice
- Treat with 1% tannic acid (gallotannin) in 0.05 M sodium cacodylate buffer for 45 minutes at room temperature [30]
- Treat with 1% sodium sulfate for 5-10 minutes
- Contrast ultrathin sections with lead citrate before EM viewing
IV. Imaging and Morphometric Analysis
- Record TEM images at appropriate magnification (e.g., 20,000-40,000x)
- Measure viral particle parameters (maximal diameter, circumference)
- Count spike proteins per viral profile
- Calculate spike density using established measurement methods [5]
Protocol: Negative Staining TEM for Rapid Viral Assessment
Negative staining TEM provides a rapid method for initial assessment of virus preparations and is particularly valuable for diagnostic applications [36].
I. Sample Preparation
- Apply 3-5 μL of virus suspension to a glow-discharged EM grid
- Allow adsorption for 30-60 seconds
- Wick away excess liquid with filter paper
- Immediately apply 3-5 μL of negative stain (1-2% uranyl acetate or phosphotungstic acid)
- Incubate for 30 seconds
- Wick away excess stain and allow grid to air dry
II. Imaging and Analysis
- Screen samples at lower magnifications (10,000-25,000x) to identify regions of interest
- Acquire high-magnification images (40,000-80,000x) for detailed analysis
- Assess virus morphology, size, and structural integrity
- For immunolabeling studies, incubate grid with primary antibody before negative staining
The Scientist's Toolkit: Essential Research Reagents
Table 3: Essential Research Reagents for Viral Electron Microscopy
| Reagent/Category | Function/Application | Examples/Specifications |
|---|---|---|
| Cell Lines | Host system for virus propagation | Vero E6 cells (African green monkey kidney epithelial cells) [5] |
| Fixatives | Structural preservation of viral and cellular components | 2.5% glutaraldehyde; 1% paraformaldehyde in 0.05 M HEPES buffer [5] |
| Contrast Enhancers | Membrane preservation and staining | 1% Osmium tetroxide with 1.5% potassium ferricyanide; 1% tannic acid [30] |
| Embedding Media | Structural support for ultrathin sectioning | Epoxy resins (Epon 812); Low-melting point agarose [30] [5] |
| Negative Stains | Rapid sample contrast for screening | 1-2% Uranyl acetate; Phosphotungstic acid [36] |
| Grids | Sample support for EM imaging | Copper or gold grids with various support films |
| Antibodies | Viral antigen detection and labeling | Primary antibodies specific to viral proteins; Gold-conjugated secondary antibodies |
Data Integration and Collaborative Research
The interoperability between EMDB and PDB creates powerful opportunities for integrative structural virology. The connection between 3DEM maps in EMDB and atomic models in PDB allows researchers to:
- Validate atomic models against experimental density maps
- Combine high-resolution structural information with lower-resolution cellular context
- Study viral assembly pathways and host-virus interactions at multiple scales
- Develop comprehensive understanding of viral replication cycles
For viral morphology research, this integration is particularly valuable for:
- Mapping antigenic sites on virus surfaces for vaccine design
- Understanding fusion mechanisms of enveloped viruses
- Visualizing capsid maturation processes in complex viruses
- Characterizing antibody-neutralization mechanisms
The public availability of these complementary data types through unified search interfaces enables researchers to access and utilize structural information without technical barriers, accelerating collaborative research efforts across institutions and geographical boundaries.
The EMDB and PDB archives provide an indispensable foundation for viral morphology research, ensuring data quality through standardized deposition protocols and rigorous validation processes. The exponential growth of these archives, particularly in cryo-EM structures of viral pathogens, demonstrates their critical role in modern virology and drug development. By providing open access to validated structural data and supporting interdisciplinary collaboration, these resources significantly accelerate research on emerging viral threats and contribute to the development of targeted antiviral strategies. The protocols and resources detailed in this application note provide practical guidance for researchers to effectively utilize these archives in their investigation of viral structure and function.
Conclusion
Electron microscopy remains an indispensable and dynamically evolving pillar in virology, bridging the gap between cellular visualization and atomic-level structural detail. The foundational techniques of TEM and negative staining provide rapid diagnostic capabilities and morphological classification, while advanced methods like cryo-EM and tomography now enable the study of viral complexes in their native states at near-atomic resolution. This detailed structural insight is directly fueling a new era in structure-based drug design, as evidenced by the growing number of ligand-target complexes solved by cryo-EM. For the future, the integration of EM with bioinformatics, molecular dynamics, and machine learning promises to further accelerate the pace of discovery. The continued development of validation standards and correlative technologies will be crucial for leveraging these powerful imaging tools to combat emerging viral threats and develop next-generation antiviral therapeutics.
References
- 1. Viral detection by electron microscopy: past, present and future [https://pmc.ncbi.nlm.nih.gov/articles/PMC7161876/]
- 2. Viral detection by electron microscopy: past, present and ... [https://inserm.hal.science/file/index/docid/308276/filename/index.xhtml]
- 3. Diagnostic electron microscopy in human infectious diseases [https://pmc.ncbi.nlm.nih.gov/articles/PMC12352021/]
- 4. Evolution of Virology: Science History through Milestones and ... [https://pmc.ncbi.nlm.nih.gov/articles/PMC10975421/]
- 5. Electron microscopy images and morphometric data of ... [https://www.nature.com/articles/s41597-024-04182-3]
- 6. Hunting coronavirus by transmission electron microscopy [https://pmc.ncbi.nlm.nih.gov/articles/PMC7537546/]
- 7. COVID-19 Virus Using correlative FESEM and Fluore [https://www.jeolusa.com/NEWS-EVENTS/Blog/covid-19-virus-using-correlative-fesem-and-fluorescence-microscopy]
- 8. Multi-color electron microscopy by element-guided ... [https://www.nature.com/articles/srep45970]
- 9. Unsupervised classification of influenza virus surface spikes ... [https://pmc.ncbi.nlm.nih.gov/articles/PMC12604196/]
- 10. The powerful imaging technique revealing a hidden world ... [https://www.nature.com/articles/d42473-025-00158-y]
- 11. Contrast in Cryo-EM [https://guide.cryosparc.com/cryo-em-foundations/image-formation/contrast-in-cryo-em]
- 12. Brief Introduction to Contrasting for EM Sample Preparation [https://www.leica-microsystems.com/science-lab/life-science/brief-introduction-to-contrasting-for-em-sample-preparation/]
- 13. Modern Uses of Electron Microscopy for Detection of Viruses [https://pmc.ncbi.nlm.nih.gov/articles/PMC2772359/]
- 14. Protocol for high-throughput electron tomography exemplified ... [https://pmc.ncbi.nlm.nih.gov/articles/PMC10320260/]
- 15. Characterizing Viral Infection by Electron Microscopy [https://pmc.ncbi.nlm.nih.gov/articles/PMC7678435/]
- 16. Virus classification [https://en.wikipedia.org/wiki/Virus_classification]
- 17. About Virus Taxonomic Classification [https://ictv.global/about/taxonomy]
- 18. Viral Envelope - an overview [https://www.sciencedirect.com/topics/immunology-and-microbiology/viral-envelope]
- 19. Enveloped vs. non-enveloped viruses [https://virologyresearchservices.com/2022/05/22/enveloped-vs-non-enveloped-viruses/]
- 20. Viral envelope [https://en.wikipedia.org/wiki/Viral_envelope]
- 21. Cryo-electron microscopy and image classification reveal ... [https://www.nature.com/articles/s42003-022-03863-2]
- 22. Structural Capsidomics of Single-Stranded DNA Viruses [https://pubmed.ncbi.nlm.nih.gov/40143263/]
- 23. Summary of taxonomy changes ratified by the International ... [https://pmc.ncbi.nlm.nih.gov/articles/PMC12451623/]
- 24. Viral envelope – Knowledge and References [https://taylorandfrancis.com/knowledge/Engineering_and_technology/Biomedical_engineering/Viral_envelope/]
- 25. Viral detection by electron microscopy: past, present and ... [https://inserm.hal.science/inserm-00308276/en/]
- 26. Lost Data in Electron Microscopy [https://www.mdpi.com/2624-8549/7/5/160]
- 27. 2025 Volume Electron Microscopy Conference GRC [https://www.grc.org/volume-electron-microscopy-conference/2025/]
- 28. Quantitative Electron Microscopy for Cell Biology [http://meetings.embo.org/event/26-em-cellbio]
- 29. Full Symposium Descriptions - M&M 2025 [https://mmconference.microscopy.org/full-symposium-descriptions]
- 30. Electron Microscopy Analysis of Viral Morphogenesis - PMC [https://pmc.ncbi.nlm.nih.gov/articles/PMC7103132/]
- 31. Electron microscopy protocols [https://www.nature.com/collections/bgdjhjbdga]
- 32. Negative Staining Electron Microscopy [https://www.urmc.rochester.edu/research/electron-microscope/services/protocols-techniques/negative-staining-electron-microscopy.aspx]
- 33. Multiscale Electron Microscopy for the Study of Viral ... [https://www.mdpi.com/1999-4915/13/2/197]
- 34. Dose-efficient cryo-electron microscopy for thick samples ... [https://www.nature.com/articles/s41592-025-02834-9]
- 35. Time-Resolved Fluorescence Imaging and Correlative Cryo ... [https://pmc.ncbi.nlm.nih.gov/articles/PMC12409903/]
- 36. Electron Microscopy Methods for Virus Diagnosis and High ... [https://www.frontiersin.org/journals/microbiology/articles/10.3389/fmicb.2018.03255/full]
- 37. Visualization of SARS-CoV-2 particles in naso/oropharyngeal ... [https://virologyj.biomedcentral.com/articles/10.1186/s12985-023-01981-9]
- 38. Combined 100 keV Cryo-Electron Microscopy and Image ... [https://www.sciencedirect.com/science/article/abs/pii/S0022354924001230]
- 39. Systematic Comparison of Commercial Uranyl‐Alternative ... [https://pmc.ncbi.nlm.nih.gov/articles/PMC12184085/]
- 40. Negative and Positive Staining in Transmission Electron ... [https://www.intechopen.com/chapters/48639]
- 41. Unraveling atomic complexity from frozen samples - PMC [https://pmc.ncbi.nlm.nih.gov/articles/PMC12009148/]
- 42. (IUCr) Cryo-EM single-particle analysis expanding towards ... [https://journals.iucr.org/d/issues/2025/11/00/zha5001/]
- 43. CryoPROS: Correcting misalignment caused by preferred ... [https://www.nature.com/articles/s41467-025-59797-w]
- 44. Cryo-electron tomography reconstructs polymer in liquid ... [https://www.nature.com/articles/s41467-025-63689-4]
- 45. Modeling cryo-EM structures in alternative states with ... [https://www.nature.com/articles/s42004-025-01751-4]
- 46. Immunoelectron microscopy: a comprehensive guide from ... [https://pmc.ncbi.nlm.nih.gov/articles/PMC12420552/]
- 47. AI-based hardware and software tools in microscopy to ... [https://www.frontiersin.org/journals/immunology/articles/10.3389/fimmu.2025.1610345/full]
- 48. An optimized protocol for immuno-electron microscopy of ... [https://pmc.ncbi.nlm.nih.gov/articles/PMC9673964/]
- 49. Cryo-EM single-particle analysis expanding towards ... [https://pmc.ncbi.nlm.nih.gov/articles/PMC12576849/]
- 50. Advances in Single-Particle Electron Cryomicroscopy Structure Determination applied to Sub-tomogram Averaging - PMC [https://pmc.ncbi.nlm.nih.gov/articles/PMC4559595/]
- 51. The advent of structural biology in situ by single particle cryo-electron tomography | Biophysics Reports [https://link.springer.com/article/10.1007/s41048-017-0040-0]
- 52. A new approach for higher resolution structure determination of macromolecules in their native context [https://www.biophys.mpg.de/2300320/news_publication_15206318_transferred]
- 53. A Bayesian approach to single-particle electron cryo-tomography in RELION-4.0 | eLife [https://elifesciences.org/articles/83724]
- 54. Viral Infection at High Magnification: 3D Electron Microscopy ... [https://pmc.ncbi.nlm.nih.gov/articles/PMC4690864/]
- 55. TomoTwin: generalized 3D localization of macromolecules in ... [https://pmc.ncbi.nlm.nih.gov/articles/PMC10250198/]
- 56. for Electron of infectious agents in... microscopy rapid diagnosis [https://pubmed.ncbi.nlm.nih.gov/12643823/]
- 57. Innovations | Resources Microscopy [https://microscopyinnovations.com/resources/]
- 58. Scanning Transmission Electron Microscopy Tomography ... [https://pubmed.ncbi.nlm.nih.gov/40853940/]
- 59. Working to Reform the Drug Discovery Process ... [https://www.chugai-pharm.co.jp/english/story/detail/20250404000000_25.html]
- 60. Enhanced electron microscopy imaging for a detailed ... [https://www.sciencedirect.com/science/article/abs/pii/S0144861725010240]
- 61. Limitations of beam damage in electron spectroscopic ... [https://pmc.ncbi.nlm.nih.gov/articles/PMC3204671/]
- 62. EDS Artifacts Induced by Beam Damage [https://www.globalsino.com/EM/page3123.html]
- 63. Can I Trust My Quantitative EDS Data? | JEOL Resources [https://www.jeolusa.com/RESOURCES/Electron-Optics/Documents-Downloads/can-i-trust-my-quantitative-eds-data]
- 64. A practical protocol for correlative confocal fluorescence ... [https://pmc.ncbi.nlm.nih.gov/articles/PMC12211028/]
- 65. Automatic beam optimization method for scanning electron ... [https://www.nature.com/articles/s44172-024-00230-3]
- 66. Aberration Correction in Electron and Light Microscopes: Methods & Advances – ICO Optics [https://www.ico-optics.org/aberration-correction-in-electron-and-light-microscopes/]
- 67. DeepFocus: fast focus and astigmatism correction for electron microscopy - PMC [https://pmc.ncbi.nlm.nih.gov/articles/PMC10830472/]
- 68. Choosing the Right Electron Microscopy Technique [https://www.labmanager.com/choosing-the-right-electron-microscopy-technique-34315]
- 69. Comparison of Nanoparticle Sizing Techniques: TEM vs. ... [https://delongamerica.com/nanoparticle-sizing-techniques-tem-dls-afm]
- 70. Comparison of Particle Size (Diameter) Measured by TEM ... [https://www.malvernpanalytical.com/en/learn/knowledge-center/insights/comparison-of-tem-and-dls-dynamic-light-scattering-as-measured-by-particle-size]
- 71. Dynamic light scattering [https://en.wikipedia.org/wiki/Dynamic_light_scattering]
- 72. Dynamic light scattering: a practical guide and applications in ... [https://pmc.ncbi.nlm.nih.gov/articles/PMC5425802/]
- 73. Enhanced visualization of influenza A virus entry into living ... [https://pmc.ncbi.nlm.nih.gov/articles/PMC12478160/]
- 74. a simple approach for interactive visualisation of electron ... [https://pmc.ncbi.nlm.nih.gov/articles/PMC11529876/]
- 75. A Simple Guide For Preparing Samples For Sem Imaging [https://www.atascientific.com.au/a-simple-guide-for-preparing-samples-for-sem-imaging/]
- 76. Handle with care – preparing sensitive samples [https://www.jeolusa.com/RESOURCES/Sample-Preparation/Documents-Downloads/handle-with-care-preparing-sensitive-samples]
- 77. Heterogeneous virus classification using a functional deep ... [https://www.nature.com/articles/s41598-024-80013-0]
- 78. The progressive spectral signal-to-noise ratio of cryo ... [https://www.sciencedirect.com/science/article/abs/pii/S0169260722001754]
- 79. A framework to enhance the signal-to-noise ratio for ... [https://journals.plos.org/plosone/article?id=10.1371/journal.pone.0330718]
- 80. Preservation of Fluorescence Signal and Imaging ... [https://www.frontiersin.org/journals/cell-and-developmental-biology/articles/10.3389/fcell.2021.737621/full]
- 81. Outcome of the First Electron Microscopy Validation Task ... [https://pmc.ncbi.nlm.nih.gov/articles/PMC3328769/]
- 82. Next-gen electron microscope at UCLA opens new chapter in ... [https://cnsi.ucla.edu/january-23-2025-next-gen-electron-microscope-at-ucla-opens-new-chapter-in-seeing-the-improbably-small/]
- 83. EMDB—the Electron Microscopy Data Bank - PMC [https://pmc.ncbi.nlm.nih.gov/articles/PMC10767987/]
- 84. User guide to the wwPDB EM validation reports [http://www.wwpdb.org/validation/2017/EMValidationReportHelp]
- 85. 3DEM Structure-Map Validation Recommendations [https://www.rcsb.org/news/feature/689f2e8a3b59581b680197a2]
- 86. 3DEM Structure-Map Validation [https://www.ebi.ac.uk/emdb/news/q-relative]
- 87. High-resolution protein modeling through Cryo-EM and AI [https://pmc.ncbi.nlm.nih.gov/articles/PMC12590954/]
- 88. Rapid increase of near atomic resolution virus capsid ... [https://www.sciencedirect.com/science/article/abs/pii/S1047847717301752]
- 89. Structure determination of a human virus by the ... [https://pmc.ncbi.nlm.nih.gov/articles/PMC5138254/]
- 90. Structure determination of a human virus by the ... [https://www.biophysics-reports.org/en/article/doi/10.1007/s41048-016-0027-2]
- 91. 3.3 Å Cryo-EM Structure of a Nonenveloped Virus Reveals ... [https://pmc.ncbi.nlm.nih.gov/articles/PMC3422562/]
- 92. Advances in Structural Virology via Cryo-EM in 2022 [https://www.mdpi.com/1999-4915/15/6/1315]
- 93. Stain-free artificial intelligence-assisted light microscopy for ... [https://www.frontiersin.org/journals/bioinformatics/articles/10.3389/fbinf.2025.1628724/full]
- 94. Prototype-Guided Cross-Modal Knowledge Enhancement ... [https://papers.miccai.org/miccai-2025/0733-Paper2488.html]
- 95. UT Southwestern scientists develop 'self-driving' microscope [https://www.utsouthwestern.edu/newsroom/articles/year-2025/march-self-driving-microscope.html]
- 96. New inverted light-sheet microscopy platform for research ... [https://www.zeiss.com/microscopy/en/about-us/newsroom/press-releases/2025/partnership-with-alpenglow.html]
- 97. Protocols in 2025 [https://www.nature.com/nprot/articles?type=protocol&year=2025]
- 98. Light microscopy reporting for reproducibility [https://www.nature.com/articles/s41556-025-01704-y]
- 99. A comprehensive survey and benchmark of deep learning ... [https://pmc.ncbi.nlm.nih.gov/articles/PMC12253957/]
- 100. LLM Benchmarking Decoded: Updates In May 2025 [https://empathyfirstmedia.com/llm-benchmarking-decoded-updates-in-may-2025/]
- 101. About EMDB [https://www.ebi.ac.uk/emdb/about]
- 102. EMDB < Policies [https://www.ebi.ac.uk/emdb/documentation/policies]